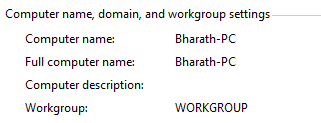
Computer names are pretty much useful to distinguish different computers when you are on a network with too many computers connected it. You would normally choose this computer name during the initial installation. Or if your system came with a pre-installed version of Windows 7 or Windows Vista, chances are that your manufacturer might have chosen a crappy computer name. It is always a good practice to have a unique computer name which is more descriptive so that you can easily identify your computer over others in the network.
Changing a computer name was relatively easy in Windows XP. When it comes to Windows 7 and Vista, you need to get through a couple of windows before you can land at the correct settings window. Here are the steps.
Steps:
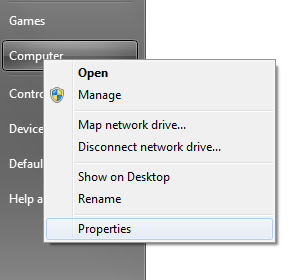
1. Go the Start Menu, right-click on the “Computer” and click “Properties”.
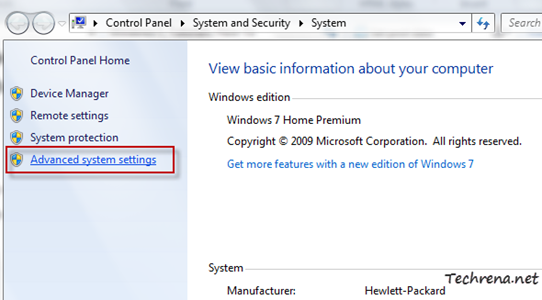
2. Click on the “Advanced system settings” link on the left hand side pane.
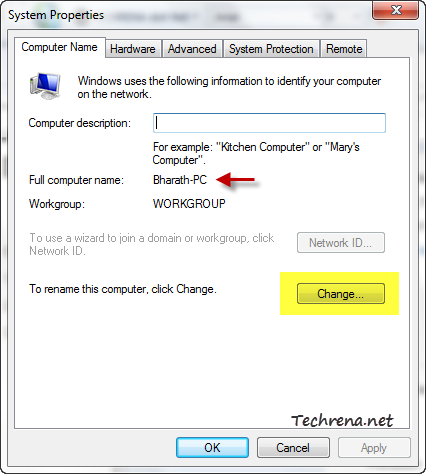
3. Go to the “Computer Name” tab in the System Properties window.
Note: In Windows 7 you can also arrive at the above settings window from the “Computer name, domain, and workgroup settings” from the step 2.

4. In the next dialog box, you can change your computer name and the workgroup membership of your computer.
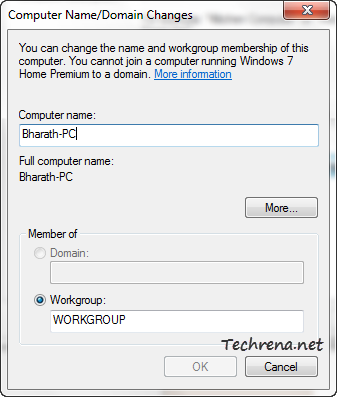
Click OK to close the window and apply the changes. You must restart your system for the full changes to take effect.

Very nice article. I like it so much.Please keep update your artcle. thanks for sharing.
Very nice blog, I found it very interesting and have learned from it. I always wondered how to do that in windows 7 on my computer.
awsome maan thank you very much