
Earlier this month, we had covered in an article about how to remove “Favorites” from the Navigation pane in Windows 7. Sometimes you don’t want to remove them completely, all you want is to customize them by renaming “Favorites”. Fortunately, this can be done with simple tweaks in Windows 7. Let’s get started on how you can rename “Favorites” in the Windows 7 explorer.
Steps:
1. Type regedit in the Start menu search bar and open “regedit.exe”. Click Yes when prompted by the UAC.

2. Navigate to the following path in the Registry Editor:
HKEY_CLASSES_ROOT\CLSID\{323CA680-C24D-4099-B94D-446DD2D7249E}
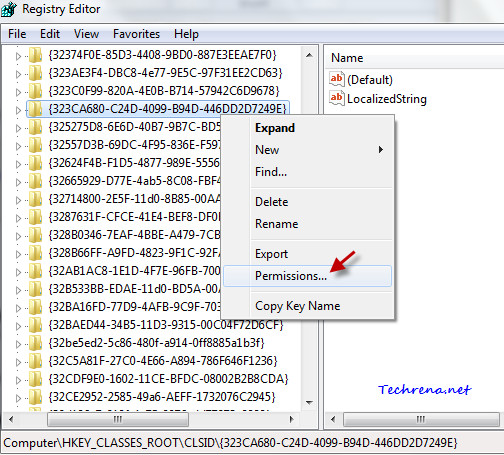
3. Right-click on {323CA680-C24D-4099-B94D-446DD2D7249E} folder and choose “Permissions…”
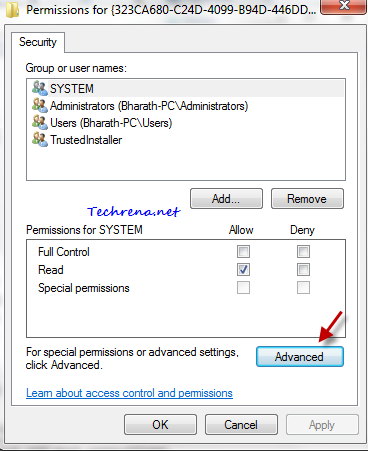
4. Click on the Advanced button in the Permissions window. It will now open another dialogue box.
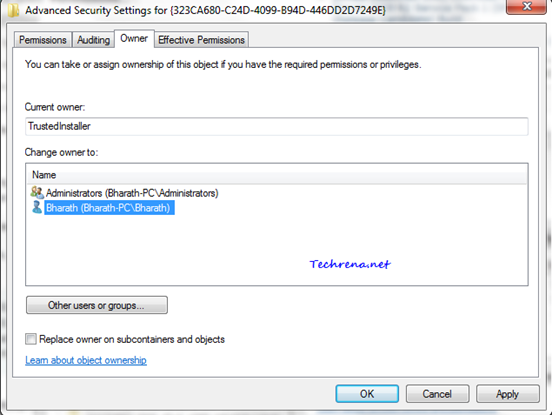
5. Go the Owner tab in the dialogue box. Select your Administrator account. Click OK to save the changes.
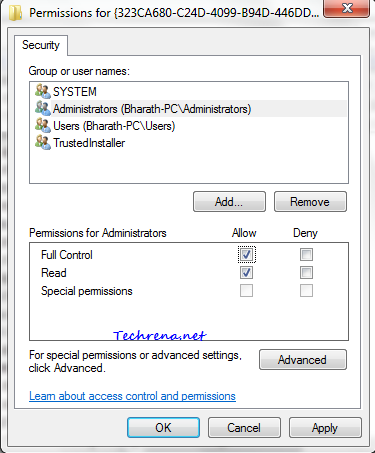
6. In the Permissions window, select your username from the list and check against Allow button right next to “Full Control” option. Click OK button to close the window.
6. On the left hand side pane, double click on the “LocalizedString” registry key.

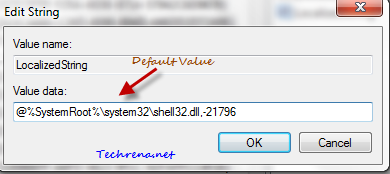
7. Type the new name which you want to set for Favorites in the Value data field, thus changing it from the default value @%SystemRoot%\system32\shell32.dll,-21796
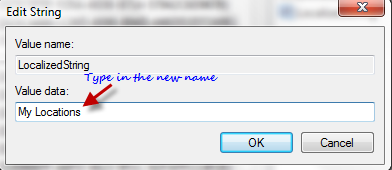
You can give it any name that you wish, be it “PC Locations”, “Personal Favs”, “Important Folders”..etc., whatever .
8. Click OK to save the settings. Close the Registry Editor. Restart the Windows Explorer (explorer.exe) process to see the change.

You can see how “Favorites “being renamed to “My Locations” in Windows 7 explorer’s Navigation pane in the above screenshot.
To set the back the defaults, just go to step 7 and change the Value data field to the default value “@%SystemRoot%\system32\shell32.dll,-21796”.
