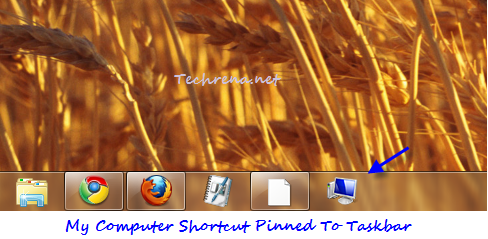
Windows 7 taskbar is really handy and as you might be knowing it allows you to just drag and pin any program shortcut to the taskbar. But have you ever tried pinning the “Computer” shortcut from desktop to the taskbar in Windows 7? Does it get pinned to it? No, right? This what you will end when you try to pin it to the taskbar:

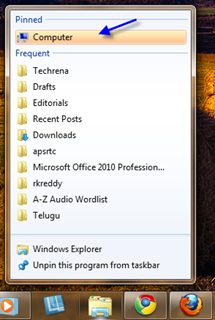
It gets pinned to the “Windows Explorer” and it’ll be shown above the jump lists as shown in the above screenshot. Oh no, wait! not exactly where we wanted it to be! No compromise, we just want it to be pinned to the taskbar no where else! Oh no, problem, problem, problem!!
We are here for you. In this tutorial we are going to talk about workaround to pin the Computer icon to the taskbar. Let’s get started !
Steps:
1. Create a new shortcut on your desktop: Right-click on your desktop and choose New > Shortcut.
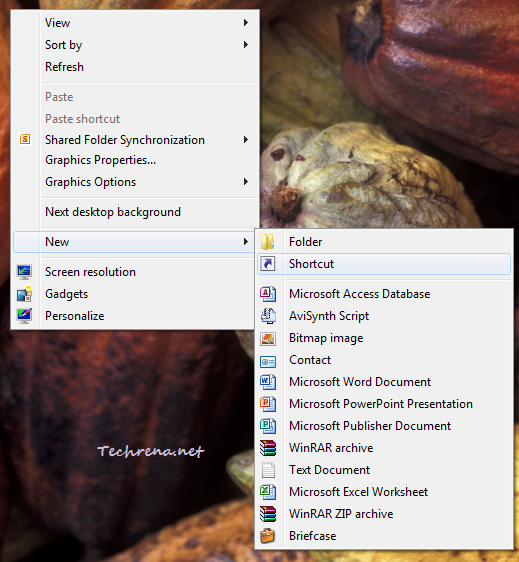
2. In the next “Create Shortcut” window, paste the following string:
%SystemRoot%\explorer.exe shell:MyComputerFolder
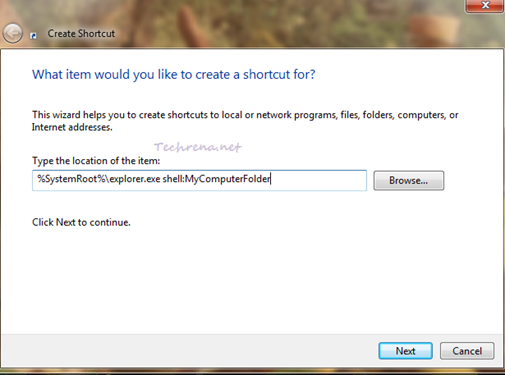
Click “Next” button at the bottom of the window
3. Name the shortcut. You can type any name for the shortcut and click “Finish” button to finish the wizard.
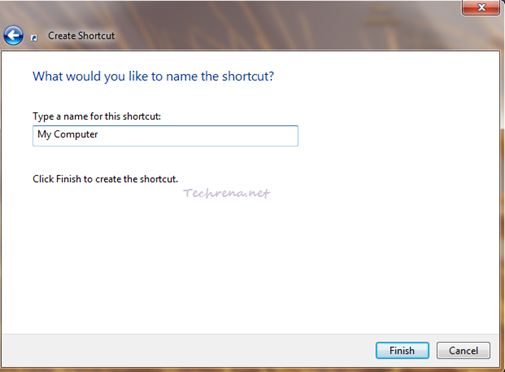
4. Now you will have a shortcut for “My Computer” created on your desktop.
![]()
5. Now we are going to change the icon for the shortcut and get the original icon (computer) that is normally associated with “My Computer”.
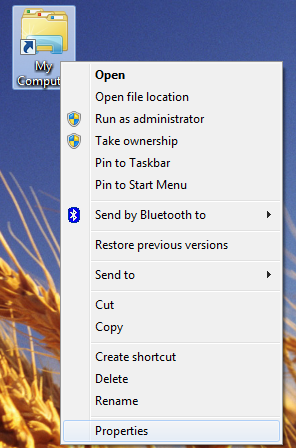
To do this, right-click on the shortcut and select “Properties”.
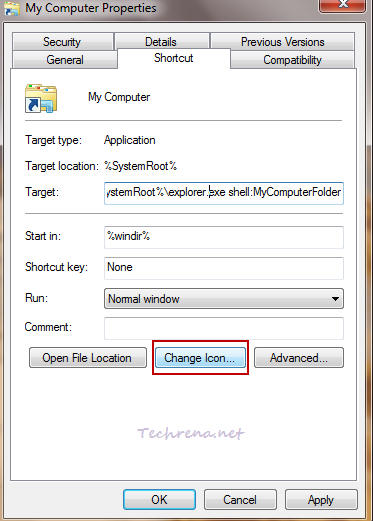
6. Go to the “Shortcut” tab in the “Properties” window and click “Change Icon”.
7. Paste the following string in the “Look for icons in this file” field and press Enter.
%SystemRoot%\system32\imageres.dll
![]()
Select the “Computer” icon and click OK.
8. Click OK to close the Properties window.
9. Now try dragging the shortcut to the taskbar and it works!!
![]()
You will now have the Computer icon pinned to the Taskbar as shown in the above pic. If you liked this post then chances are that you might also want to checkout Start Windows Explorer With Custom Folder
