Well most of us are aware how to enable network files and folder sharing in Windows XP. It was comparatively easier in Windows XP performing this procedure. Windows 7 has more secure features with network user groups, password protected sharing etc.
Sharing Folders and Files in Windows has been very useful where you can access files in some other computer in the same network. Another advantage is the data transfer rate is very much higher than other connections like USB. In a wired LAN the speed has reached 1Gbps. With these speeds you can transfer data quite faster than before.
The process of sharing folders and files is as follows:
Step 1:
Go to the Control Panel location given below. You can copy and paste it in your address bar.
Control Panel\Network and Internet\Network and Sharing Center\Advanced sharing settings
Step 2:
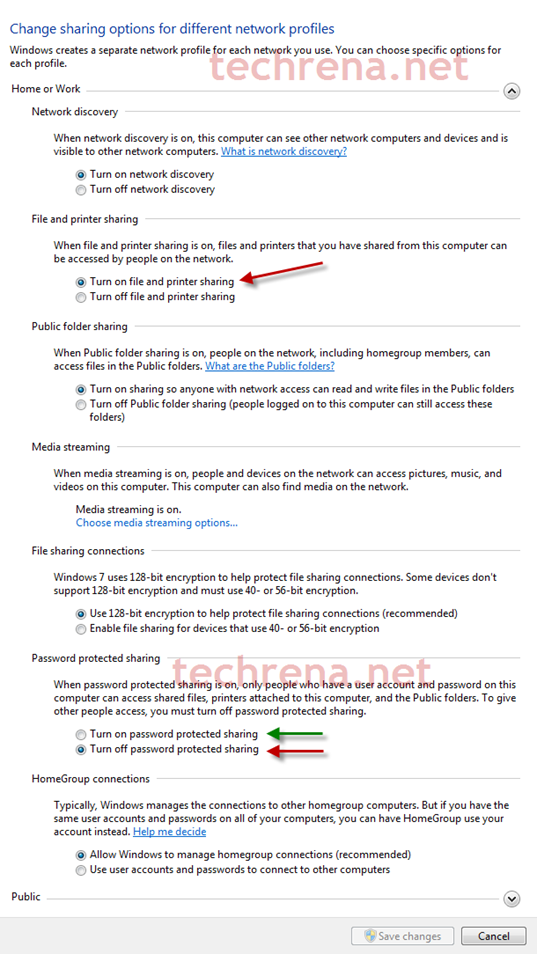
Select the specific group profile you want to share your files with. For example I have selected Home. Change the settings as shown in the picture below and save the changes.
For the password protected sharing, you can select any. If you select Password protect on, you need to use our username and password to access the files.
Step 4:
Now go to the folder you want to share, right click on it and select Share with. You can select the people you want to share.
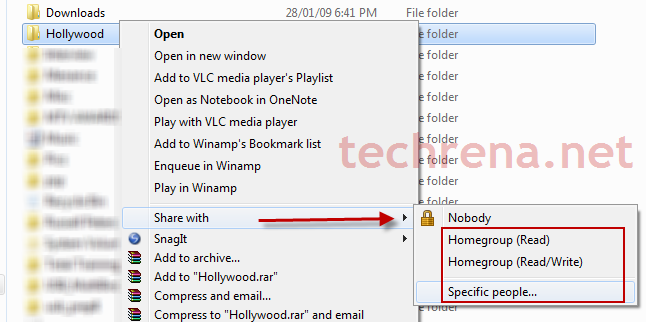
If you select Specific people, you need to select and add the Computer Name.
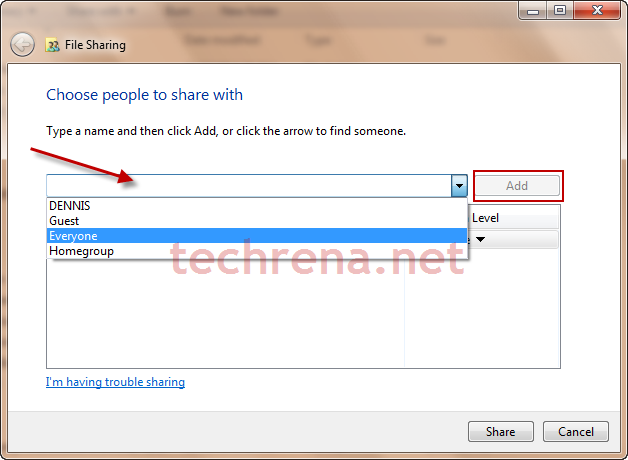
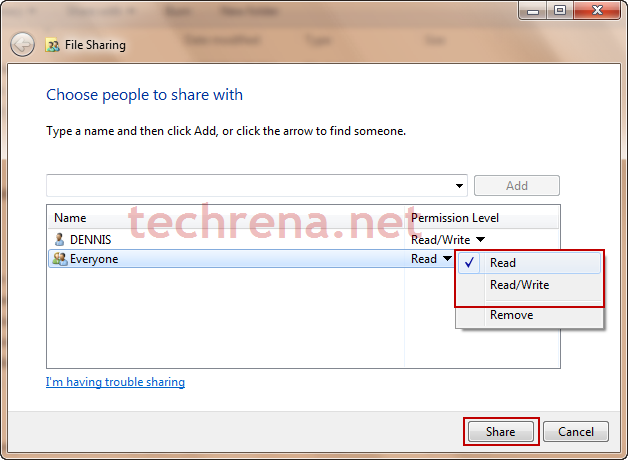
You can also change the Permissions for the people who wants to access your folder.
Step 5:
Now you can check in the computer who wants to access your files. Go to Computer->Network. Your computer name should be visible.
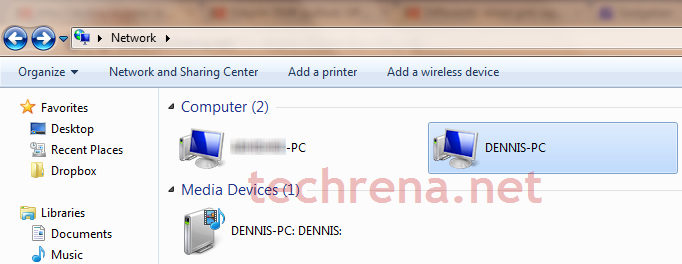
Open your computer name and the folder(s) you shared should be visible. Now you can perform what you want according to the permission you have given.
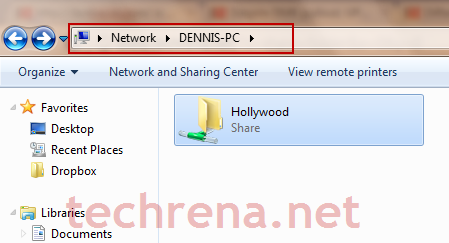
If you can’t find your computer name in the Network, you can use your IP address to access the files.
You should know your IP to perform this. For example, type: \\192.168.1.4 in the address bar. That is my IP. Your IP will be different. See the Notes below to view your IP.
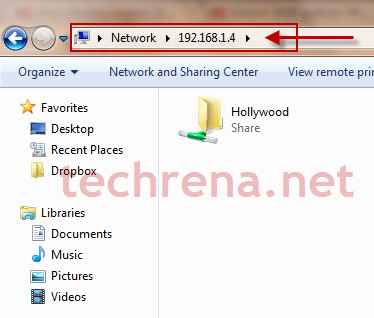
Now the sharing has been completed and the data can be shared.
Important Notes:
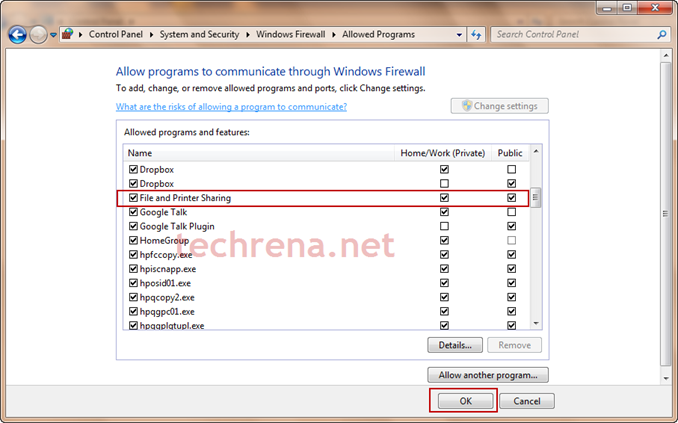
1. Firewall. If you have Windows Firewall enabled you should have allowed File and printer sharing. To allow, go to: Control Panel\System and Security\Windows Firewall\Allowed Programs
Check the File and Printer sharing Check Box.
If you have a third party Firewall installed, you need to check these settings there.
2. IP Address. To find out your IP Address, please go to this location:
Control Panel\Network and Internet\Network Connections. Right click on the Adapter you are using for sharing. Select Status. Then go to Details.
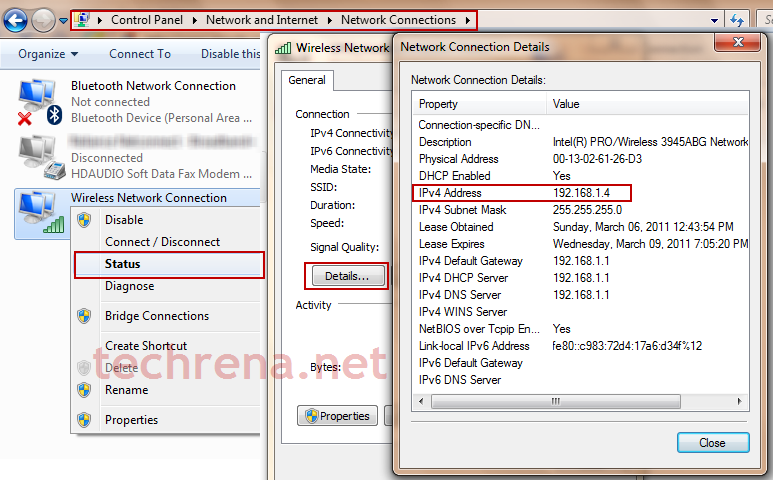
If the Host and the Client does not have a same Level of IP and profile, you may no be able to access each other. To change the IP Address Follow: Change IP Address of Your Network Adapters in Windows 7.


