[How To] Find The Date When The Windows Was Installed

Windows logo

If you have installed Windows long back like me and not sure the exact date when you installed it, there is a simple way you could find this. As a part of the “systeminfo” command, Windows shows this info through the command prompt window. This trick works in all the different versions of Windows including Windows 7, Windows Vista and Windows XP. Follow these steps to learn how to find the original install date of Windows.

Steps:

1. Type “cmd” in the Start Menu and hit Enter to open the Command Prompt (Choose “Yes” when asked by UAC in Windows 7 to open the cmd)
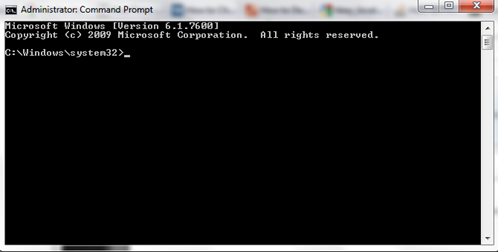
Command Prompt window

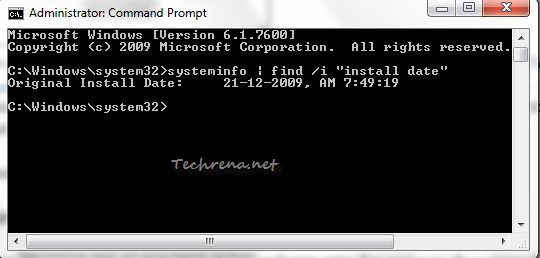
2. Type the following command in the command prompt window and press Enter.

systeminfo | find /i "install date"

Wait till the requested information is loaded in the window.
cmd_original_install_date

3. You will see the date of installation of Windows shown next to “Original Install Date”.

A Complex Alternative Method:

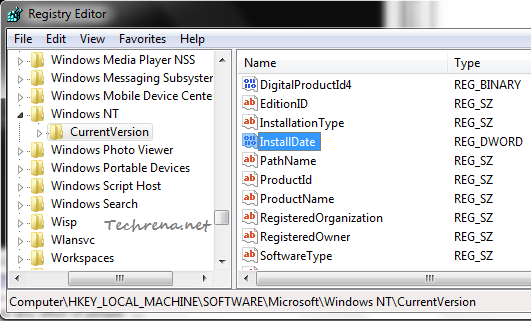
If you are curious to find other ways to find the same, open the Registry Editor (press Start button + R, type “regedit” and click OK), navigate to the following path:

HKEY_LOCAL_MACHINE\SOFTWARE\Microsoft\Windows NT\CurrentVersion
installDate regedit value

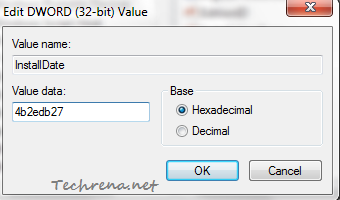
On the right hand pane, find the key with name “InstallDate”. Double-click on it to see the value data, which will be in “Hexadecimal” form.
InstallDate regedit value

For instance in my case it is 4b2edb27. It indicates the number of seconds since January 1, 1970 (1/ 1/ 1970) when converted to binary decimal. Use “Programmer” mode in Windows 7 calculator to do this conversion. In this case, the value turns out to be 1261361959. So the date of installation of Windows 7 on my system happened 1261361959 seconds after 1/ 1/ 1970 12 AM. Do the math and find the value Smile , if you are patient enough and the result should match the date found using the first method.

[How To] Add “Show Desktop” Shortcut Manually In Windows 7

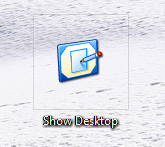
show desktop shortcut

Remember the pretty useful “Show Desktop” icon that used to be present on the quick launch toolbar in Windows XP?

Show desktop windows xp

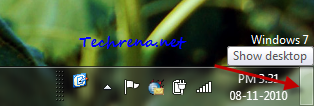
It was the life saviour for many users like me when I quickly wanted to open my desktop with too many windows being kept open. Fast forward to 2010. Most of us are now using Windows 7, the most successful Windows OS after Windows XP. Microsoft, desperate to decrease the amount of space occupied by icons like these, has removed this button from the original position altogether. Instead, Windows 7 came with a small rectangular blank button on the far right of the taskbar next to the clock. When you hover the mouse on this button will hide all the open windows quickly to shows up the desktop. If you have enabled Aero effects, you will see ghosted outlines of the windows, a part of the Windows 7’s “Aero Peck”.

Show desktop bar in windows 7

You can also get to the desktop anytime using Windows Key + D shortcut, besides choosing “Show the desktop” from the context menu that appears when you right-click on the taskbar. Despite all these options, you might still have a liking for that old XP style “Show desktop” icon on the quick launch toolbar. Even though it’s a bit difficult to add such a shortcut or icon to the quick launch bar in Windows 7, you can still add this “Show Desktop” shortcut to your Start Menu to for a quicker access. Here is what you need to do:

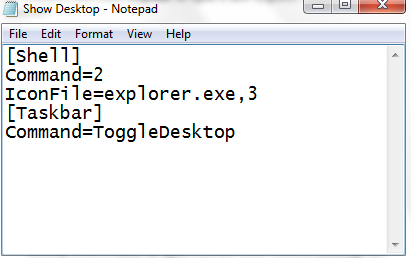
1. Open notepad (or any text editor for that matter) and type the following code:

[Shell]
Command=2
IconFile=explorer.exe,3
[Taskbar]
Command=ToggleDesktop

show desktop code in notepad

2. Click File> Save As and choose “All Files (*.*)” from “save as type” and give “Show Desktop.scf” as the file name.

saving Show Desktop.scf file

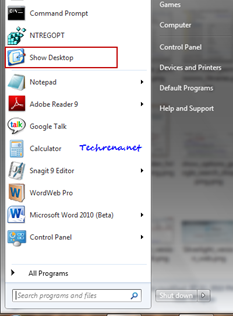
3. Drag the file to the Start Menu and release it to have it pinned to the Start Menu as shown:

Show desktop in start menu in windows 7

That’s it! The “Show Desktop” shortcut comes to your Start Menu.

Note:

1. This guide also works for Windows XP and Windows Vista based computers. You might want to implement this guide to restore “Show Desktop” icon in case it goes missing from your quick launch bar.

2. *scf stands for “Shell Command File”

[Download] WordPress Official App For Nokia S60 Mobiles

WordPress_Nokia_image

WordPress has just released an official app for the users of Nokia Symbian and Maemo based mobile phones. The latest free WordPress app for Nokia devices comes after the successful launch of such apps for iPhone,Android and BlackBerry devices.

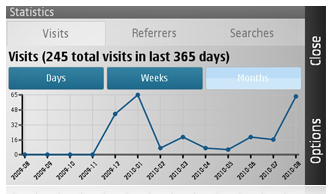
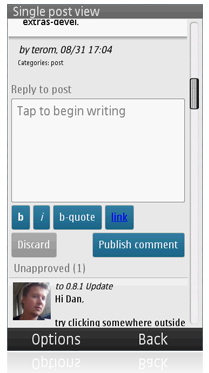
With this app installed, you can manage (add new posts or pages, edit existing content, manage content etc.) your WordPress blogs directly from your mobile phone. The app will also have the inbuilt statistical analysis which allows you see all the important data like visits, referrers and search terms accounted for brining the visitors to your WordPress blog.

WordPress nokia stats

WordPress new post in nokia

The app works for blogs hosted on WordPress (*.wordpress.com) and also for slef-hosted blogs that use WordPress as a Content Management System (CMS) for blogging and supports all the versions which are using WordPress 2.7 or later versions of the blogging platform. Currently the app support Nokia X6 and Nokia N97 mini but it’ll be coming to more devices very soon.

Download WordPress for Nokia S60 and Maemo (via Ovi Store)

More info at nokia.wordpress.org

[How To] Edit “Send To” Menu In Windows 7

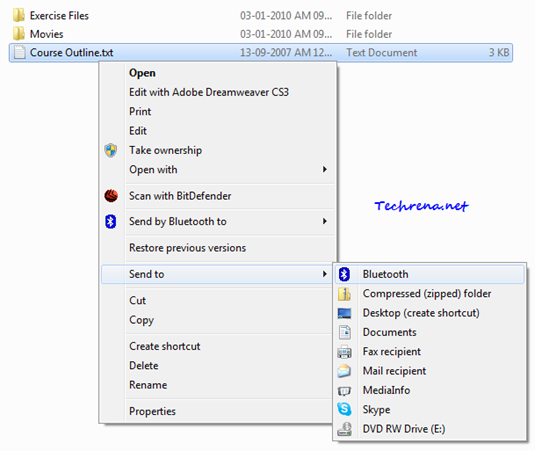
Do you frequently move files to a particular folder or location on your computer? Wish you could have an easy way to quickly transfer a file to that location? Yes, Windows does have a solution for you, in the form of “Send to” menu list found in the right-click context menu of any folder.

Send To items in windows 7 explorer

This tutorial explains about how you can add or delete items from the “Send to” menu list in Windows 7, Windows Vista and Windows XP.

Steps:

1. Navigate to the following folder in Windows:

Windows XP users:

C:\Documents and Settings\(User-name)\SendTo

Windows Vista & Windows 7 users:

C:\Users\(User-name)\AppData\Roaming\Microsoft\Windows\SendTo

Where “User-name” stands for the Windows username with which you are logged in.

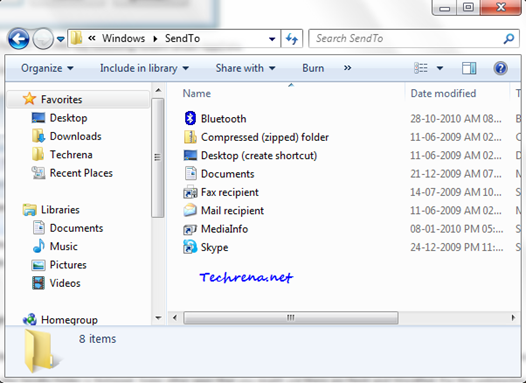
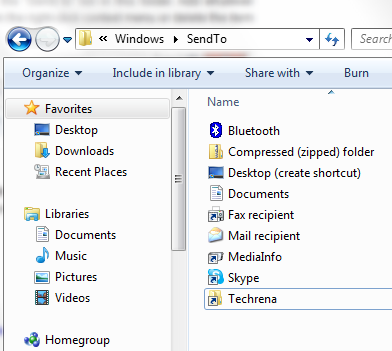
2. You will find all the shortcuts that are included in the “Send to” list in this folder. Add whatever shortcut t(program or folder) hat you would like to have it in the “Send to” in the right-click context menu or delete the item which you don’t want to see in the “Send to” menu option.

SendTo folder in windows 7

3. For instance, I have added a nee shortcut for “Techrena’ folder inside the “Send to” list as shown:

SendTo folder edit

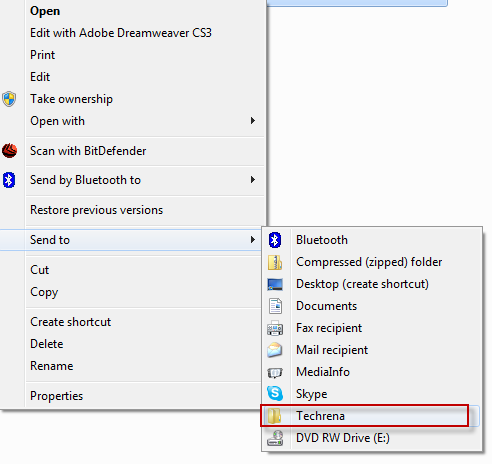
and it’ll appear in the “Send to” list in the right-click context menu as shown:

Added item in Send to list

Isn’t that simple? Now go and play around with the Send to items in your Windows (XP/ Vista/ Windows 7).

[How To] Start Windows Explorer With Custom Folder

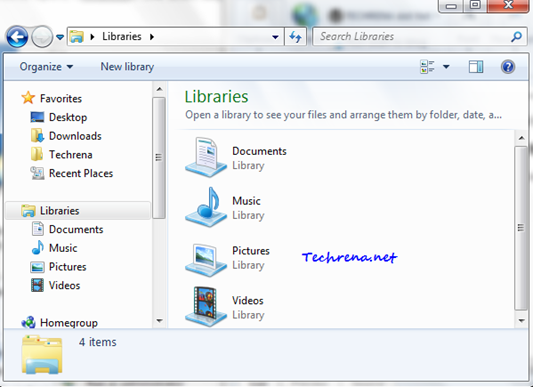
Windows 7 has a small folder icon Explorer windows 7 pinned itempinned to the taskbar (or you can add it manually*)  which indicates the shortcut for the “Windows Explorer”. Clicking on it will open the “Libraries” folder by default as shown.

Libraries in windows 7 explorer

But in most of the cases, you might want this to open a default folder other than the “Libraries” folder. Use the following trick to customize any Windows Explorer shortcut to open it with a custom folder of your choice in Windows 7, Windows Vista and Windows XP.

* This tutorial assumes that you have a pinned shortcut for the Windows Explorer on your taskbar. To pin the Windows explorer the shortcut to the taskbar, just drag and drop the “Computer” entry found in the Start menu. This guide works well for all types of shortcuts for the Windows Explorer. You can also add a desktop shortcut for the windows explorer on your desktop. To do this, search “explorer” in the Start menu and drag the “Windows Explorer” result to the desktop.

Steps:

1. Right-click on the folder icon at the taskbar:

Change explorer shortcut properties

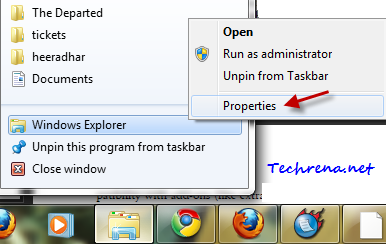
2. Again right-click on Windows Explorer, choose Properties.

windows explorer context menu in taskbar

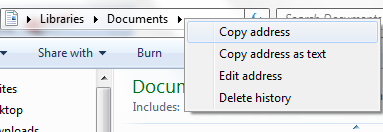
3. Now open the folder which you want to open through this Windows Explorer shortcut . Right-click on the path box, and select “Copy address”. The most sought folder which most of the users might want to use as default folder would be the “My Documents” folder. So here I’m taking it as an illustration to explain you the this trick.

copy address from libraries folder

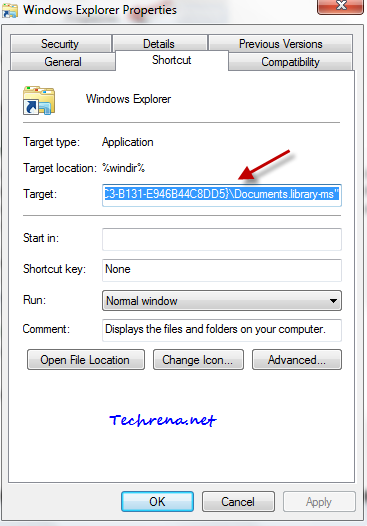
4. Now go back to the “Properties” window that is kept open in the step 2, choose “Shortcut” tab and focus on the “Target” field. By default, it would have the following path:

%windir%\explorer.exe

5. Select the “Target” filed and paste the address that you copied from the step 3. For “My Documents”, it would be this string

%windir%\explorer.exe Libraries\Documents”::{031E4825-7B94-4DC3-B131-E946B44C8DD5}\Documents.library-ms”

customizing windows explorer shortcut

6. Click on “OK” to apply and save the settings.

Target strings for other destinations:

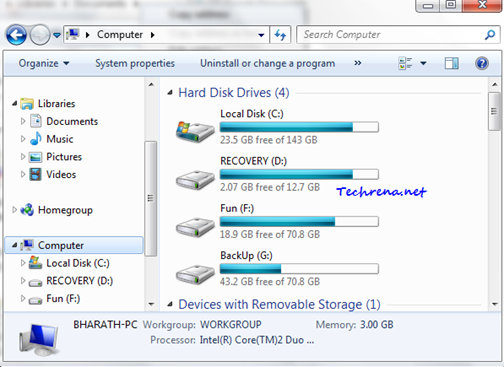
Computer: %SystemRoot%\explorer.exe /E,::{20D04FE0-3AEA-1069-A2D8-08002B30309D}

Set the above string under Target filed to open “Computer” by default in Windows Explorer.

computer in windows 7 explorer

From now on, when you double click on this Windows Explorer shortcut, it will open the custom folder that you set.

Related: Pin Computer Icon To Windows 7 Taskbar