[Download] WordPress 3.0.4 Important Security Update

WordPress has probably rolled out the last update for the year 2010, WordPress 3.0.4, an important security update for the popular CMS. In a blog post about the release of the update, Matt Mullenweg, founder of Automattic, the company behind WordPress, has termed the latest update as “critical”. The update apparently fixes a core security bug called KSES found in WordPress HTML sanitation library.

WordPress 3.0.4

To keep your website or blog managed by WordPress CMS, it is strongly advised that you immediately update it to the latest version. You can either choose the automatic update mode or download the file from the links below and extract to your server using an FTP client.

Download:

WordPress.zip (3 MB)

WordPrress.tar.gz (2.7 MB)

[Download] WordPress 3.0.2

wordpress logo

WordPress 3.0.2 is now available as a mandatory security update for all the earlier versions of WordPress.

WordPress 3.0.2 release fixes a moderate security issue identified in WordPress that could allow a author-level user to gain access to some administrator related features of the site. The update also fixes as many as 9 minor bugs and also packs some security enhancements. For full list of updates in the versions 3.0.2, read at WordPress Codex.

WordPress 3.0.2 Update

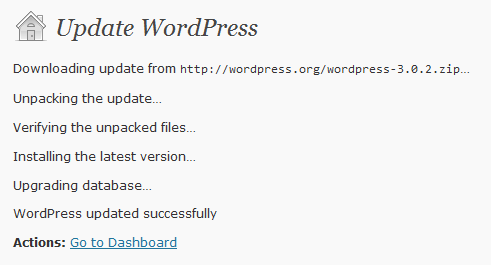
To update your blog to to the latest version of the WordPress, either download 3.0.2 version or use the automatic update feature from Dashboard > Updates menu from the administrator’s area in your blog. It is highly recommended that you download this update immediately even if you think your site hasn’t got any untrusted users.

[Download] WordPress Official App For Nokia S60 Mobiles

WordPress_Nokia_image

WordPress has just released an official app for the users of Nokia Symbian and Maemo based mobile phones. The latest free WordPress app for Nokia devices comes after the successful launch of such apps for iPhone,Android and BlackBerry devices.

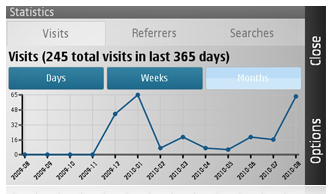
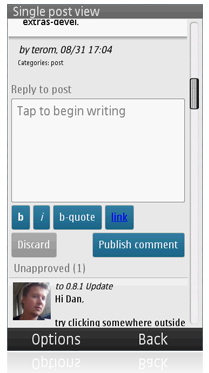
With this app installed, you can manage (add new posts or pages, edit existing content, manage content etc.) your WordPress blogs directly from your mobile phone. The app will also have the inbuilt statistical analysis which allows you see all the important data like visits, referrers and search terms accounted for brining the visitors to your WordPress blog.

WordPress nokia stats

WordPress new post in nokia

The app works for blogs hosted on WordPress (*.wordpress.com) and also for slef-hosted blogs that use WordPress as a Content Management System (CMS) for blogging and supports all the versions which are using WordPress 2.7 or later versions of the blogging platform. Currently the app support Nokia X6 and Nokia N97 mini but it’ll be coming to more devices very soon.

Download WordPress for Nokia S60 and Maemo (via Ovi Store)

More info at nokia.wordpress.org

[How To] Disable All In One SEO Additional Columns From Posts Editing Page

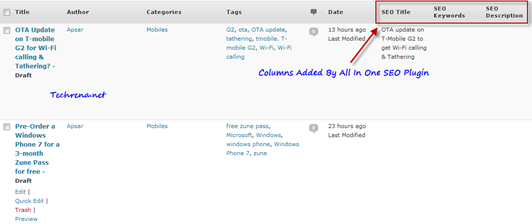
If you have just upgraded the All In One SEO plugin today for your WordPress based blog, you might have noticed three new columns being added to the post editing page (SEO Title, SEO Keywords and SEO Description) as shown below

All in one seo added additional columns

It’s very much annoying as the the post title column gets longer due to this and make it difficult to read it as you need to scroll down. These columns added after upgrading the All In One SEO are not actually needed considering the fact that they take significant amount of your screen space. So I quickly dug into this to find out how we can remove, and realized that it was quite easy after seeing a tweet from Micheal Torbert, the developer of this great plugin. Here is how you can remove the additional three SEO columns in posts editing page (no code modification required):

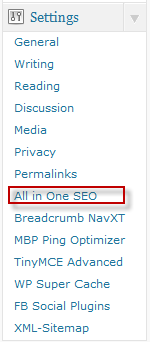
1. Go to All In One SEO plugin configuration page (Can be found under Settings menu in your dashboard).

All in one seo link in sidebar

2. Look for “Custom Post Types for SEO Column Support” filed in the settings page. By default, the settings would be enabled for both post and page editors as shown:

Custom post types SEO Columns checked in All in One SEO

3. Hold Control key and uncheck the post and page options as shown:

Custom post types SEO Columns unchecked in All in One SEO

4. Click Save the Options and go back and check the post and page editing page in your WordPress dashboard, the extra columns should have been removed now.

WordPress 3.0 Available For Free Download

WordPress developers has today officially released the latest version of their popular Blogging and CMS(Content Management System) platform WordPress 3.0 (code name ‘Thelonious’).

WordPress 3.0 is the thirteenth major release of WordPress software and and is also the first major release of WordPress since the version 2.9.

The following are the major updates in WordPress 3.0.

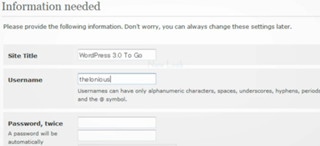
1. Admin Username during the installation:

WordPress 3.0 allows you to give your own Username instead of default “admin” during the installation of WordPress.

Admin_username_wordpress_3
2. New look:

The Dashboard has been made a little lighter in color for better appearance.

WordPress_3_new_screenshot
3. Bulk Updates:

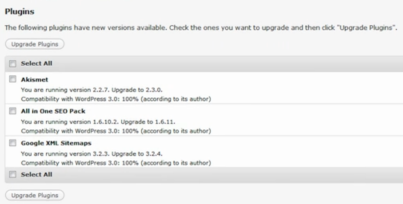
You can now upgrade multiple WordPress plugins simultaneously.

plugins_bulk_update_wordpress_3
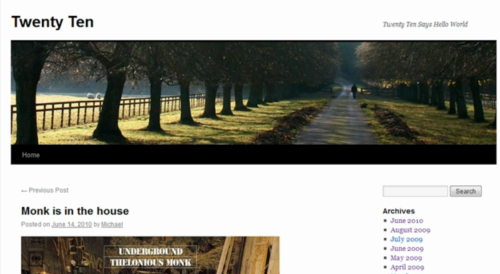
4. Twenty Ten Theme:

A new sexy Twenty Ten theme replaces the classical Kubric theme which WordPress had for years

Twenty_ten_theme_WordPress_3
5. Custom Backgrounds:

change background in WordPress 3.0

Change the background color or upload a new image for background
6. Custom Headers:

You  customize the header by uploading your own images
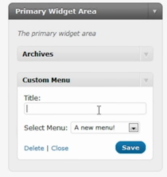
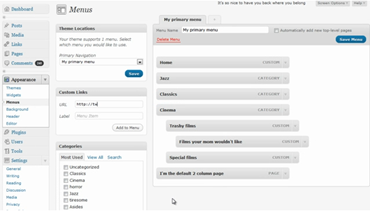
7. Custom Menus:

You can now add menus to your blog..as easy as 1 2 3..You can choose the order/hierarchy in which they should appear. This is very good for SEO prospective.

Create_menu_WordPress_3

Custom_menus_Wordpress_3
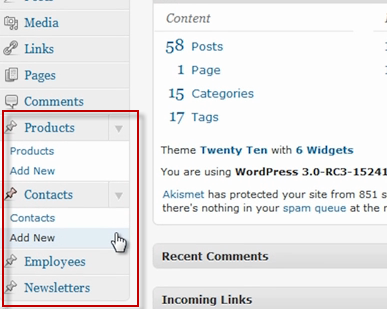
8. Custom Post Types:

You can now choose custom post types for your blog like if you manage a big organization, you can have custom post types like “Products”, “Contacts”, “Employees”, “Newsletters” etc.

Post_types_Wordpress_3
9. Shortlink Support (Built-in):

WordPress now supports a default in-built URL shortener (shortlink generator) right from the post editor itself.

Shortlink WordPress 3 post

10. MU + WP = 3.0:

Now you can run a millions (virtually !) of blogs with a single WordPress installation.

Installing WordPress 3.0 In Your Blog:

You can either download WordPress 3.0 Zip file or you can use the Upgrade from your dashboard to upgrade the WordPress automatically to  WordPress 3.0.

Bing 404 Plugin For WordPress

wordpress official logo

If you are looking for a plugin to manage 404 error pages in a more better way in your WordPress blog, here’s a plugin “Bing404” for WordPress by Microsoft. Even though WordPress has a default 404 template which avoids otherwise a dead “Page Not Found” error, you might still want to handle 404 error pages better so that you won’t loose your visitors landing your 404 pages accidentally. Bing 404 plugin shows a list of possible pages on your domain via search results based on the keyword  (you may range of domains to narrow down the search).

Follow these steps to start using this in your blog:

1. Download the Bing404 WordPress plugin

2. Upload the plugin to your blog and activate it.

3. Get the Bing App ID using your existing Windows Live ID.

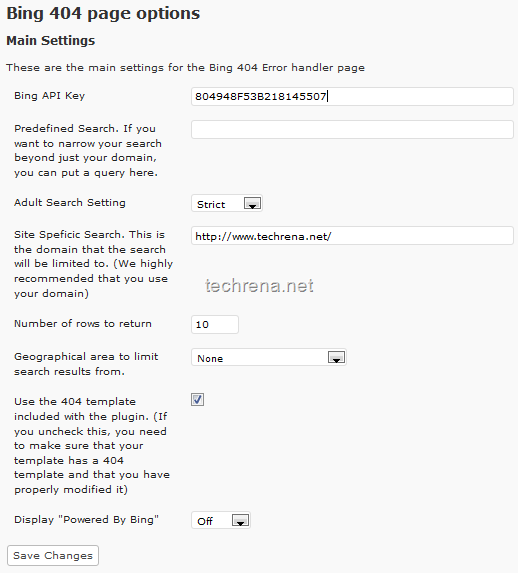
4. Configure the plugin by entering the Bing App ID and you can also customize other settings.

Bing404 plugin configuration

The plugin includes a 404 page, if you check the option to use this 404 page that came with the plugin, it should work without any code modifications. However, if you want to use this plugin with your own 404 page, you may have to add the following code to your template’s 404.php

<?php if(function_exists('bing404_search_bing')) { echo bing404_search_bing(); } ?>

Now that you have implemented the plugin, check the 404 pages yourself. You can learn more about this plugin at thus post by watching the video below:

Watch this video to learn more:

[How To] Easily Embed MP3 File Into A WordPress Blog Post

Embed Mp3 into WordPress post

This tutorial deals with how to embed a Mp3 audio file into a WordPress post so that it can be played right inside the post in players like Quicktime.This saves the time for your readers as they need not download the file to listen to it. Follow these simple steps to learn how you can do it.

Steps:

1. Star composing a new post by clicking on “Add New” under posts section. Next to Upload/Insert option, click on the music icon to add (upload) audio to the media library.

Upload audio file to the WordPress media library

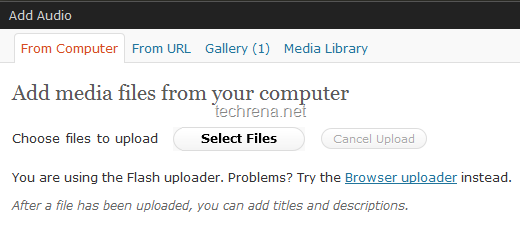
2. Click on the Select Files and chose your audio (mp3) file and click Ok.

Add media files from your computer to the WordPress media library
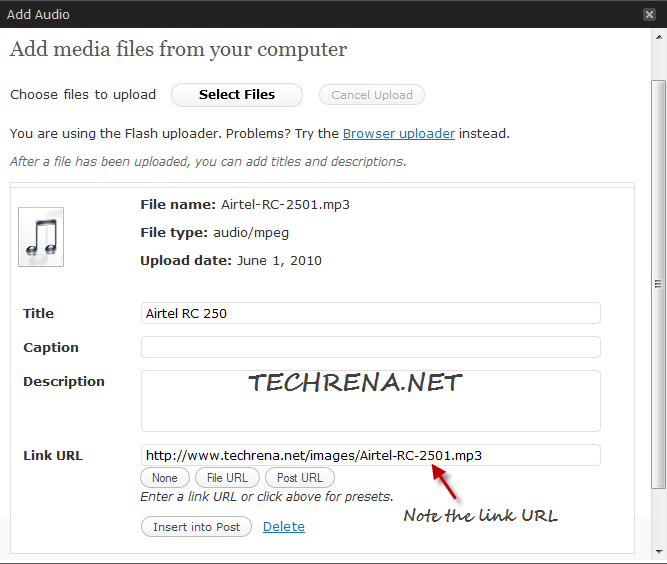
Wait until the upload gets over. Copy the link URL to notepad.

Media file uploaded to WordPress library

3. Now go to back the post editor, and click on the small video file like icon (see in the screenshot). New “Insert / edit embedded media” popup will open.

Click on this to embed media into the WordPress post
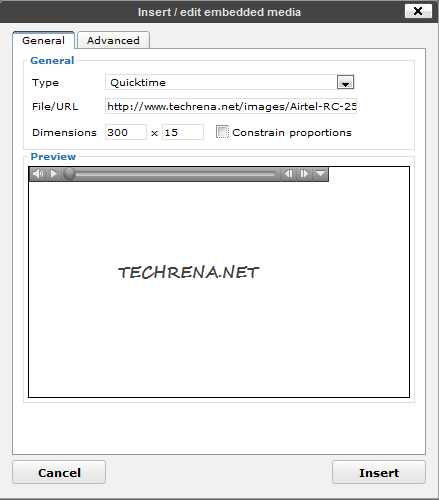
Under the File/URL filed, enter the URL that you have just copied to the notepad in the previous step. You can now customize the Quciktime player by setting your preferred dimension (I had chosen 300 x 15 in the screenshot). You can preview the audio file by playing it under the “Preview” section.

insert_embedded_media

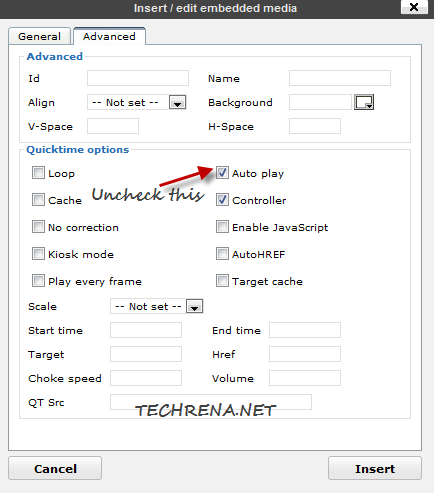
4. Now go to Advanced tab and uncheck “Auto play”. Auto play, if checked plays the audio file automatically when the page loads, many of us may not want this, hence it’s better to keep it unchecked. Click Insert to embed the audio file into the post.

Uncheck Auto play in embedded media settings

5. The audio file (mp3) will now be embedded into your post and this is how it looks like in your WYSIWYG editor.

Mp3 file embedded in WordPress post editor

6. Publish the post and you will now see the mp3 file embedded into the post as shown in the below screenshot:

Mp3 embedded into a WordPress post

Implement Google Adsense For Search In WordPress Blog

Google adsense for search in wordpress self-hosted blog

Adding Google Adsense for search (AFS) for self-hosted WordPress blogs is a bit tricky.In case of a blog hosted on Blogger, it’s enough if you place the codes wherever you want as long it lies within the <body>  section of the HTML source.Coming back to WordPress, even though there won’t be much difficulty in adding the code for displaying the Adsense search box, showing search results is the hard part.This requires you to create a separate page for displaying the search results.

Here we are coming up with an exclusive full tutorial on how to add Google Adsense site search in your WordPress blog.Follow the steps carefully to learn add Adsense site search feature on your own.

What Do We Need ?

– We need a standalone WordPress page to show search results

– We need a separate WordPress page template to embed the search results

– Codes for generating Adsense search box and Adsense search results

Procedure:

Step 1: Creating page template

We are going to generate a WordPress page template in this step.

Open any text editor and copy paste the below code into it and save it as something like googlesitesearch.php.

Code:

<?php
 /*
 Template Name: google site search
*/
?> 

<?php get_header(); ?> 

<!-- Your Adsense serach result code goes here --> 

<?php get_sidebar(); ?>
<?php get_footer(); ?>

Note the template name that you have given here (google site search), we make use of this in the next step.You may have to upload it to your WordPress theme folder to use it in the next step.

Step 2: Creating WordPress page

This is much simpler step, you just need to create a new WordPress page (Go to Pages> select “Add New”). Give it some name like Google Site Search.

Important: On the right side pane, select the page template that we have created in the first step (google site search).
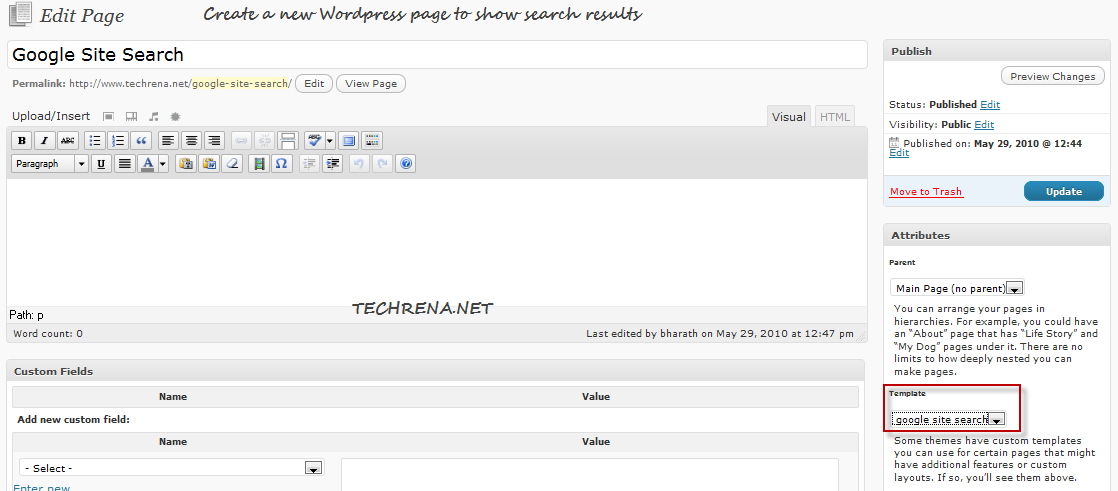
WordPress page for site search results

Publish the page and note down the URL of the page (ex: www.techrena.net/google-site-search).

Step 3:

Login to your Adsense account and create a new Adsense for search ad.

In the second page of the AFS wizard, enter the above URL from the above step in the text box under “Open results within my own site” option.

AFS search results page

Finish the AFS settings wizard and now you are ready with two separate codes, one for generating Adsense search form and another for generating search results.
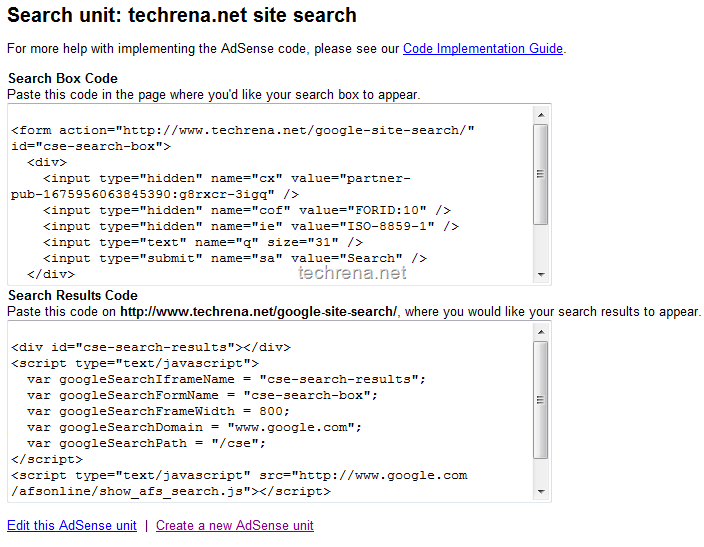
Adsense for search code

Step 4:

Copy the Search Results Code and paste it into the page template file (googlesitesearch.php), save it and re-upload it to your current WordPress theme folder via FTP. Now this is your final page template that loads the search results.
You are done and the sample result page will look like the following:
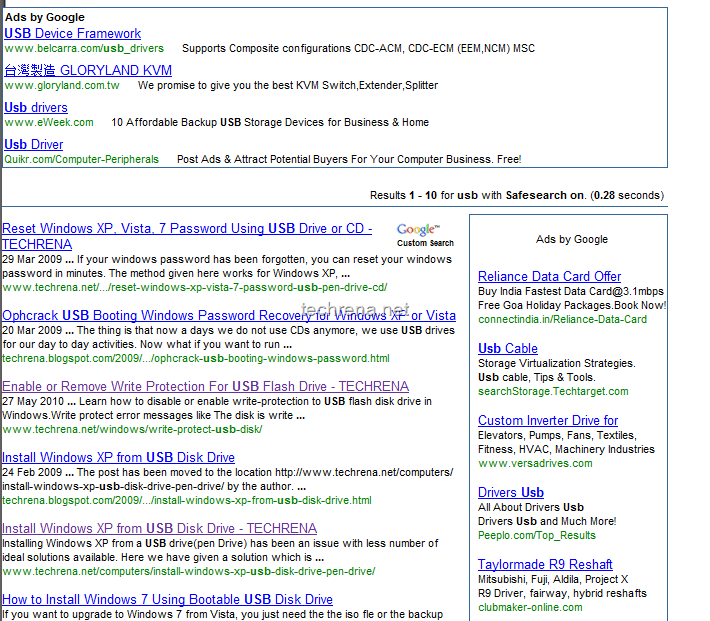
techrena AFS results page

Let us know, if you face any difficulties in implementing Adsense for search in your WordPress blog.