[How To] Remove Shutdown, Restart Options From Start Menu

no shutdown and restart option in start menu

Do you want to prevent other users from shutting down your computer when you are away? Are you serving a server on your computer which needs to be up all the time and hence want to remove the Power button and other options including Shut Down, Restart, Sleep, and Hibernate from the Start Menu so that gets to difficult to turn off the system?

Whatever may be the reason, if you want to remove the Shut Down button et al., follow the steps discussed below. You have two methods to choose from: The first method is universal and applies to all the editions of Windows 7, while the second method is applicable to Professional, Business or Ultimate editions only.

Warning: If you have followed this tutorial and removed the “Shutdown” and “Restart” options from your Start Menu, the “Turn Off” option that would normally shows up when you hit CTR+ ALT+ DELETE would also go missing and the only way to shutdown your computer in such a case is to use the command line tool which can be a bit difficult. Try these methods only if you are really need to do so.

Method-I: Using Registry Editor

1. Press Windows key + R to open RUN and type “regedit” in the text field and press OK.
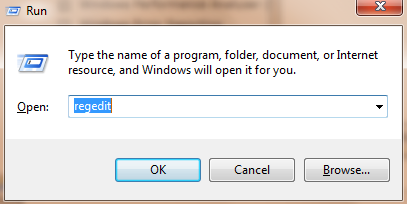
regedit run command

2. Navigate to the following path in the registry editor:

HKEY_CURRENT_USER\Software\Microsoft\Windows\CurrentVersion\Policies\Explorer

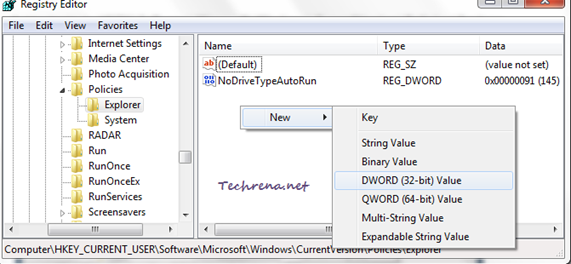
3. Right-click on the right side pane and choose New > “DWORD (32-bit) Value”.

New_Dword_regedit_shutdown_remove

4. Give it a name as “NoClose”.

NoClose new dword in regedit

5. Double-click on the newly created DWORD (NoClose) and change the “value data” to 1.
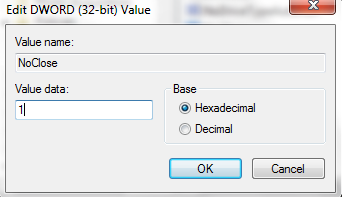
Regedit edits to remove shutdown options

Click OK and close the registry editor. You might have to log out and then log back in or restart the “explorer” (kill explorer.exe and run it again using the task manager) to see the changes.

Method-II: Using Group Policy Editor :

Group Policy Editor will not be present in the Windows 7 Home edition. So if you have other editions of Windows 7 like Professional, Ultimate or Business, you can proceed with this method which is relatively simpler than the first method.

1. Press Windows Key + R and type “gpedit.msc” in the text field and hit OK to open the Group Policy Editor.
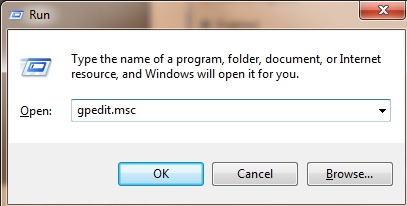
gpedit in run command

2. Navigate to the following path:

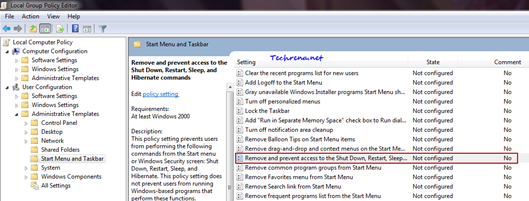
Local Computer Policy > User Configuration > Star Menu and Taskbar
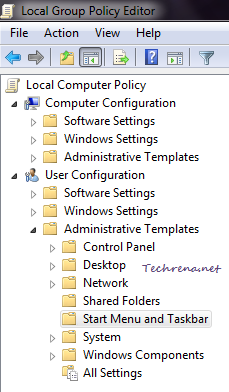
Start Menu and taskbar in GPEDIT

3. On the right side pane, you will find an entry “Remove access to the Shut Down, Restart, Sleep and Hibernate commands”.

GPEDIT shutdown button access settings

Double-click on it to change the settings.

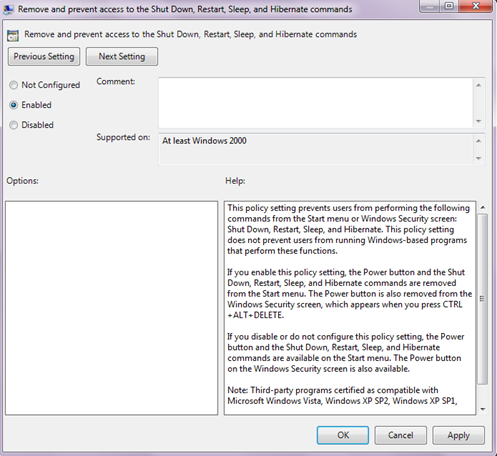
4. You need to change the option in settings window to “Enabled” from the default value “Not Configured”.
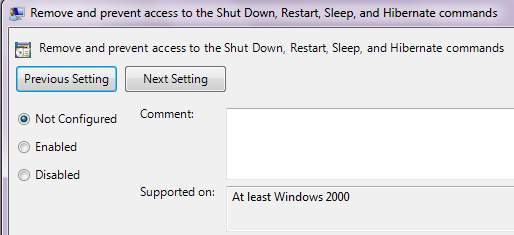
shutdown button access settings

New setting:

shutdown button access settings

Click OK to apply the changes and close the window. The changes can be seen immediately. The Power button and the Shut Down, Restart, Sleep, and Hibernate commands will be removed from the start menu as shown in this pic.

To undo this change:

Delete the NoClose DWORD entry in the method-1.

Change the value back to “disabled” or “not configured” in case of method-2.

[How To] Add, Edit & Manage Windows Contacts

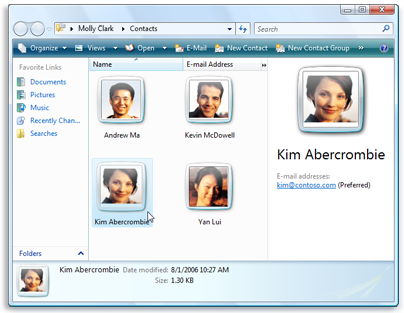
Windows 7 contacts

Windows Contacts is a nice little feature that lets you create contacts for people and organizations to keep track of them in your computer. You can create a dedicated contact for one person or organization. All Windows Contacts added here will automatically serve as address book for Windows Mail, meaning that you can choose the recipient from this Contacts folder.

All the details in the Contacts folder can also serve as multi-purpose contacts and contain various information including E-mail addresses, picture, phone numbers, street addresses, family information, website addresses, notes etc.

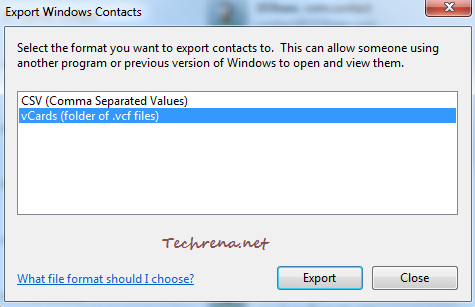
You can also synchronize Windows Contacts to your mobile phone or vice-versa. Nokia and Samsung mobile phones support contacts in vCard(.vcf) and CSV format and Sony Ericsson mobile phones support .contact format. The good thing with Windows Contacts is that you can export all the contacts inside this folder to the above formats.

export windows contacts

To open Contacts folder in your Windows, go to Start Menu, and type “contacts” in the search box and open the Contacts from the results.

contacts search results in start menu

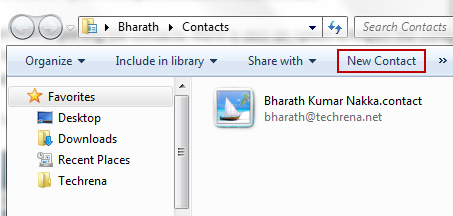
Click on “New Contact” link below the location bar in the Window to create a new contact.

New contact link in contact folder

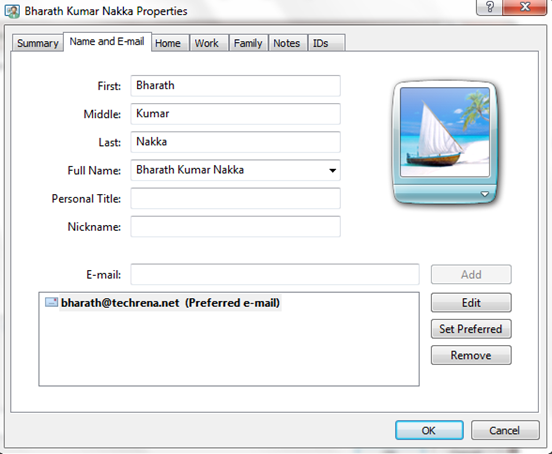
Add as much details as you can, you can even add a picture to it:

Editing Windows Contacts details

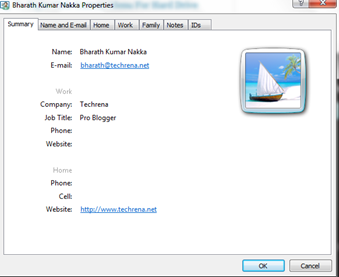
Windows contact summary

That’s it. Now you have successfully created a new contact in the Windows Contacts. Add as many contacts as you can, and you will be ready use to these contacts with Windows Mail or sync with your mobile phone and other supported devices.

[How To] Find The Date When The Windows Was Installed

Windows logo

If you have installed Windows long back like me and not sure the exact date when you installed it, there is a simple way you could find this. As a part of the “systeminfo” command, Windows shows this info through the command prompt window. This trick works in all the different versions of Windows including Windows 7, Windows Vista and Windows XP. Follow these steps to learn how to find the original install date of Windows.

Steps:

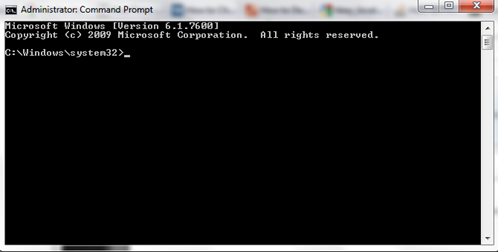
1. Type “cmd” in the Start Menu and hit Enter to open the Command Prompt (Choose “Yes” when asked by UAC in Windows 7 to open the cmd)

Command Prompt window

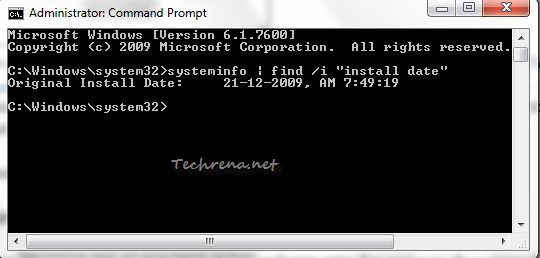
2. Type the following command in the command prompt window and press Enter.
systeminfo | find /i "install date"

Wait till the requested information is loaded in the window.

cmd_original_install_date

3. You will see the date of installation of Windows shown next to “Original Install Date”.

A Complex Alternative Method:

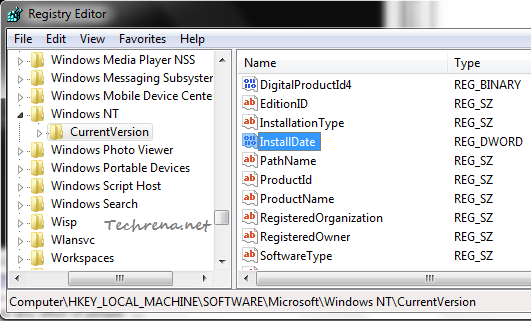
If you are curious to find other ways to find the same, open the Registry Editor (press Start button + R, type “regedit” and click OK), navigate to the following path:

HKEY_LOCAL_MACHINE\SOFTWARE\Microsoft\Windows NT\CurrentVersion

installDate regedit value

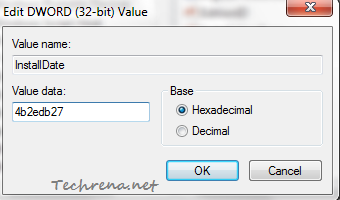
On the right hand pane, find the key with name “InstallDate”. Double-click on it to see the value data, which will be in “Hexadecimal” form.

InstallDate regedit value

For instance in my case it is 4b2edb27. It indicates the number of seconds since January 1, 1970 (1/ 1/ 1970) when converted to binary decimal. Use “Programmer” mode in Windows 7 calculator to do this conversion. In this case, the value turns out to be 1261361959. So the date of installation of Windows 7 on my system happened 1261361959 seconds after 1/ 1/ 1970 12 AM. Do the math and find the value Smile , if you are patient enough and the result should match the date found using the first method.

[How To] Add “Show Desktop” Shortcut Manually In Windows 7

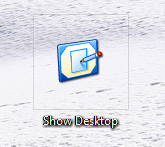
show desktop shortcut

Remember the pretty useful “Show Desktop” icon that used to be present on the quick launch toolbar in Windows XP?

Show desktop windows xp

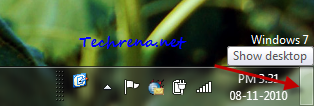
It was the life saviour for many users like me when I quickly wanted to open my desktop with too many windows being kept open. Fast forward to 2010. Most of us are now using Windows 7, the most successful Windows OS after Windows XP. Microsoft, desperate to decrease the amount of space occupied by icons like these, has removed this button from the original position altogether. Instead, Windows 7 came with a small rectangular blank button on the far right of the taskbar next to the clock. When you hover the mouse on this button will hide all the open windows quickly to shows up the desktop. If you have enabled Aero effects, you will see ghosted outlines of the windows, a part of the Windows 7’s “Aero Peck”.

Show desktop bar in windows 7

You can also get to the desktop anytime using Windows Key + D shortcut, besides choosing “Show the desktop” from the context menu that appears when you right-click on the taskbar. Despite all these options, you might still have a liking for that old XP style “Show desktop” icon on the quick launch toolbar. Even though it’s a bit difficult to add such a shortcut or icon to the quick launch bar in Windows 7, you can still add this “Show Desktop” shortcut to your Start Menu to for a quicker access. Here is what you need to do:

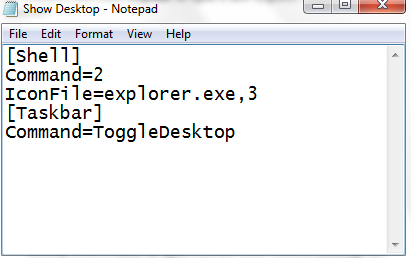
1. Open notepad (or any text editor for that matter) and type the following code:

[Shell]
Command=2
IconFile=explorer.exe,3
[Taskbar]
Command=ToggleDesktop

show desktop code in notepad

2. Click File> Save As and choose “All Files (*.*)” from “save as type” and give “Show Desktop.scf” as the file name.

saving Show Desktop.scf file

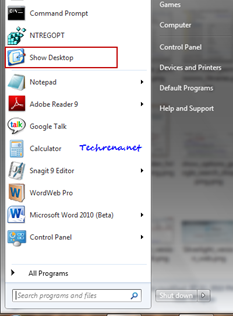
3. Drag the file to the Start Menu and release it to have it pinned to the Start Menu as shown:

Show desktop in start menu in windows 7

That’s it! The “Show Desktop” shortcut comes to your Start Menu.

Note:

1. This guide also works for Windows XP and Windows Vista based computers. You might want to implement this guide to restore “Show Desktop” icon in case it goes missing from your quick launch bar.

2. *scf stands for “Shell Command File”

[How To] Edit “Send To” Menu In Windows 7

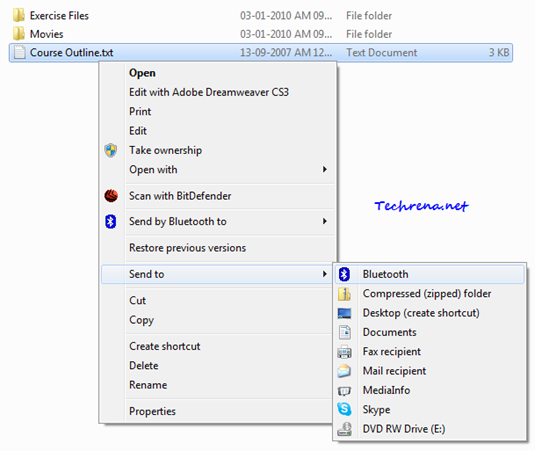
Do you frequently move files to a particular folder or location on your computer? Wish you could have an easy way to quickly transfer a file to that location? Yes, Windows does have a solution for you, in the form of “Send to” menu list found in the right-click context menu of any folder.

Send To items in windows 7 explorer

This tutorial explains about how you can add or delete items from the “Send to” menu list in Windows 7, Windows Vista and Windows XP.

Steps:

1. Navigate to the following folder in Windows:

Windows XP users:

C:\Documents and Settings\(User-name)\SendTo

Windows Vista & Windows 7 users:

C:\Users\(User-name)\AppData\Roaming\Microsoft\Windows\SendTo

Where “User-name” stands for the Windows username with which you are logged in.

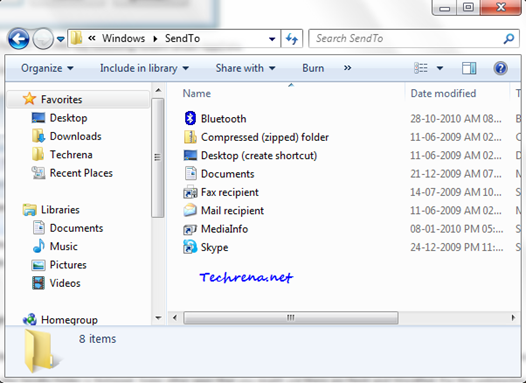
2. You will find all the shortcuts that are included in the “Send to” list in this folder. Add whatever shortcut t(program or folder) hat you would like to have it in the “Send to” in the right-click context menu or delete the item which you don’t want to see in the “Send to” menu option.

SendTo folder in windows 7

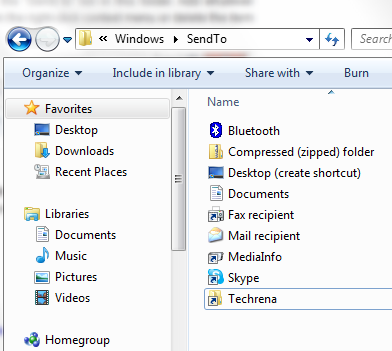
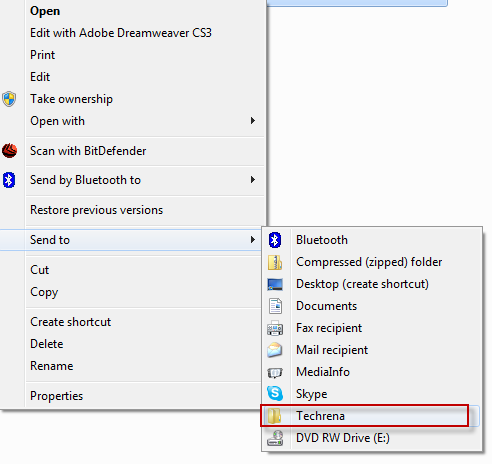
3. For instance, I have added a nee shortcut for “Techrena’ folder inside the “Send to” list as shown:

SendTo folder edit

and it’ll appear in the “Send to” list in the right-click context menu as shown:

Added item in Send to list

Isn’t that simple? Now go and play around with the Send to items in your Windows (XP/ Vista/ Windows 7).

[How To] Start Windows Explorer With Custom Folder

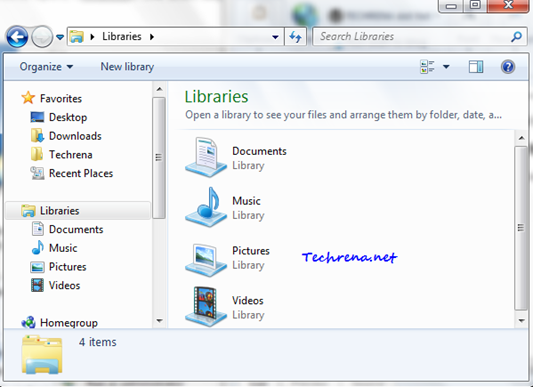
Windows 7 has a small folder icon Explorer windows 7 pinned itempinned to the taskbar (or you can add it manually*)  which indicates the shortcut for the “Windows Explorer”. Clicking on it will open the “Libraries” folder by default as shown.

Libraries in windows 7 explorer

But in most of the cases, you might want this to open a default folder other than the “Libraries” folder. Use the following trick to customize any Windows Explorer shortcut to open it with a custom folder of your choice in Windows 7, Windows Vista and Windows XP.

* This tutorial assumes that you have a pinned shortcut for the Windows Explorer on your taskbar. To pin the Windows explorer the shortcut to the taskbar, just drag and drop the “Computer” entry found in the Start menu. This guide works well for all types of shortcuts for the Windows Explorer. You can also add a desktop shortcut for the windows explorer on your desktop. To do this, search “explorer” in the Start menu and drag the “Windows Explorer” result to the desktop.

Steps:

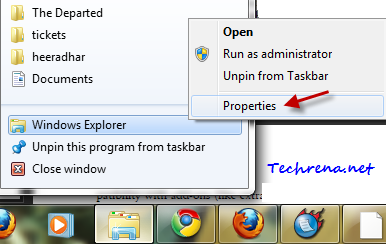
1. Right-click on the folder icon at the taskbar:

Change explorer shortcut properties

2. Again right-click on Windows Explorer, choose Properties.

windows explorer context menu in taskbar

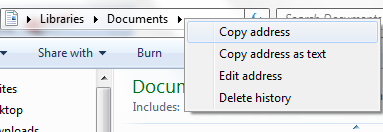
3. Now open the folder which you want to open through this Windows Explorer shortcut . Right-click on the path box, and select “Copy address”. The most sought folder which most of the users might want to use as default folder would be the “My Documents” folder. So here I’m taking it as an illustration to explain you the this trick.

copy address from libraries folder

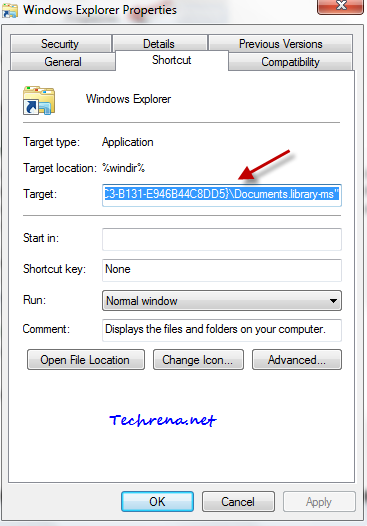
4. Now go back to the “Properties” window that is kept open in the step 2, choose “Shortcut” tab and focus on the “Target” field. By default, it would have the following path:

%windir%\explorer.exe

5. Select the “Target” filed and paste the address that you copied from the step 3. For “My Documents”, it would be this string

%windir%\explorer.exe Libraries\Documents”::{031E4825-7B94-4DC3-B131-E946B44C8DD5}\Documents.library-ms”

customizing windows explorer shortcut

6. Click on “OK” to apply and save the settings.

Target strings for other destinations:

Computer: %SystemRoot%\explorer.exe /E,::{20D04FE0-3AEA-1069-A2D8-08002B30309D}

Set the above string under Target filed to open “Computer” by default in Windows Explorer.

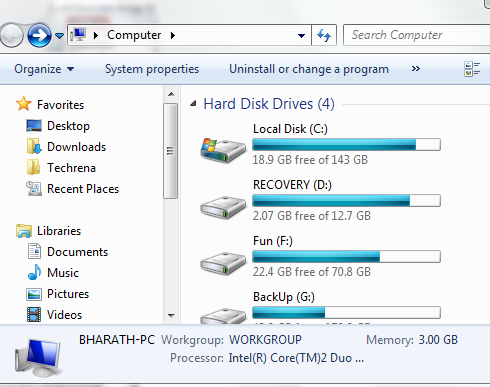
computer in windows 7 explorer

From now on, when you double click on this Windows Explorer shortcut, it will open the custom folder that you set.

Related: Pin Computer Icon To Windows 7 Taskbar

[Download] Programming Windows Phone 7 Free Ebook

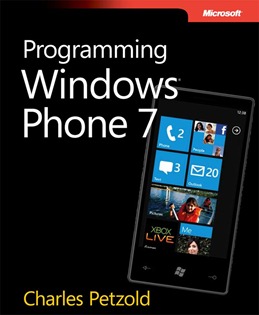
programming windows phone 7

If you are a C# programmer and willing to develop application for the newly launched Windows Phone 7 platform, here is a good news for you!

Microsoft has released a 1013-page long free ebbok , Programming Windows Phone 7 written by the popular author Charles Petzold. Charles Petzold, who has authored various programming books on Windows OS for the last 24 years has complied this book as a gift to programming community from the Microsoft Windows Phone 7 team. The book contains 24 chapters which have been divided into 3 parts: The Basics, Silverlight, and XNA. While this is available as a freely downloadable ebook , the book will also be available for sale as two print editions: Microsoft Silverlight Programming for Windows Phone 7 and Microsoft XNA Framework Programming for Windows Phone 7, and should be available in stores starting from December 2010.

Download Programming Windows Phone 7 : ebook (pdf format) |  ebook’s sample code (zip file)

[How To] Turn Menu Bar On Or Off In Windows 7 Explorer

Menu bar in windows 7

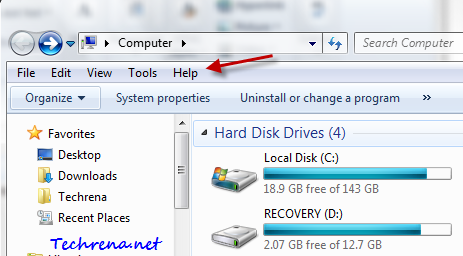
Menu bar is that small bar having options like “File”, “Edit”, “View”, “Tools” and “Help” in Windows explorer. One can find it always in the top of any window s explorer window in the Windows XP and earlier versions, however Microsoft had started to hide this menu bar ever since the Windows Vista was launched owing to save some space in Windows explorer. Windows 7 and Vista users can always easily toggle between turning the menu bar on or off by pressing the “Alt” key.

But fortunately Windows 7 has added a feature to let users choose to enable or disable the menu bar in windows explorer. If you are very much used to Windows XP-like environment in windows explorer, you might fancy to have the menu bar permanently appear in Windows 7. Here is how you can turn on the menu bar forever in Windows 7.

1. Open windows explorer (press Start button + E).

Windows explorer in windows 7

2. Click Organize at the top of the window.

Organize button in explorer

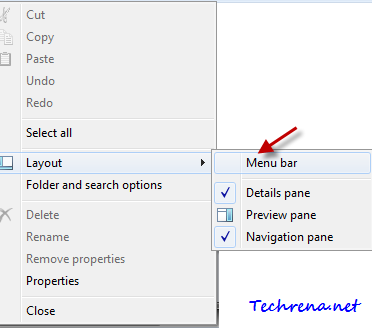
3. Expand “Layout” options and select “Menu bar” from the list.

Menu bar in organize options

That’s it, the menu bar will start appear in all windows explorer windows from now on.

Menu bar permanent in windows 7

[How To] Disable Auto Sleep Mode In Windows 7

Windows 7 power options

If you have recently purchased a new computer (laptop in particular), there is a setting which you need to look at is the “Power Options” found under the Control Panel. By default, the power options would be set to make your computer go to sleep mode automatically after being idle for a defined amount of time. It would be really annoying when the laptop goes into sleep mode without your attention when you let your laptop run a program in the background (like downloading a big file from internet) and go away from it. Even though it is not advisable to change the advanced settings of a power plan, we can safely change these basic settings like  “Turn off the display”, “Put the computer to sleep” etc. Follow these steps:

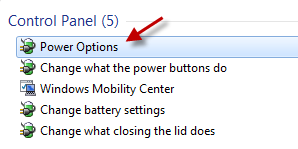
1. Type “power options” in the Start menu search and open “Power Options” result from the Control Panel section.

Power options start menu search result

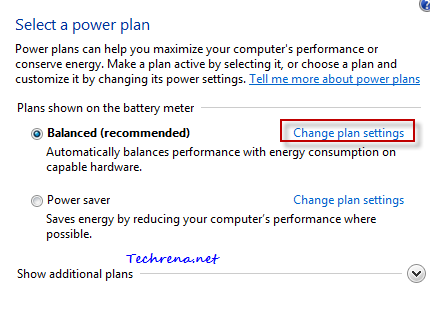
2. Click on “Change plan settings” found right next to your current power plan.

Power options window

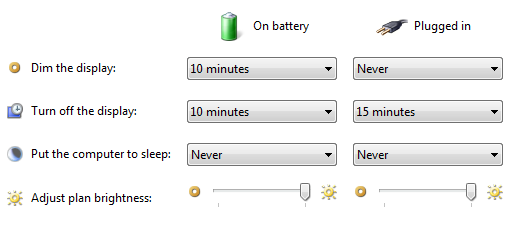
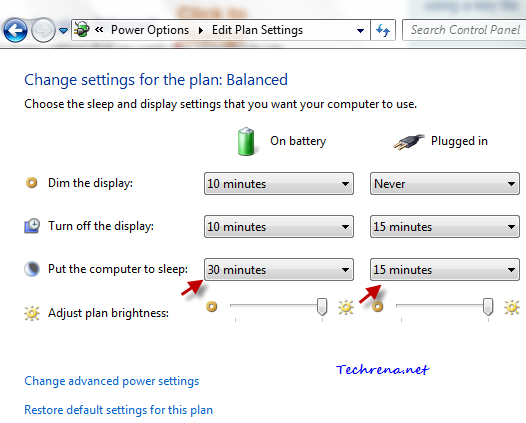
3. You will see the default settings for when to “dim the display”, when to “turn off the display” and when to put the computer to sleep.

Power plan default settings

Change the settings to your convenience, you can try setting “Put the computer to sleep” option to “Never” to disable the auto sleep mode completely (preventing your computer from going to sleep mode automatically).

Editing plan settings in power options

Click Save changes button once you are done with it and that’s it! You have now successfully turned off the auto-sleep mode in Windows 7.

Get A Free 500GB HDD With Windows 7 Purchase

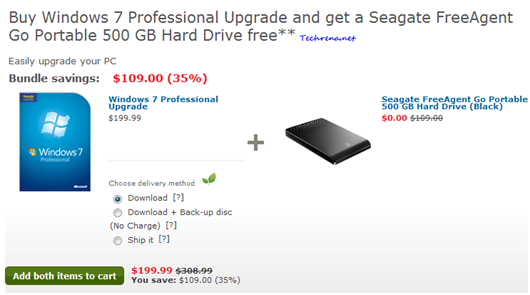
Windows 7 pro upgrade HDD offer

Microsoft is offering a free Seagate FreeAgent Go Portable 500 GB Hard Drive with every purchase of Windows 7 Professional Upgrade. You can buy both these items at a discounted price of $199.99. If you purchase the same Seagate 500GB hard drive independently, it would cost you $109 alone. It’s really worth a deal and if you are running a licenced version of Windows XP or Windows Vista and plan to upgrade to the latest Windows 7 (includes both 33-bit and 64-bit versions), it is the right time to go for it.

This is a limited period offer and is valid till the supplies last. So hurry up! visit this Microsoft Store page to download or order the Windows 7 Professional Upgrade now.

For any queries, you can call the Microsoft toll-free number (United States) at 1-877-696-7786.