Windows automatically assigns letters to drives by default. Most users are happy with the letters that Windows chooses and they don’t complain about it. But for some reasons, if you didn’t like a letter assigned by Windows to one your new drives, you might want to step-in and select your desired letter for that drive instead of the one chosen by Windows 7. Here is a tutorial on how you can accomplish it.
Please note that you must be logged on as an administrator to perform the steps mentioned below.
Steps:
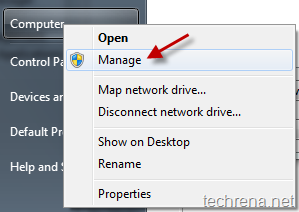
1. Right-click on “Computer” and click on “Manage” to open “Computer Management”.
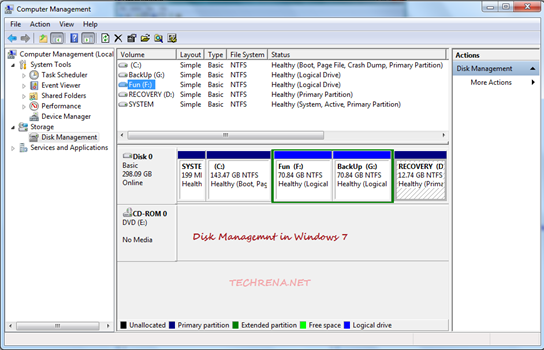
2. In the Disk Management windows, click “Disk Management” under the section “Storage”.
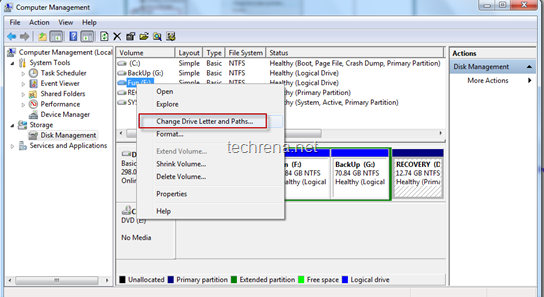
3. Right-click on the drive or partition that you want to change, and then select “Change Drive Letter and Paths”.
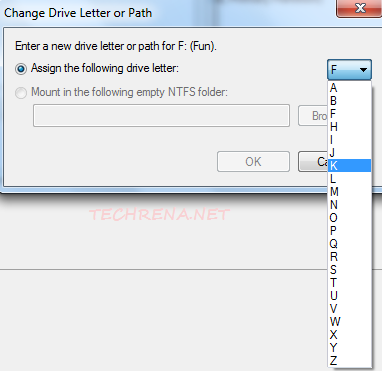
4. Click on Change and then click “Assign the following drive letter” and select the drive letter that you want.
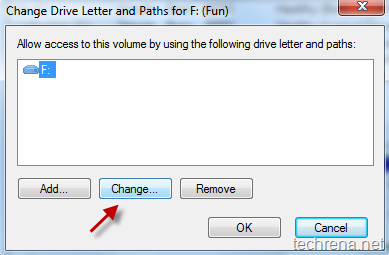
Similarly if you want to remove a drive letter, click “Remove” in the previous step and click Yes to confirm.
Close the Computer Management window and checkout the changes that you have made.
