System Restore is a feature of Windows Operating Systems namely Windows 7, Vista and XP. This feature in Windows enables you to restore or rollback your system to a position in an earlier time. Windows automatically creates restore points to back up the program files, registry and system data whenever you install a new software, driver or make any changes in the system settings. You can restore the system to the restore points saved earlier if anything goes wrong in future. You can also create the restore points manually.
The only problem in System Restore is that it occupies a lot of disk space, as it has to save a lot of restore information in your system. This system restore information is stored in System Volume Information. You may be confused that all the data in your drive is showing lesser usage then the actual amount of disk usage. This is due to the System Restore Files present in the inaccessible folder System Volume Information. You can open this folder by taking Ownership in windows 7 or Vista.
Now, if you feel that System Restore is not necessary or if you want to free up disk space by deleting the earlier Restore points then refer the details below.
Open System Properties:
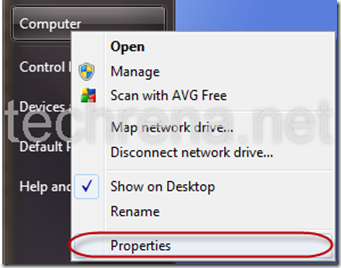
Open Start Menu, Right click on My Computer (in XP) or Computer (In Windows 7) and Select Properties
Open System Restore or System Protection:
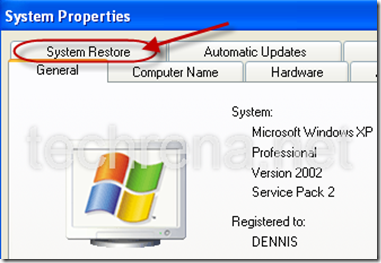
If you are using Windows XP, then Go to System Restore Tab.
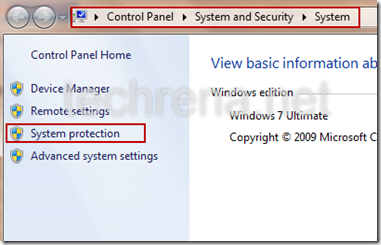
If you are Using Windows 7, Click on System protection in the left pane.
Turn off or delete system restore points in Windows XP:
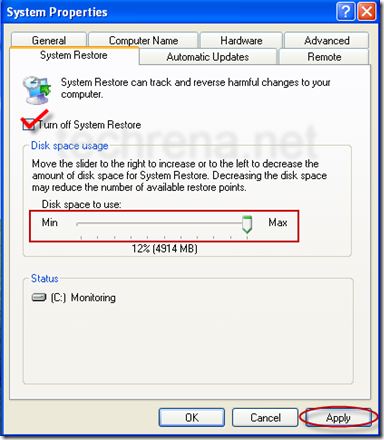
You can see the System Restore Options. Here you can change the amount of Disk space to be used for System Restore.
If you want to delete the System Restore Data then, check Turn off System Restore and click Apply. It will delete all the related data and turn off your System Restore. Now the disk space has been freed up.
Note: If you only want to delete the system restore data but don’t want to turn off System restore then, don’t forget to turn it back on by unchecking the checkbox and applying again.
Turn off or delete system restore points in Windows 7:
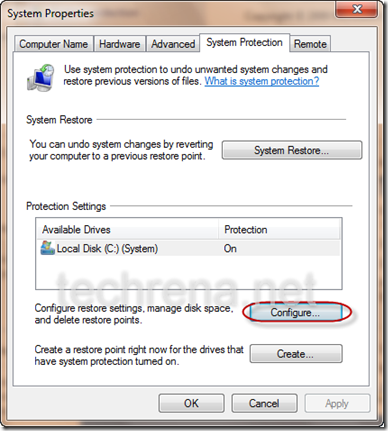
In the System Protection tab, click on Configure.
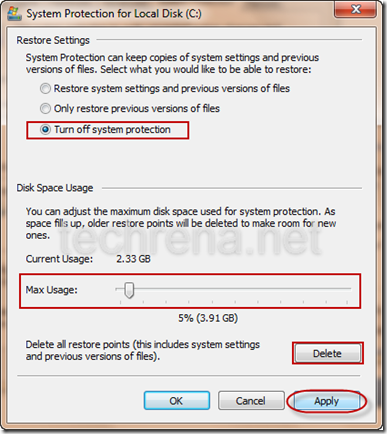
It will open System Protection for your disk. You can change Maximum Disk space Usage for System Restore. You can delete the system restore points to free up the disk. Or you can turn off the System Protection feature completely in your Windows 7 PC.
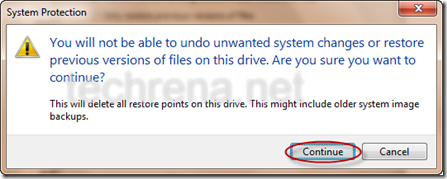
If you Click on delete it will ask for confirmation as follows. Then it will delete the restore points. Deleting the System Restore points will not Turn off System Restore in Windows 7.
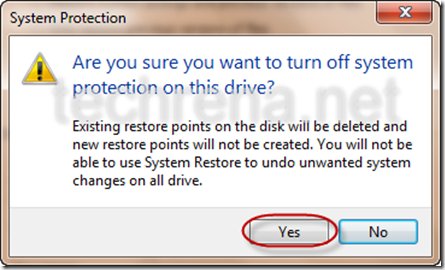
If you select Turn off System protection and click on apply, it will ask for the confirmation given below and Turn off your restore. This will also delete all your current restore points.
You can turn On the system Restore anytime by Selecting Restore system settings and previous version of files and clicking Apply.
In Windows 7 there is an option for restoring the previous version fo files or deleted files in a folder. To know more, refer the post: How to Restore Previous Versions of Files in Windows 7 Using System Restore.
Important:
1. The given procedure will also work for Windows Vista.
2. It is not recommended to Turn off or Disable System Restore in your Windows PC.
3. If you are deleting all the System Restore Points, then you will not be able to restore the system to any earlier point of time.

