If you have recently purchased a new computer (laptop in particular), there is a setting which you need to look at is the “Power Options” found under the Control Panel. By default, the power options would be set to make your computer go to sleep mode automatically after being idle for a defined amount of time. It would be really annoying when the laptop goes into sleep mode without your attention when you let your laptop run a program in the background (like downloading a big file from internet) and go away from it. Even though it is not advisable to change the advanced settings of a power plan, we can safely change these basic settings like “Turn off the display”, “Put the computer to sleep” etc. Follow these steps:
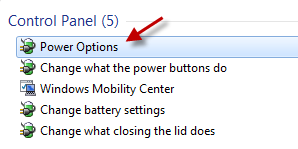
1. Type “power options” in the Start menu search and open “Power Options” result from the Control Panel section.

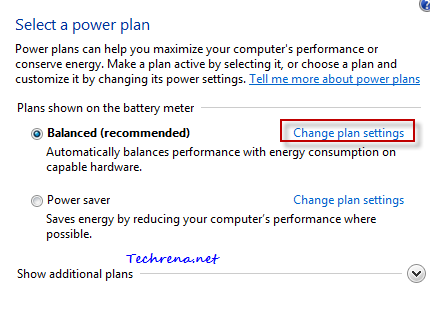
2. Click on “Change plan settings” found right next to your current power plan.

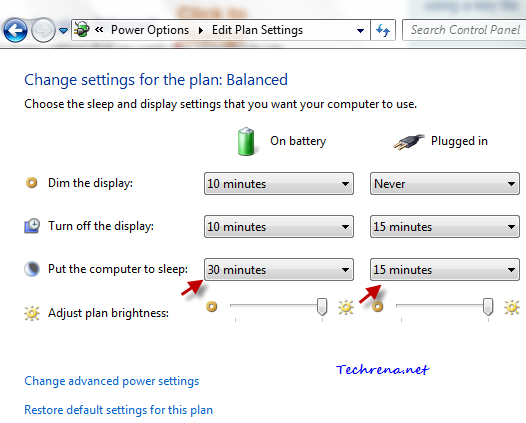
3. You will see the default settings for when to “dim the display”, when to “turn off the display” and when to put the computer to sleep.

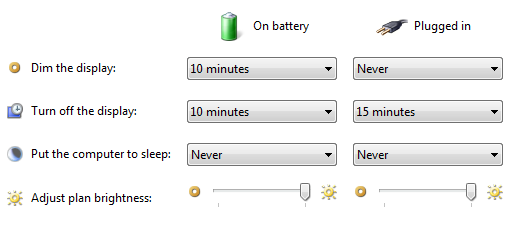
Change the settings to your convenience, you can try setting “Put the computer to sleep” option to “Never” to disable the auto sleep mode completely (preventing your computer from going to sleep mode automatically).

Click Save changes button once you are done with it and that’s it! You have now successfully turned off the auto-sleep mode in Windows 7.

This was awesome THANK YOU!