If your computer is used by many of your friends or family members etc., you might want to restrict access to Control Panel of your Windows 7 (or Windows Vista) so that they won’t mess up with it. Disabling access to control panel means that they won’t be able to modify the default settings of the programs installed and other settings as well.
Here is the step-by-step by guide to disable Control Panel from your Windows 7. It not only disables access to the Control Panel, it’ll also remove shortcuts present for Control Panel in places like Start Menu etc. I’m going to discuss two ways in which you can do it. While the first method only works for Professional, Enterprise or Ultimate editions of Windows 7 or Windows Vista.
Method-I: Using Group Policy Editor
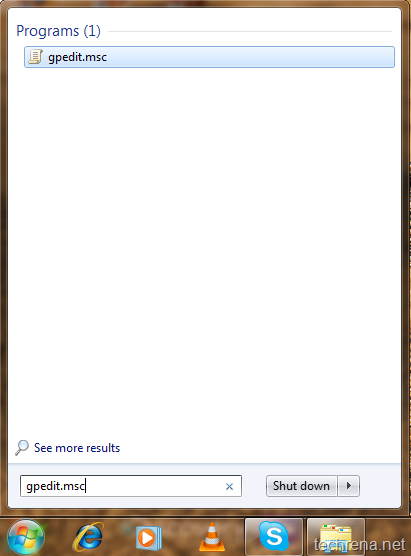
1. Open start menu and type “gpedit.msc” in the search box and open the Group Policy Editor from the results:
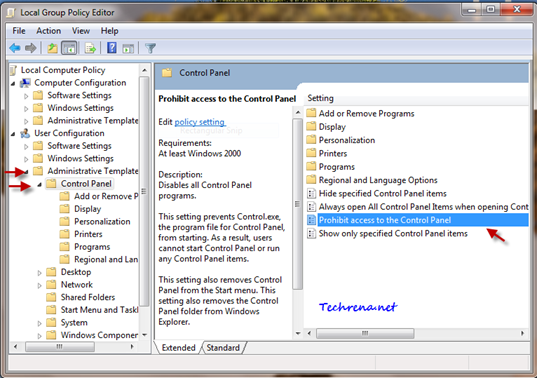
2. In the Group policy editor, expand “User Configuration” and find “Control Panel” under “Administrative Templates” as shown in the screenshot below:
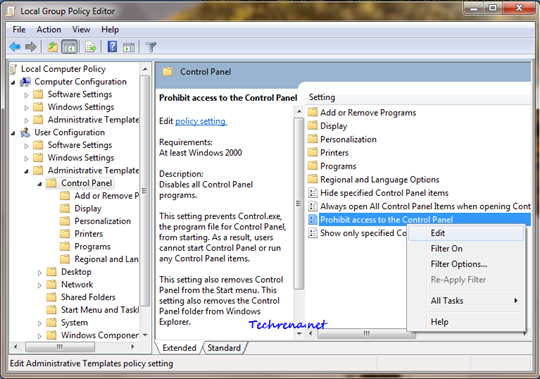
3. Find the “Prohibit access to the Control Panel” entry in the right hand side of the window. Either double click on it or right-click and choose “Edit”.
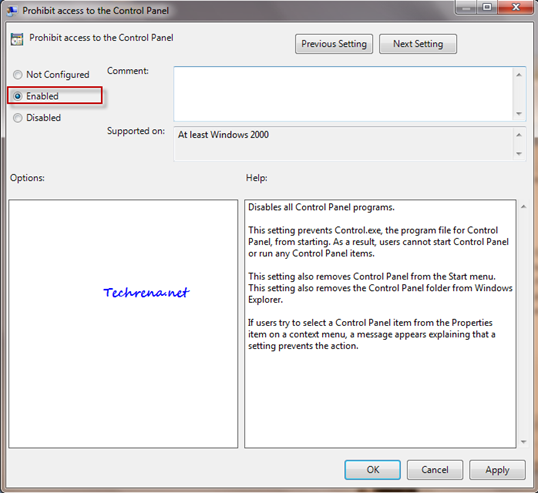
4. Choose the option “Enabled” under “Prohibit access to Control Panel” as shown here.
Click “Apply” and then choose “OK” to close the window.
5. Now your Control Panel will get disabled and you can’t even find the link for the same in the Start Menu. Check it yourself:
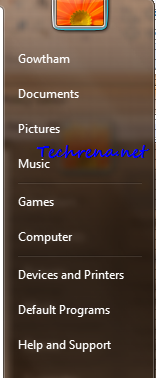
When you try to open it by searching it in start menu, you will get an error:
This operation has been cancelled due to restrictions in effect on this computer. Please contact your system administrator.


Method- II: Using Registry Editor:
This method works on all versions of Windows 7 & Windows Vista. But this involves a bit of editing the values in registry editor. If you are not acquainted with the Registry Editor much, we strongly advise not to implement this.
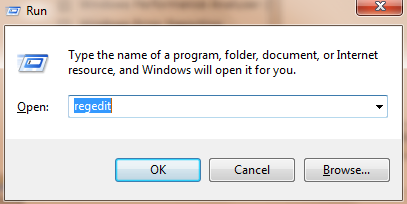
1. Press Start + R to open the run command. Type “regedit” and click OK.
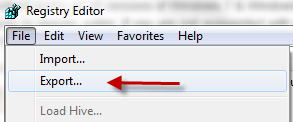
2. First take a backup of the registry editor just to be on the safe side. Go to File > Export and save a backup on your computer.
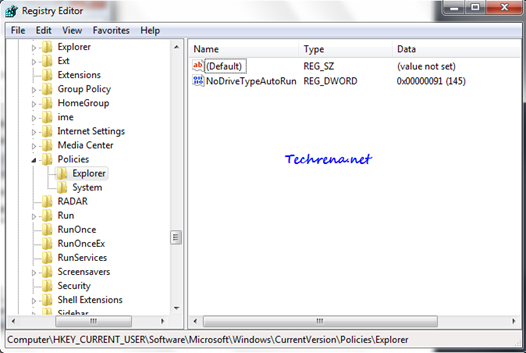
3. Now navigate to the following path in the registry editor:
HKEY_CURRENT_USER > Software > Microsoft > Windows> Current Version> Policies> Explorer
4. Right click on the right hand pane and select “New > DWORD (32-bit) Value”
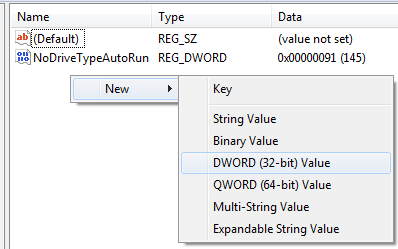
Give it a value “NoControlPanel”.

Right-click on the new value NoControlPanel and choose “Modify”.
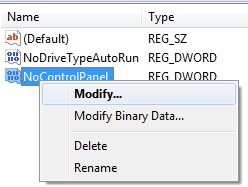
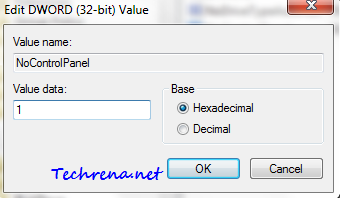
Change the Value Data filed value to “1” from “0” and click OK.
Close the registry editor and restart your computer and check back. When you check back after rebooting your PC, you will find that the Control Panel is disabled and also is not listed in the Start Menu as shown in the first method.
If you want to enable the Control Panel again, just choose ‘Disabled" (third option) in the step 4 of the first step. In case of the second method, just delete the "NoControlPanel" DWORD Value and the Control would be back once your reboot your system.
Disabling Control Panel is just not enough to restrict users using your PC, If you want to setup advanced controls on your computer, read how to setup parental controls in Windows 7 .

