This is a small tutorial dealing on how to enable or disable automatic updates in Windows 7 or Windows Vista.This is basically intended for beginners who have just installed Windows 7 or Windows Vista in their systems and looking for assistance.
User level: Beginner
Complexity Level: Easy
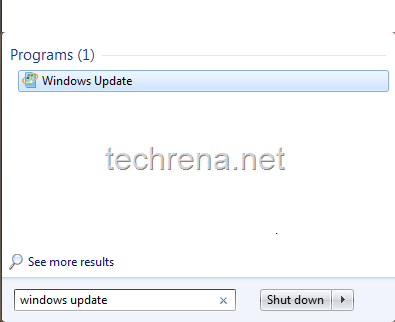
1. Go to Start menu and type windows update in the search box.Click the Windows Update program in the search result.

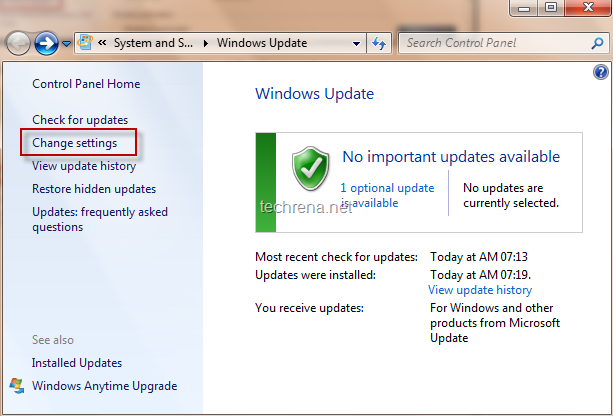
2. Now the Windows Update window will be opened.On the left pane, find “Change Settings” and click on it to open the Windows Update Settings page.
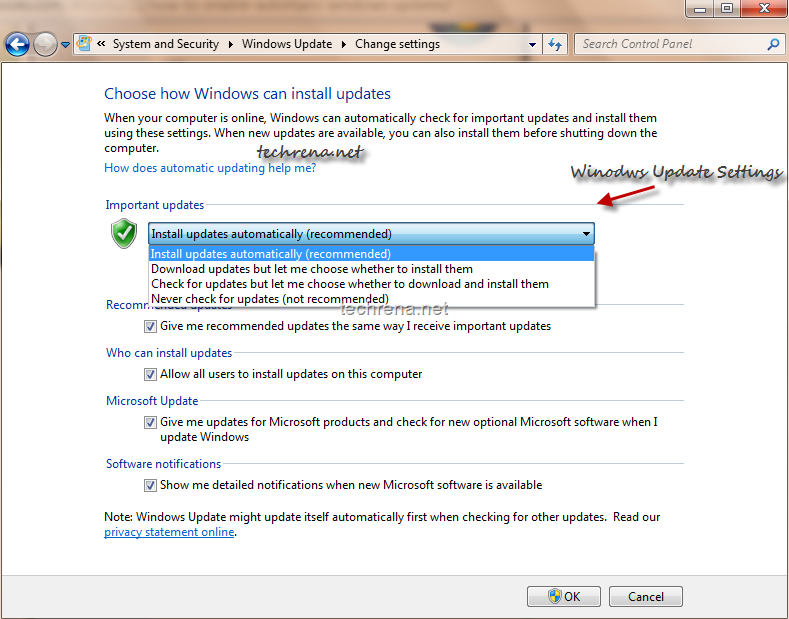
3. In the Windows Update Settings window, as you can see there are basically 4 options to choose from.
- #1 Install updates automatically (recommended)
- #2 Download updates but let me choose whether to install them
- #3 Check for updates but let me choose whether to download and install them
- #4 Never check for updates (not recommended)
It is always recommended that you choose the option #1 “Install updates automatically” to install updates that address various vulnerabilities and keep your Windows up-to-date.
Option #2 is also OK, given that it makes your Windows to download the updates automatically as and when they are available but will install them without your permission.
Options #3 and #4 are recommended only if you are using an interconnection with limited data usage (like using mobile phone to connect to internet).If these options are chosen, your Windows will not automatically download or install the updates.


