
Windows Error Reporting (WER), a technology (previously known as Dr. Watson),developed by Microsoft lets you report post-error debug information to the developer of the particular application that has just crashed or stopped responding.Windows Error Reporting has been introduced as a Windows service from Windows XP and is being continued in the later versions Windows Vista and Windows 7.By default, this Error Reporting service will be started automatically.
However for some reasons like you may get annoyed by frequent error reporting alerts or for privacy concerns etc., you may want to disable or stop Error Reporting in your Windows operating system (here it is Windows 7).If you are not sure how to stop Error Reporting in Windows 7, please do follow the steps outlined below:
Method-1: Using Action Center
1.Type “wer” in the Start menu search bar.Check the results obtained for this search in control panel (refer to the screen shots).

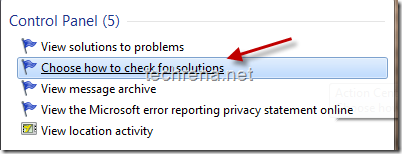
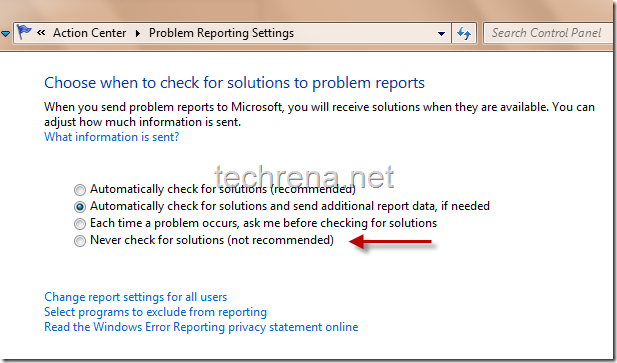
2.Click on the “Choose how to check for solutions” item in the search results.It will open up the “Problem Reporting Settings” under Windows Action Center.
3. By default the first or second option (“Automatically check for solutions”) will be selected by your Windows.If you want Error reporting to be disabled, select the last option “Never check for solutions” for completely disabling it or select the third option “Each time a problem occurs, ask me before checking for solutions” for moderating the error reporting alerts.Click “Ok” button down the window once you have selected your option.
Method-2: Disabling WER service
Windows Error Reporting Service function:
“Allows errors to be reported when programs stop working or responding and allows existing solutions to be delivered. Also allows logs to be generated for diagnostic and repair services. If this service is stopped, error reporting might not work correctly and results of diagnostic services and repairs might not be displayed.”
We’ll try to achieve the same previous settings result but this time via disabling the Windows Error Reporting(WER) service.To do this, follow..
1. Press Windows button + R to open the Windows Run command.Type “services.msc” in the run command bar and hit ‘OK’.
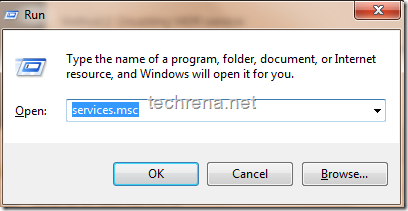
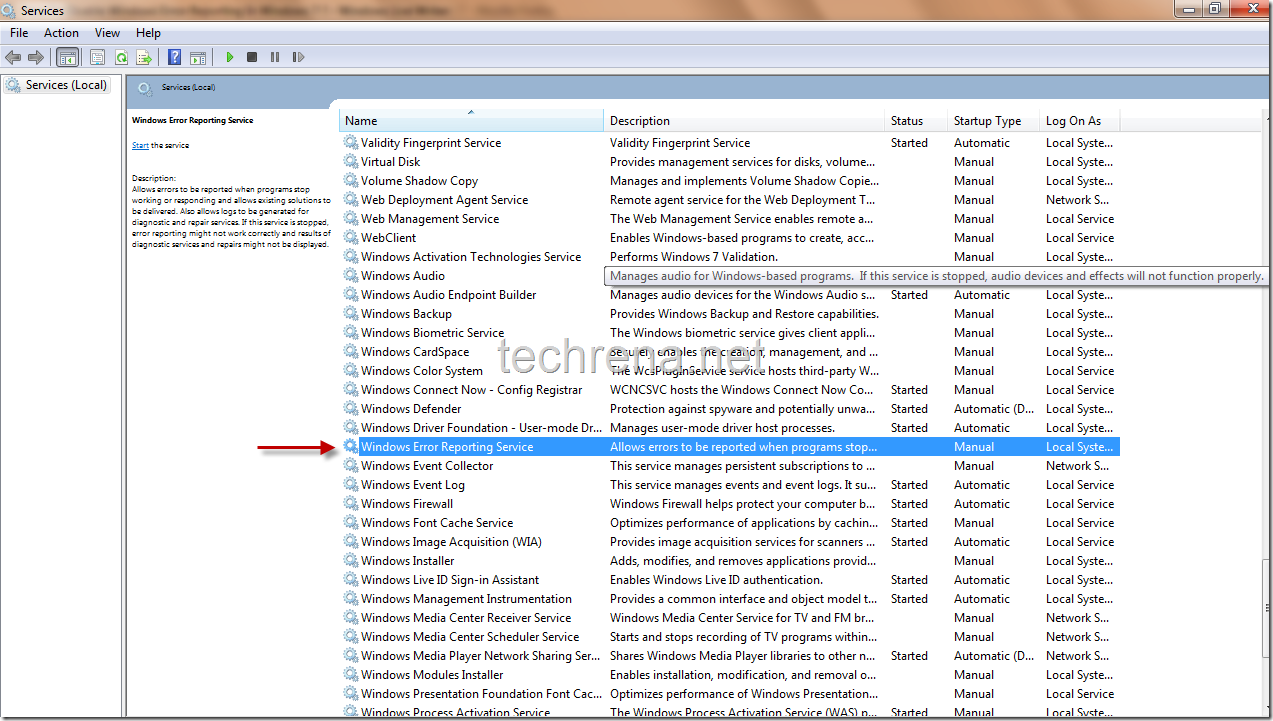
2. It will open up Services window, where you can see list of all the services that are currently available on your Windows.Find “Windows Error Reporting Service” in this list.
3. Right click on the Windows Error Reporting Service and choose “Properties’ that should open a new properties window.The startup type will be either in “Automatic” or “Manual” by default.To completely disable the service choose “Disabled” and press ok.
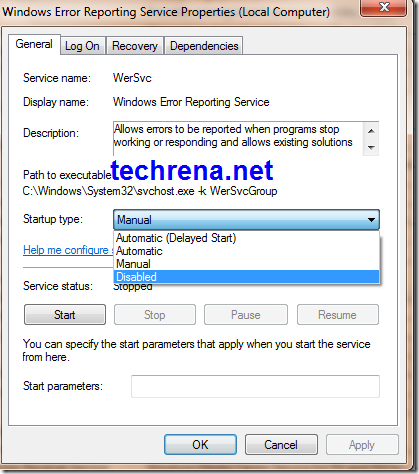
That’s it, now you have disabled the Windows Error Reporting Service successfully.
Method–3: Using Registry Editor
Warning: Changing registry values without much knowledge will dump your entire Windows Operating system.Change them at YOUR OWN RISK.
1. Type Windows + R as in the previous case to open Windows run command.Type “regedit” in the command bar.

2.It will open up the Registry Editor window which will look like this.It contains three folders like navigable sub keys:
HKEY_CLASSES_ROOT ,
HKEY_CURRENT_USER,
HKEY_LOCAL_MACHINE,
HKEY_USERS,
HKEY_CURRENT_CONFIG.

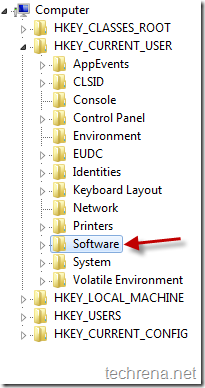
HKEY_CURRENT_USER is the one we want.Click on it to expand the sub registry key.
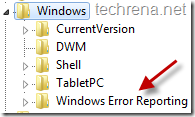
3. Navigate to HKEY_CURRENT_USER\Software\Microsoft\Windows\Windows Error Reporting sub key using the following screen shots carefully.

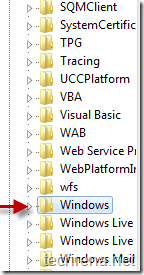
4. In the Dword list, find the registry entry by name “Disabled” (highlighted in the screen shot).By default the Date value of this dword will be “0” meaning that it is enabled.
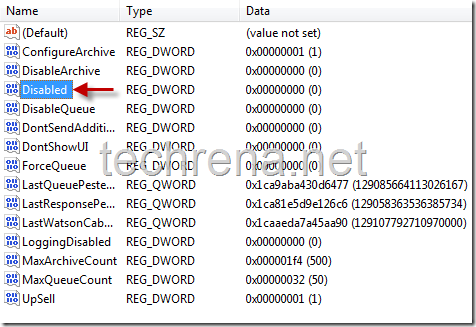
Right click on the “Disabled” DWORD and choose “Modify”.In the value data filed, change its value to “1” instead of “0”.Click on to reflect the changes.
Now you have successfully disabled WER.
You may also want to read our previous guides on A-Z of Installing Windows 7, Installing Windows 7 on USB stick, Activating Windows 7, Resetting Windows 7 password (when you forget it and unable to retrieve it), Creating desktop shutdown shortcut in Windows 7,Enabling GOD mode in Windows 7, Partitioning hard disk in Windows 7 , Restoring previous versions of files in Windows 7, Install and Run Windows XP in Windows 7 Using VMware Player and much more..
Feel free to leave a comment here if you find problem somewhere in following these methods.

When the Windows Error Reporting is disabled.
Is this that they can get in the Program without Problems Reporting or Stop Working?