[How To] Turn Off Windows Search In Windows 7

Windows Search has been modified and improved a lot since Windows Vista and is much better in the case of Windows 7. Windows Search is by default turned on all machines running Windows. If you prefer to use a third-party search application instead of Windows Search, you might want to disable the Windows Search so that it doesn’t interfere in the working of the third-party application. Read the following guide to learn how to turn off the Windows Search.
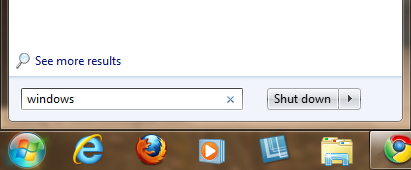
Windows search in start menu

Steps:

1. Open Control Panel from the link in the Start Menu.
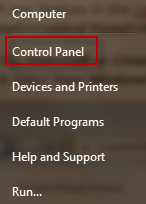
Control panel link in start-menu

2. Click On “Programs” link on the Control Panel items.
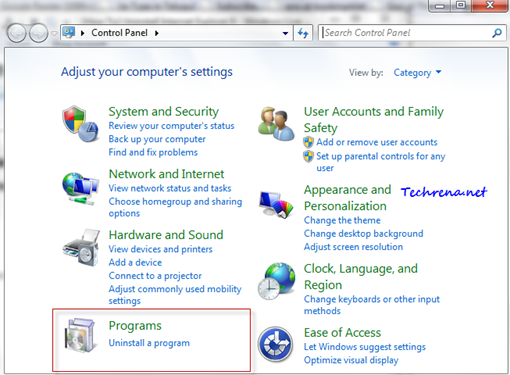
Control Panel items

3. Click on “Turn Windows features on or off” link under “Programs and Features”.
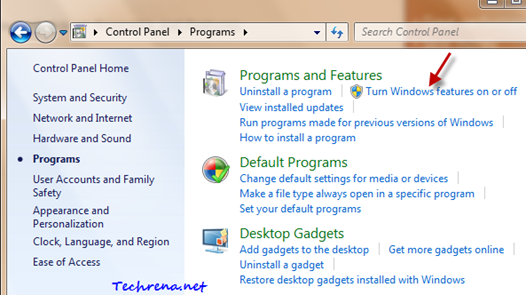
Programs-control-panel

[You can also open the same by searching “Windows features” in the Start Menu and then by opening the “Windows Features”.]

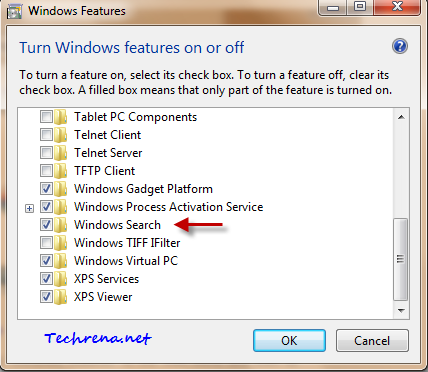
4. Windows Features settings would now open up. Scroll down until you find “Windows Search”.
Windows-features-windows-search

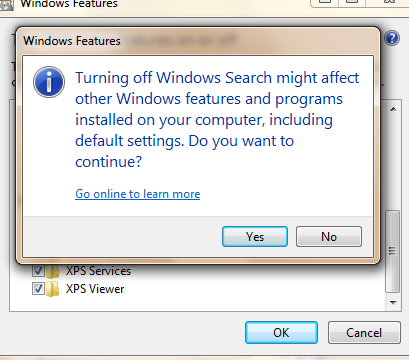
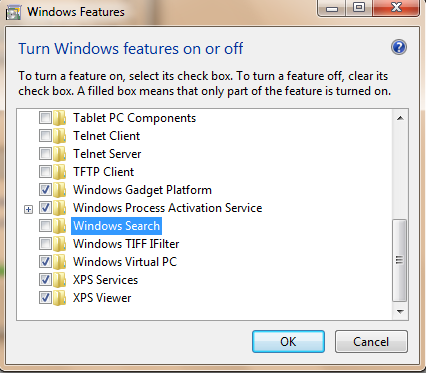
Uncheck in the checkbox against “Windows Search” and you would be presented with a warning. Click Yes to continue.
Windows search turn off warning

5. Click “OK” button to apply the settings.
Windows search off

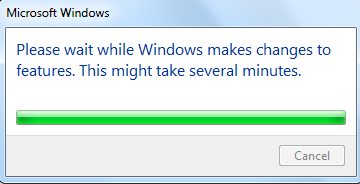
It may take several minutes for Windows to make changes to the Windows Features.
Windows-making-changes-wait-message

6. You need to restart your computer to see the changes in action.
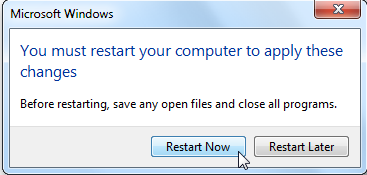
Windows Restart to apply changes

When you see your computer after the reboot, you will find that all the search boxes in Windows are gone! There won’t be search boxes in the Start Menu, Windows Explorer, Control Panel and Libraries.

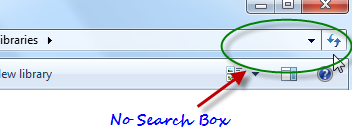
No search box in Start Menu

Windows Search box missing

If you want to turn the Windows Search feature on, just go back to the step 4 and check the “Windows Search” option to enable it again.

[Download] Harry Potter And Halo Reach Windows 7 Themes

Microsoft has released fresh themes to the Windows 7 themes gallery as it has been doing all the time. The recent new theme packs are “Harry Potter”, “Halo Reach: Art Inspiration”, and “Halo Reach”.

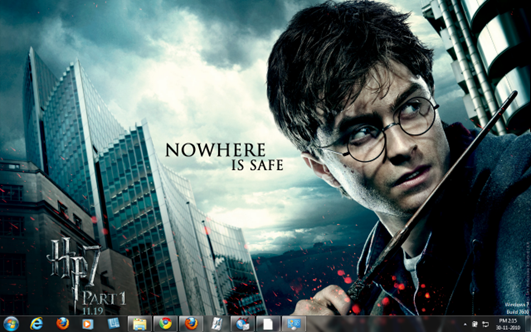
Harry Potter theme packs six high resolution desktop wallpapers showing lead roles Harry Potter, Hermione, Ron etc. from the latest Harry Potter 7: Part 1 film. [Download]

Harry Potter 7 Windows 7 theme

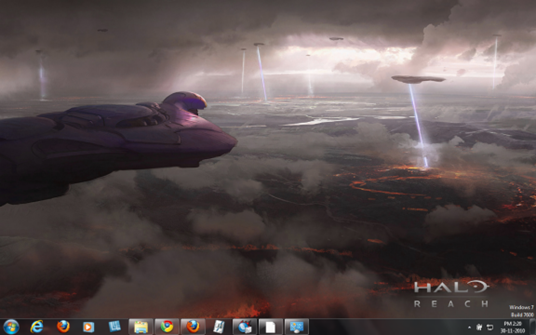
Halo Reach: Art Inspiration theme contains thirteen wallpapers providing rather amusing custom sounds, based on the blockbuster Xbox video game Halo: Reach. [Download]

Halo reach art inspiration Windows 7 theme

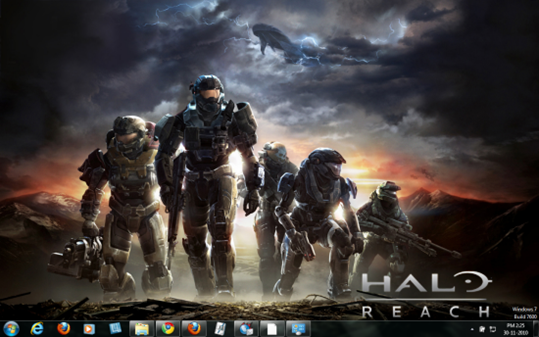
And finally, Halo: Reach theme features twelve desktop backgrounds inspired from the same video game, Halo: Reach.

Halo reach windows 7 theme

Download:

Halo Reach: Art Inspiration

[Tip] Run Program As Administrator Right From The Start Menu In Windows 7

If you are using Windows 7, you might well be knowing by now that you can easily start any program from Start Menu by simply searching for it there. The problem here, which many of us aren’t aware is that when you a program in this fashion, it doesn’t start with administrator rights. There may be times where in you need to start a program for instance a command prompt with elevated rights, otherwise you might receive errors such as “The requested operation requires elevation” etc. Thankfully, there’s a little lesser-known trick available in Windows 7 to execute a program directly from the Start Menu search or quick search run box as administrator. Here is how you can do it:

1. Go to Start Menu, type the name of the program that you want to run in the search box. I’m going to run Command Prompt window as administrator so, in my case, I need to type “cmd” in the search box.

Cmd start menu search

2. Now, when you see the required program in the search results, you tend to hit enter to run it.

CMD start menu search result

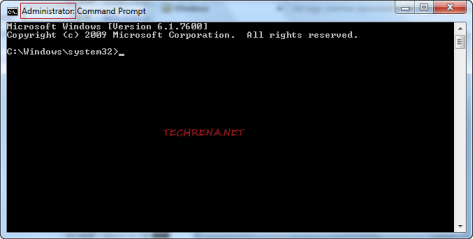
Instead, press Ctrl + Shift + Enter to run the program with elevated (administrator) rights. Click “Yes” when you are asked by UAC to run the program. That’s it! The program runs in administrator mode:

CMD as admin in Windows 7

Note: You can always right-click on the search box results and choose “Run as administrator” to run the program as an administrator as well.

Run CMD as admin from start menu search results

Also learn how to Always Run A Program As An Administrator By Default.

[Tip] Pin Important Folders To The Top In Windows Explorer

Have you ever wondered how could I keep my most frequently used folder at the top in any Windows Explorer window?

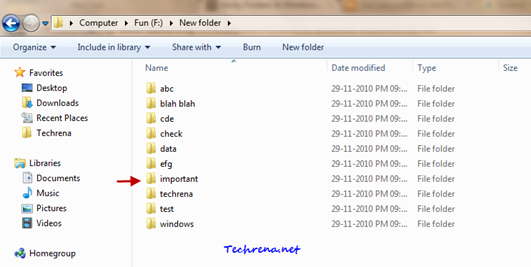
As all of us know, the folders inside any Windows Explorer window are by default sorted by name (alphabetical). So a folder like “important” would always gets listed down in order than say some folder like “abc”.

Windows explorer default view

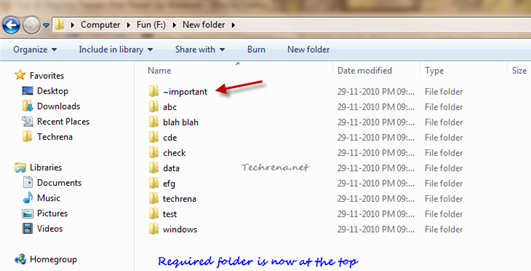
If you can see in the above screenshot, our motto is to get the “important” folder up in the order, right at the top of the list. One simple workaround to get this done is to add some symbols on your keyboard like ~, `, !, #, ^ etc to the folder names that you want to see atop. However please be aware that you can not use symbols like \, /, :, *, ?, “, <, >, | because Windows doesn’t allow these strings to be present in the names of the folders.

Sticky folder at the top of the windows explorer

Try using different symbols in order to use multiple sticky folders at the top of the Windows Explorer. If you use same symbol for any two folders, they are still going to be sorted by their names as shown:

Two folders starting with same symbol

Avoid using digits instead of symbols as the whole name looks a bit cluttered if you prepend a numbers like 1, 2, 3 etc. at the beginning of the name of the file.

[via] Labnol

[How To] Disable Aero Snap In Windows 7

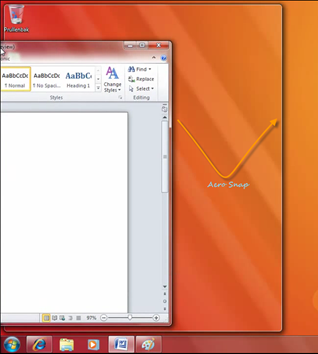
Aero Snap” is a new feature introduced in Windows 7 as part of the windows management. In short what it does is when you drag a window to the top or towards the side of the screen, it gets maximized (when dragged to top) or resized (when dragged to side) automatically to fit that portion of the screen.
Aero Snap

The minor problem here is when you want to hide the window by dragging it to the side of the screen, it gets resized instead. Also this is also a worthless feature of you use multiple monitors. Whatever may be the reason, just in case if you want to disable this feature, read the following guide:
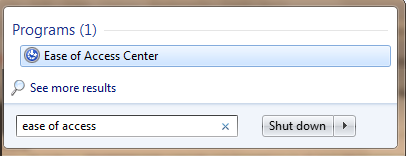
1. Type “ease of access” in the Start Menu search and open the result from the Programs section.ease of access start menu search

You may also open the Ease Of Access Center from the Control Panel menu.

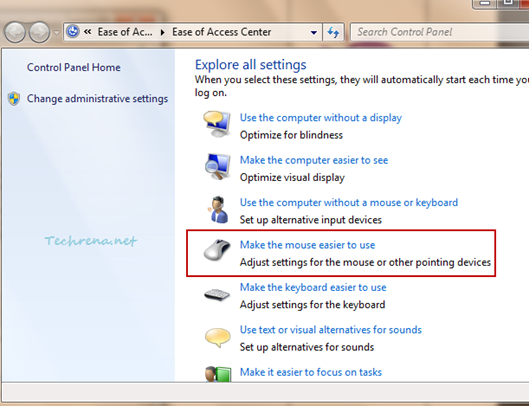
2. In the Ease Of Access Center, scroll down and click “Make the mouse easier to use

Ease of Access Center

3. A new window (Control Panel \ Ease of Access \ Ease of Access Center \ Make the mouse easier to use) will open up.

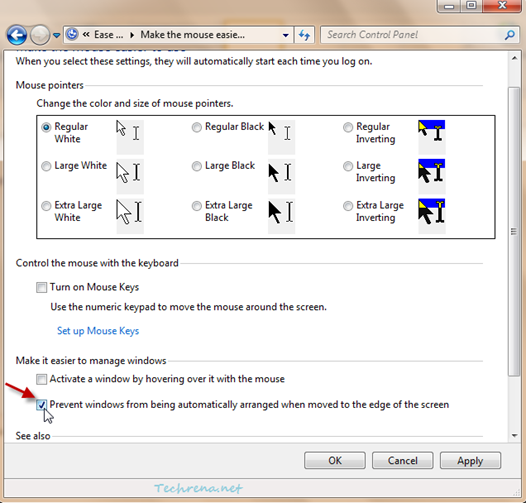
Scroll down to the bottom of the window, where you will see “Prevent windows from being automatically arranged when moved to the edge of the screen”. Check against it and click OK to apply the settings and close the window.

Make mouse easier to use settings

That’s it. You have just turned off the Aero Snap on your Windows 7. To enable the Aero Snap feature back on your computer, just uncheck the option in the step 3.

[How To] Enable Offline Files In Windows 7

Offline Files Windows 7

Offline Files is a cool feature available in Windows since the days of Windows XP which allows you to see the files shared over a network even when you are not connected to the network. When you enable offline files, it will tell the Windows to store a local copy of the files on your computer so that you can access them even when you are away from the network. Later, when you come back on to the network, these files will get synchronized with the server to update to the latest version of the files. Follow this guide to enable the Offline Files on your Windows 7 machine.

Please note that the “Offline Files” feature is not available in Windows 7 Starter and Home Premium editions.

Steps:

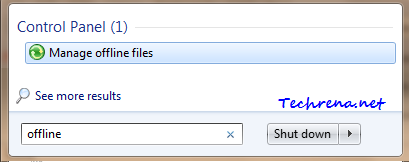
1. Type “offline” in the Start Menu search and open the first result from the Control Panel section:

offline files start menu search

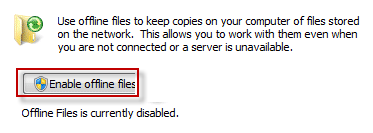
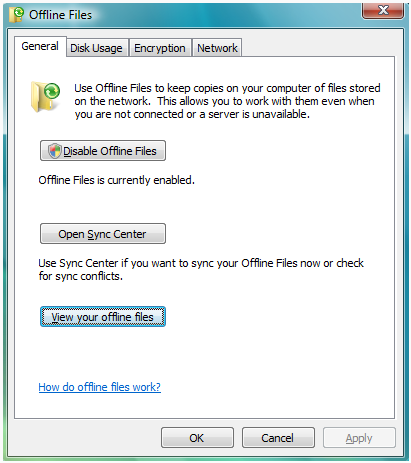
2. Click “Enable offline files” in the Offline Files window and click OK to apply the changes.

enable offline files in windows 7

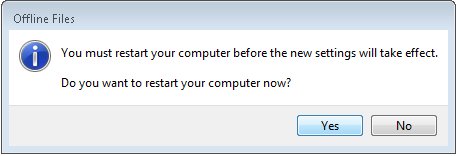
3. And you will now be prompted to restart your computer before these changes could be applied on your machine.

Restart offline files enable

Choose Yes to restart your machine and check back to see the offline files being enabled for you:

Offline files enabled

[Tip] Disable Web Clips Ads In Gmail

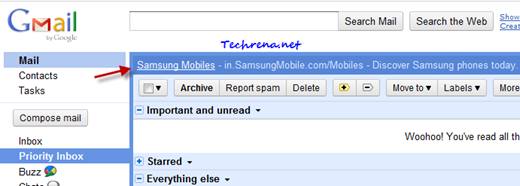
Web clips inside gmail inbox

Google had added Web Clips sometime back originally with the intention of showing some RSS and Atom feed snippets, blog posts, news headlines and above the inbox in Gmail. But seldom you see any useful clips in your Web Clips section as most of the messages that appear in this section are now seem to be just ads (sponsored links). Google however has left the choice to the users to either enable or disable them. If you find them annoying a bit, here is what you need to do in order to get rid of them:

1. Login to your Gmail and open the Web Clips settings page.

2. Uncheck against the “Show my web clips above the Inbox”.

Web clips settings in Gmail

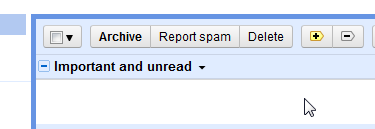
3. Go back to inbox to see the change, the Web Clips should no longer appear above your inbox.

No web clips inside Gmail

[How To] Enable Quick Launch In Windows 7

Quick Launch Bar that used to exist in Windows until Windows Vista was offering an easy way to quickly start a program from the Windows taskbar. However, this feature has been disabled (or ‘hidden’, I would rather prefer to say) in Windows 7. This is due to the latest improvements in Windows 7 that let you to directly pin the programs to the Taskbar for quicker and direct launch. But sooner or later you will understand that if you go on pinning programs to the Taskbar, you would probably left with very little space on your taskbar. Quick Launch Bar has an advantage here as it won’t occupy much space. Anyway if you are all for Quick Launch Bar and want to enable or disable it in Windows 7, here is how you have to do it:

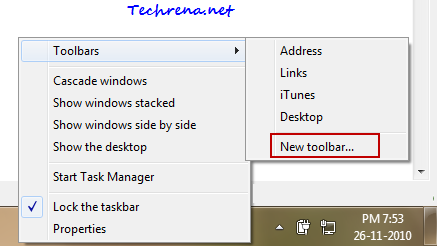
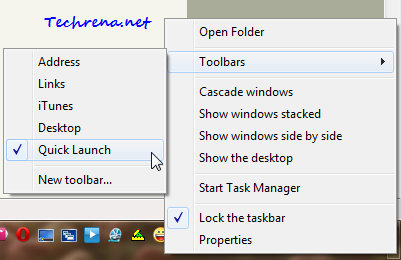
1. Right-click on the Windows 7 Taskbar and choose Toolbars> New toolbar..

new toolbar from taskbar in windows 7

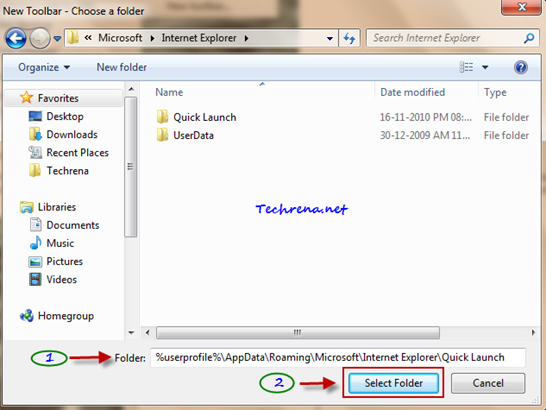
2. A new file browser window will be opened. Copy the following path and paste it into the “Folder” filed click “Select Folder”.

%userprofile%\AppData\Roaming\Microsoft\Internet Explorer\Quick Launch

Select folder for new Quick launch toolbar

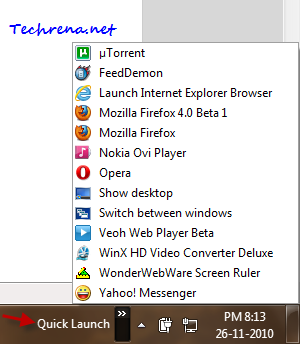
3. Now you will notice the new Quick Launch Bar being added to the Taskbar, just before the System Clock in the system tray.

Disable Quick Launch Bar

Clicking on the arrows icon next to the Quick Launch Bar would open the list of programs that are currently added to the Quick Launch Bar. So you need to open the list and then click the program to run it. Let’s see how can we make this even simpler, to quickly open the programs in the Quick Launch Bar.

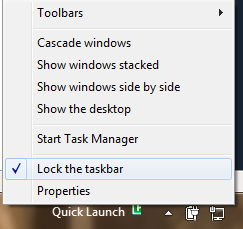
4. Right-click on the Taskbar and uncheck against “Lock the taskbar”.

Lock the taskbar in Windows 7

5. Now you’ll notice that you can actually move the Quick Launch Bar to adjust its position.

move quick launch bar

Just drag it a bit forward to show the program icons in the Quick Launch Bar as shown:

Program icons in the Quick Launch Bar expanded

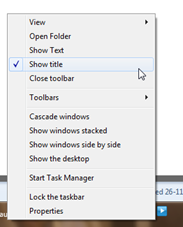
If you want further customization, you can right-click on the Quick Launch Bar position and deselect “Show Title” and then lock the taskbar to see all the Quick Launch Bar icons placed next to each other in a line.

Show title quick launch bar

Quick launch bar icons together

Disable Quick Launch Bar:

If you want to disable or hide the Quick Launch Bar from the Windows 7 Taskbar, right-click on the taskbar, Toolbars> ..and deselect Quick Launch from the context menu.

Quick Launch bar in context menu

[How To] Pin Computer Icon To Windows 7 Taskbar

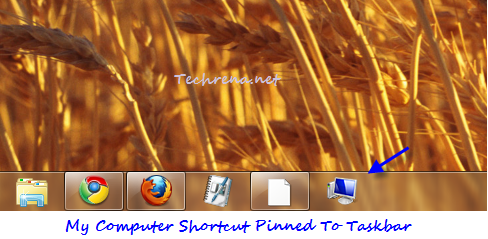
My computer shortcut icon pinned to taskbar

Windows 7 taskbar is really handy and as you might be knowing it allows you to just drag and pin any program shortcut to the taskbar. But have you ever tried pinning the “Computer” shortcut from desktop to the taskbar in Windows 7? Does it get pinned to it? No, right? This what you will end when you try to pin it to the taskbar:

Pin My Computer to Taskbar

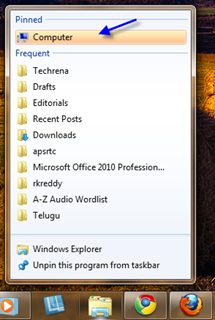
Computer icon pinned to windows explorer

It gets pinned to the “Windows Explorer” and it’ll be shown above the jump lists as shown in the above screenshot. Oh no, wait! not exactly where we wanted it to be! No compromise, we just want it to be pinned to the taskbar no where else! Oh no, problem, problem, problem!!

We are here for you. In this tutorial we are going to talk about workaround to pin the Computer icon to the taskbar. Let’s get started !

Steps:

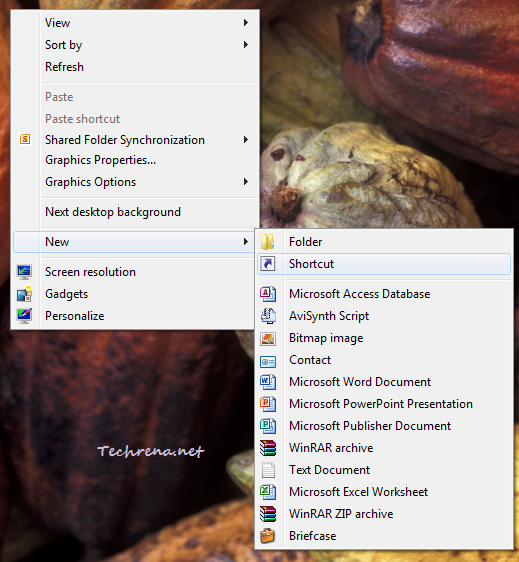
1. Create a new shortcut on your desktop: Right-click on your desktop and choose New > Shortcut.

new shortcut desktop right-click context menu

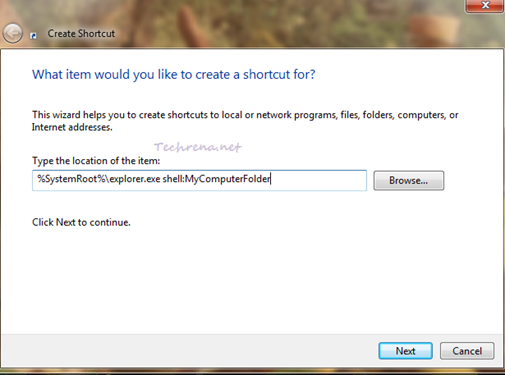
2. In the next “Create Shortcut” window, paste the following string:

%SystemRoot%\explorer.exe shell:MyComputerFolder

create desktop shortcut wizard

Click “Next” button at the bottom of the window

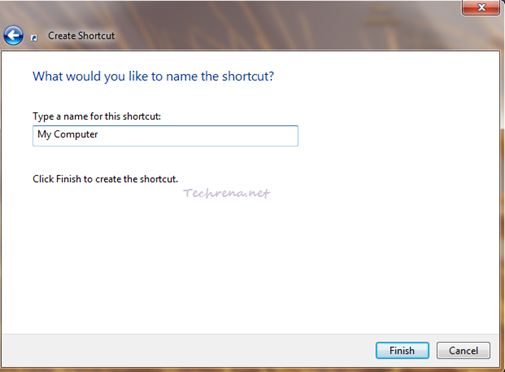
3. Name the shortcut. You can type any name for the shortcut and click “Finish” button to finish the wizard.

create desktop shortcut wizard

4. Now you will have a shortcut for “My Computer” created on your desktop.

My Computer shortcut original icon

5. Now we are going to change the icon for the shortcut and get the original icon (computer) that is normally associated with “My Computer”.

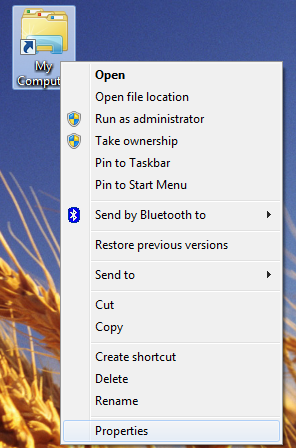
To do this, right-click on the shortcut and select “Properties”.

Right-click context menu for shortcut

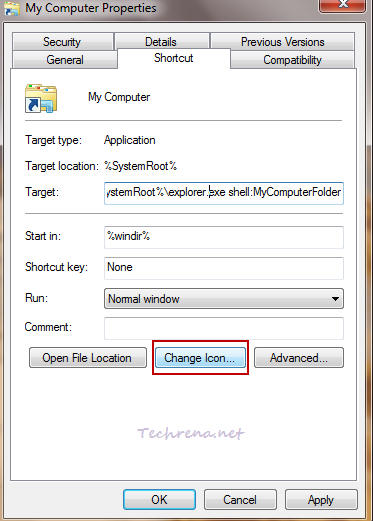
6. Go to the “Shortcut” tab in the “Properties” window and click “Change Icon”.

My computer shortcut properties

7. Paste the following string in the “Look for icons in this file” field and press Enter.

%SystemRoot%\system32\imageres.dll

Change icon for My Computer shortcut

Select the “Computer” icon and click OK.

8. Click OK to close the Properties window.

9. Now try dragging the shortcut to the taskbar and it works!!

Pin My Computer icon to taskbar

You will now have the Computer icon pinned to the Taskbar as shown in the above pic. If you liked this post then chances are that you might also want to checkout Start Windows Explorer With Custom Folder

[Tip] Quickly Resize Desktop Icons In Windows 7 & Vista

If you were used to Windows XP for long time and then shifted to the newer versions of Windows like Windows Vista or Windows 7, one thing you will find a bit annoying the default big size desktop icons that eat most of your computers desktop. Fortunately Windows has made it easier for the users to choose the size of the icons on your desktop. There are plenty ways available to resize the size of the desktop icons in your Windows 7 and Windows Vista based PCs. We’ll discuss a few of them here:

Desktop icon resize

1. Easy: Using Mouse Wheel:

mouse-wheel

This the easy and hassle free way to resize your desktop icons which many of us aren’t aware of. Just hold down the CTRL button on your keyboard, press left button on your mouse initially and then move the scroll button of your mouse to resize the desktop icons as well as icons inside any folder.

2. Usual Method: Right-click Context Menu

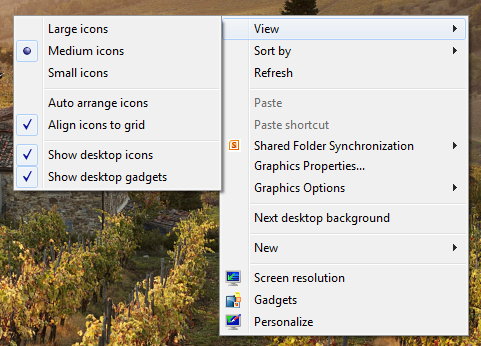
Right-click on your desktop, under “View” list, you can choose resize your desktop icons to small, medium and large icons.

View context menu on desktop

The second method is most common and  majority of the Windows 7 users might be aware of this. However the first method is pretty much simple and handy, highly recommended !!