Download Microsoft Remote Desktop Connection Manager

Remote Desktop manager

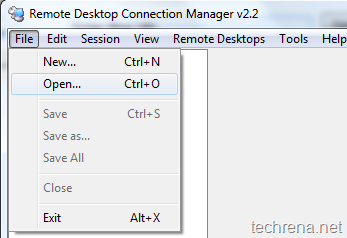
Remote Desktop Connection Manager (RDCMan) is a small program from Microsoft intended to manage your multiple remote desktop connections effectively.

With RDCMan, you can easily manage several labs when you need access at regular intervals to each machine in the lab (ex: as in a data center).It  is more or less similar to the built-in MMC Remote Desktops snap-in, but RDCMan is more flexible.

Supported OS: Windows 7, Windows Server 2003, Windows Server 2008, Windows Vista.

Download:

File Size: 789 KB

Download Link (RDCMan.msi)

[How To] Easily Embed MP3 File Into A WordPress Blog Post

Embed Mp3 into WordPress post

This tutorial deals with how to embed a Mp3 audio file into a WordPress post so that it can be played right inside the post in players like Quicktime.This saves the time for your readers as they need not download the file to listen to it. Follow these simple steps to learn how you can do it.

Steps:

1. Star composing a new post by clicking on “Add New” under posts section. Next to Upload/Insert option, click on the music icon to add (upload) audio to the media library.

Upload audio file to the WordPress media library

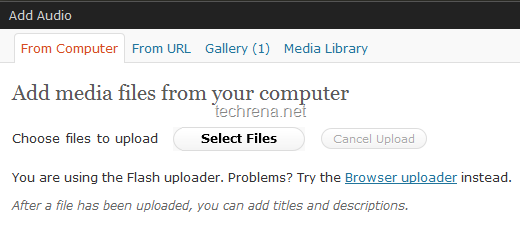
2. Click on the Select Files and chose your audio (mp3) file and click Ok.

Add media files from your computer to the WordPress media library
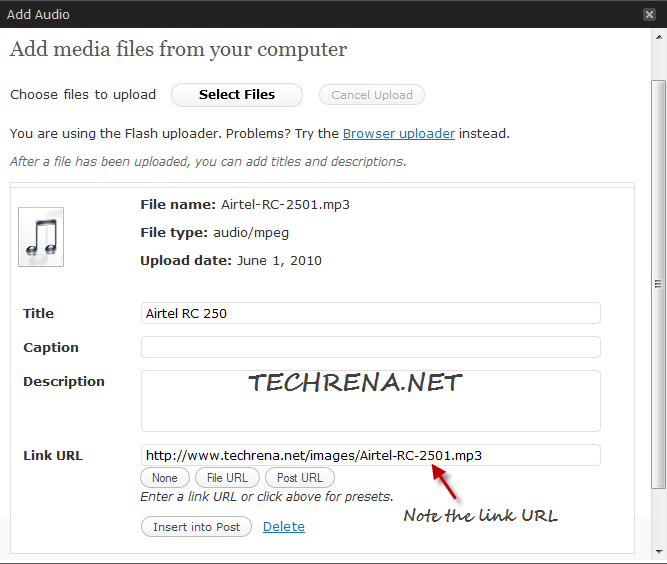
Wait until the upload gets over. Copy the link URL to notepad.

Media file uploaded to WordPress library

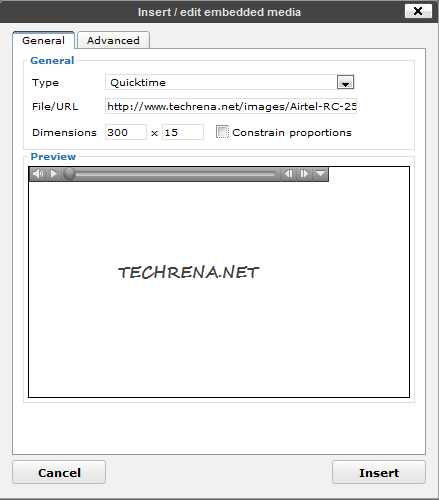
3. Now go to back the post editor, and click on the small video file like icon (see in the screenshot). New “Insert / edit embedded media” popup will open.

Click on this to embed media into the WordPress post
Under the File/URL filed, enter the URL that you have just copied to the notepad in the previous step. You can now customize the Quciktime player by setting your preferred dimension (I had chosen 300 x 15 in the screenshot). You can preview the audio file by playing it under the “Preview” section.

insert_embedded_media

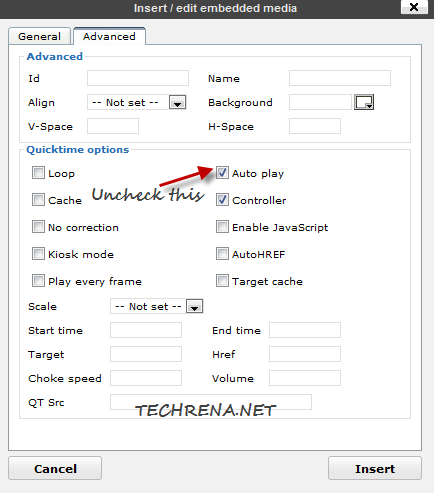
4. Now go to Advanced tab and uncheck “Auto play”. Auto play, if checked plays the audio file automatically when the page loads, many of us may not want this, hence it’s better to keep it unchecked. Click Insert to embed the audio file into the post.

Uncheck Auto play in embedded media settings

5. The audio file (mp3) will now be embedded into your post and this is how it looks like in your WYSIWYG editor.

Mp3 file embedded in WordPress post editor

6. Publish the post and you will now see the mp3 file embedded into the post as shown in the below screenshot:

Mp3 embedded into a WordPress post

Airtel RC 250 Unlimited GPRS Internet Pack

Airtel_Logo

Indian Telecom giant Airtel has just launched a new mobile unlimited internet (GPRS) pack RC 250 which gives unlimited internet browsing, valid for 90 days. All though they say it is unlimited internet, there’s however a cap of 8GB limit on the usage. Airtel is now riding on the success of RC 98 unlimited mobile internet pack, after which the company had also announced a new RC 24 which gives 200 MB worth of internet for a period of 5 days. This new RC 250 is aimed at users who are using only their mobile phones to connect to internet for longer periods instead of broadband.

While we await more information on this new internet recharge coupon from Airtel, you can listen to the following recorded audio file for the announcement of this new coupon from the Airtel customer care.

Tip:

Once you have recharged your mobile with RC250 through easy recharge, you can sms MO to 543210 to receive mobile office settings to your GPRS enabled phone.

Samsung GT-B7722 Official Specifications

Samsung logo

Specifications of Samsung B7722 have been leaked on the internet couple of days ago.

Updated after official announcement:

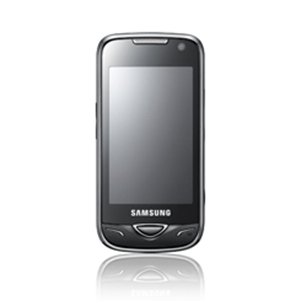
Samsung GT-B7722 is the world’s first dual-SIM 3G phone (2G+ 3G: only one of the SIM slots can support 3G) features a 3.2-inch WQVGA touchscreen, 5 MP camera with Autofocus, a microSD slot (up to 16GB), Wi-Fi, Bluetooth etc.The same phone has been named Samsung B7702 in China.

Samsung B7722 Pictures:

Samsung gt-b7722

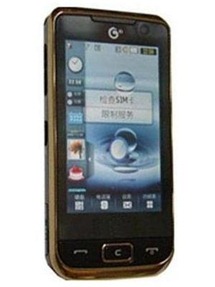
Samsung B7722 3G dual SIM

Samsung B7722 Full Specifications :

Type Dual SIM
Dimensions 113.5 x 55.5 x 14.3 mm
Weight 112 g
Display – 3.2” TFT touchscreen, 256K colors
– 240 x 400 pixels
Camera – 5 Megapixels, LED flash
– 2592 x 1944 pixels
– Autofoucs, Digital Zoom
– Video: QVGA @30 fps
Memory – External: Up to 16GB microSD
Network – GSM 900 / 1800 / 1900 (2G SIM-1)
GSM 900 / 1800 / 1900 (2G SIM-2)
– HSDPA 2100 MHz (3G)
Connectivity – 3G: HSDPA 3.6 Mbps
– Bluetooth v2.1
– Wi-Fi 802.11 b/g
– microUSB 2.0
– 3.5 mm audiojack
Audio & Video Formats – MP3/WAV/WMA/eAAC+
– MP4/H.263/H.264
Battery Standard Li-Ion battery 1200 mAh
Talk time Up to 12 hrs 50 mins
Stand-by time Up to 420 hrs
Colors Black
Availability Expected release in June 2010

Price And Availability:

Samsung GT-B7722 hasn’t been announced yet. The phone has been announced officially. The phone is coming this month (June 2010) at a price of €420 ($510) in Europe and may be expected around Rs. 25,000 INR in India.

Verdict:

Looks like this phone is obviously too overpriced, only Samsung knows the reason behind it. As far as we see you can easily get two better feature-rich phones at that price.

Automatically Log On To A User Account In Windows 7

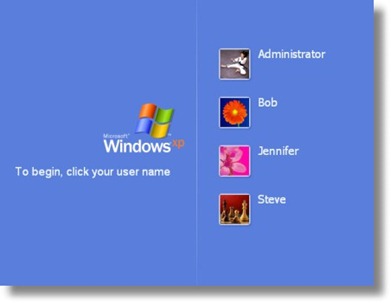
Windows welcome screen with multiple user accounts

Windows 7 by default will ask you to select your user account manually from welcome screen (log on screen) to log on to that particular account. If you have multiple user accounts, but use only one main account most of the time, you may want to save some time by letting your Windows automatically logged on to your default account rather than choosing the account manually.

This tutorial helps you to enable “Automatically Log on” feature in your Windows 7. Follow the steps outlined below to enable this feature on your Windows 7 system.

Steps:

1. Click on Start button, enter netplwiz in the search box and hit the Enter key, or open the netplwiz from the results under Programs category. This will open Advanced User Accounts section from the Control Panel items.

Windows_search_netplwiz

Windows_search_netplwiz_results

2. The Users tab may look like as shown in the below screenshot :
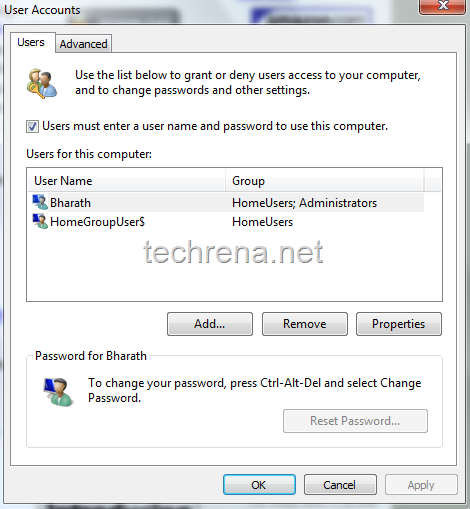
Windows user accounts

3. Now uncheck “Users must enter a user name and password to use this computer” and click Apply. You will be asked to confirm user name and password.

You can set up your computer so that users do not have to type a user name and password to log on. To do this, specify a user that will be automatically logged on below:

Just leave the password field blank if the user account doesn’t have a default password associated with it.
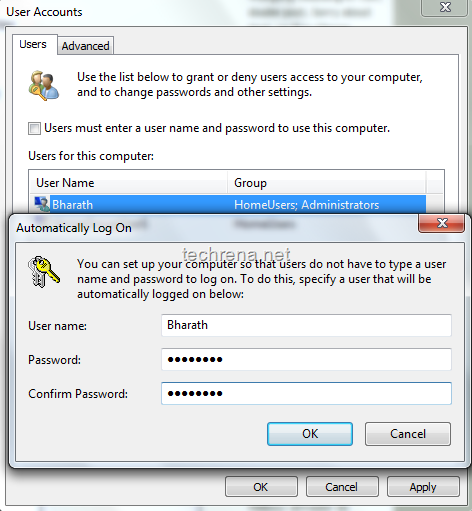
Automatically log on in Windows 7

4. Click OK and close the window.

From now on, you will be automatically logged on to Windows without manually selecting the user account.

For more tips on Windows 7, you can subscribe to Techrena.net’s RSS feed via email.

Note:

This method works well on Windows 7 as well as on Windows Vista.

You may not want to select this on a public computer for security concerns.