[How To] Create And Enable Mobile Version Of A Blogger Blog

blogger logo

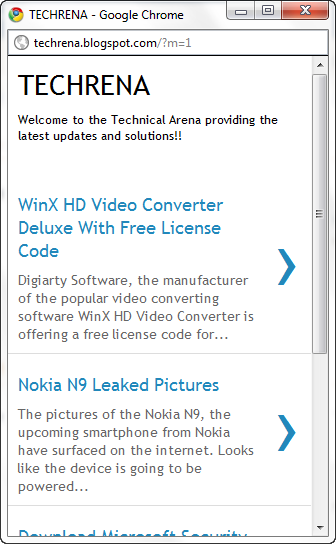
With the growing usage of iPhones, Android devices and other smartphone devices around the world, the number of people who access the internet from their mobile devices. Considering this, it is now very essential that you create a mobile version of your website or blog just to make sure that it fits perfectly on the screens of such devices. If you are a blogger and using WordPress, it’s pretty much easy to setup a mobile version of your blog with plenty of plugins serving the purpose. But what about Blogger? If you still don’t know, the answer is Yes! now you can. Blogger has recently announced the mobile templates for Blogger. But this now is available as an opt-in functionality on Blogger in Draft.

Here’s how you setup and active a mobile version for your blogspot blog without using any hacks:

1. Log in to Blogger in Draft.

Blogger in draft

2. Click on the “Settings” link for you blog

Blog settings link on Blogger dashboard

3. Go to the “Email & Mobile” tab under “Settings”.

Email & Mobile tab under blogger blog settings

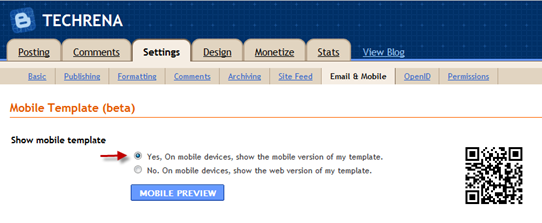
4. Under the Mobile Template, choose the first option (Yes, On mobile devices, show the mobile version of my template).

Mobile Template in Blogger

5. You can click on the “Mobile Preview” button to see a preview of how your blog will look on a mobile device

Blogger mobile preview

6. Click the “Save Settings” button at the bottom once you are done.

save settings button in blogger

You have successfully enabled the mobile template for your blog now. Test it by visiting your blogspot blog from a mobile phone or use the QR code found in the mobile template settings to directly go your site on your mobile device.

techrena QR code

New Feature: Blogger Stats Comes To Blogger In Draft

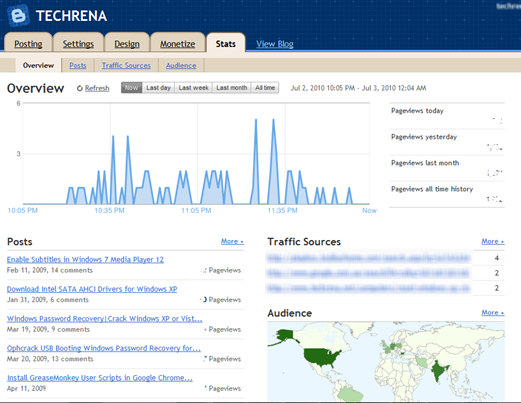
Blogger stats

Blogger has just launched a new almost real-time like visits tracking to blogger.com blogs via

Blogger in Draft (which means that it is still in testing phase).

Though we have tools like Google Analytics, people still want to see their visits in real-time. But if you think that you are just a beginner with Blogger and not completely comfortable with all those advanced features in Analytics, then this is probably the one that you just needed.

Blogger Stats offers all basic information about your site visits in a far better easier way. You can see visitors details during intervals of one hour/day/week/month like which posts are getting most visits, the referring pointing to your blog, the geographic location of your visitors etc. [Checkout “Overview”, “Posts”, “Traffic Sources” & “Audience” tabs].

Just login to draft.blogger.com, and checkout the “stats” tab on your blog dashboard to get started.

Blogger stats tab

WordPress 3.0 Available For Free Download

WordPress developers has today officially released the latest version of their popular Blogging and CMS(Content Management System) platform WordPress 3.0 (code name ‘Thelonious’).

WordPress 3.0 is the thirteenth major release of WordPress software and and is also the first major release of WordPress since the version 2.9.

The following are the major updates in WordPress 3.0.

1. Admin Username during the installation:

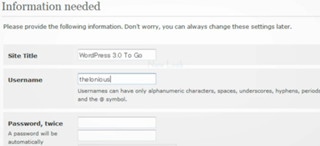
WordPress 3.0 allows you to give your own Username instead of default “admin” during the installation of WordPress.

Admin_username_wordpress_3
2. New look:

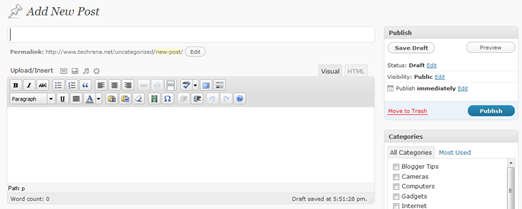
The Dashboard has been made a little lighter in color for better appearance.

WordPress_3_new_screenshot
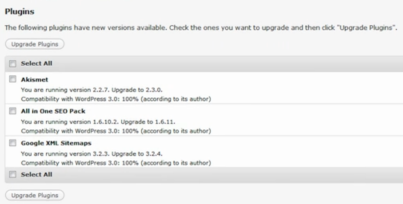
3. Bulk Updates:

You can now upgrade multiple WordPress plugins simultaneously.

plugins_bulk_update_wordpress_3
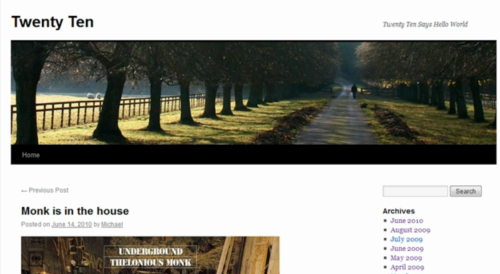
4. Twenty Ten Theme:

A new sexy Twenty Ten theme replaces the classical Kubric theme which WordPress had for years

Twenty_ten_theme_WordPress_3
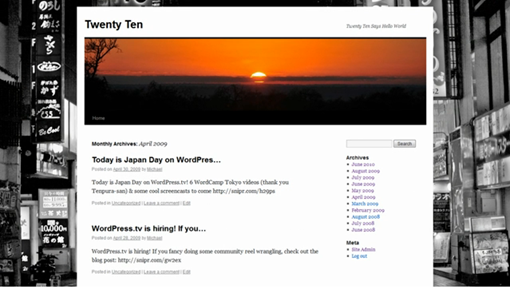
5. Custom Backgrounds:

change background in WordPress 3.0

Change the background color or upload a new image for background
6. Custom Headers:

You  customize the header by uploading your own images
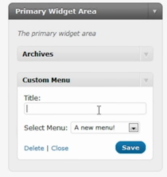
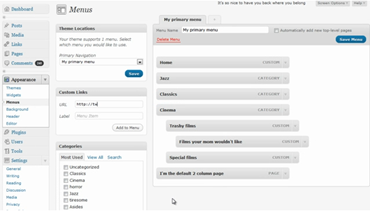
7. Custom Menus:

You can now add menus to your blog..as easy as 1 2 3..You can choose the order/hierarchy in which they should appear. This is very good for SEO prospective.

Create_menu_WordPress_3

Custom_menus_Wordpress_3
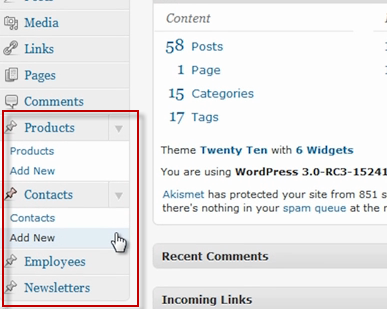
8. Custom Post Types:

You can now choose custom post types for your blog like if you manage a big organization, you can have custom post types like “Products”, “Contacts”, “Employees”, “Newsletters” etc.

Post_types_Wordpress_3
9. Shortlink Support (Built-in):

WordPress now supports a default in-built URL shortener (shortlink generator) right from the post editor itself.

Shortlink WordPress 3 post

10. MU + WP = 3.0:

Now you can run a millions (virtually !) of blogs with a single WordPress installation.

Installing WordPress 3.0 In Your Blog:

You can either download WordPress 3.0 Zip file or you can use the Upgrade from your dashboard to upgrade the WordPress automatically to  WordPress 3.0.

[How To] Easily Embed MP3 File Into A WordPress Blog Post

Embed Mp3 into WordPress post

This tutorial deals with how to embed a Mp3 audio file into a WordPress post so that it can be played right inside the post in players like Quicktime.This saves the time for your readers as they need not download the file to listen to it. Follow these simple steps to learn how you can do it.

Steps:

1. Star composing a new post by clicking on “Add New” under posts section. Next to Upload/Insert option, click on the music icon to add (upload) audio to the media library.

Upload audio file to the WordPress media library

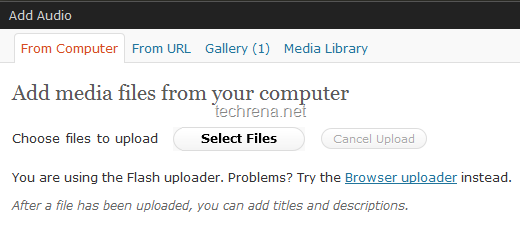
2. Click on the Select Files and chose your audio (mp3) file and click Ok.

Add media files from your computer to the WordPress media library
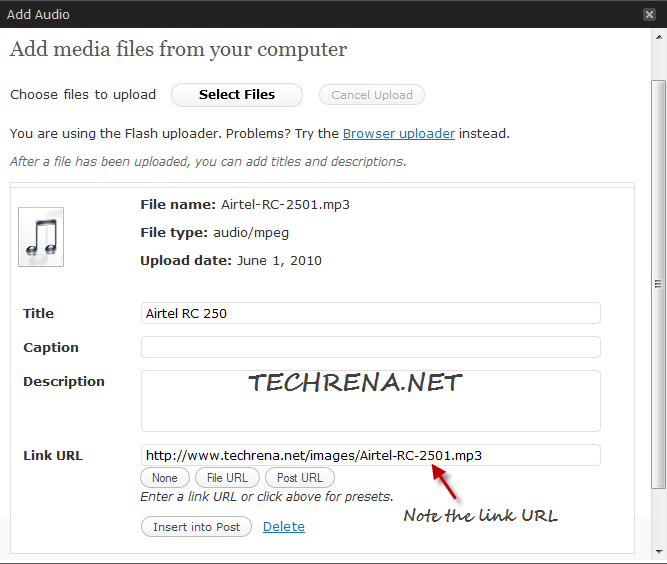
Wait until the upload gets over. Copy the link URL to notepad.

Media file uploaded to WordPress library

3. Now go to back the post editor, and click on the small video file like icon (see in the screenshot). New “Insert / edit embedded media” popup will open.

Click on this to embed media into the WordPress post
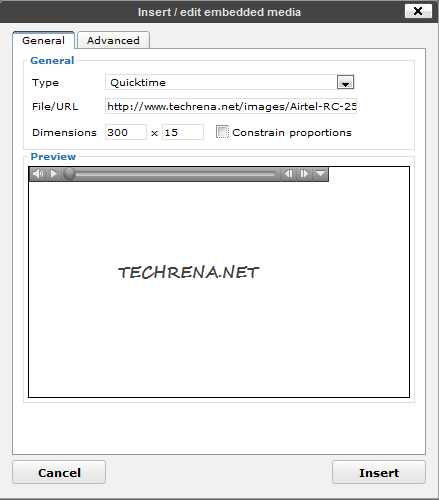
Under the File/URL filed, enter the URL that you have just copied to the notepad in the previous step. You can now customize the Quciktime player by setting your preferred dimension (I had chosen 300 x 15 in the screenshot). You can preview the audio file by playing it under the “Preview” section.

insert_embedded_media

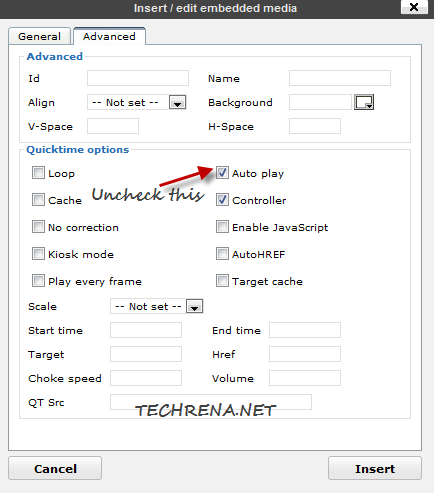
4. Now go to Advanced tab and uncheck “Auto play”. Auto play, if checked plays the audio file automatically when the page loads, many of us may not want this, hence it’s better to keep it unchecked. Click Insert to embed the audio file into the post.

Uncheck Auto play in embedded media settings

5. The audio file (mp3) will now be embedded into your post and this is how it looks like in your WYSIWYG editor.

Mp3 file embedded in WordPress post editor

6. Publish the post and you will now see the mp3 file embedded into the post as shown in the below screenshot:

Mp3 embedded into a WordPress post

Implement Google Adsense For Search In WordPress Blog

Google adsense for search in wordpress self-hosted blog

Adding Google Adsense for search (AFS) for self-hosted WordPress blogs is a bit tricky.In case of a blog hosted on Blogger, it’s enough if you place the codes wherever you want as long it lies within the <body>  section of the HTML source.Coming back to WordPress, even though there won’t be much difficulty in adding the code for displaying the Adsense search box, showing search results is the hard part.This requires you to create a separate page for displaying the search results.

Here we are coming up with an exclusive full tutorial on how to add Google Adsense site search in your WordPress blog.Follow the steps carefully to learn add Adsense site search feature on your own.

What Do We Need ?

– We need a standalone WordPress page to show search results

– We need a separate WordPress page template to embed the search results

– Codes for generating Adsense search box and Adsense search results

Procedure:

Step 1: Creating page template

We are going to generate a WordPress page template in this step.

Open any text editor and copy paste the below code into it and save it as something like googlesitesearch.php.

Code:

<?php
 /*
 Template Name: google site search
*/
?> 

<?php get_header(); ?> 

<!-- Your Adsense serach result code goes here --> 

<?php get_sidebar(); ?>
<?php get_footer(); ?>

Note the template name that you have given here (google site search), we make use of this in the next step.You may have to upload it to your WordPress theme folder to use it in the next step.

Step 2: Creating WordPress page

This is much simpler step, you just need to create a new WordPress page (Go to Pages> select “Add New”). Give it some name like Google Site Search.

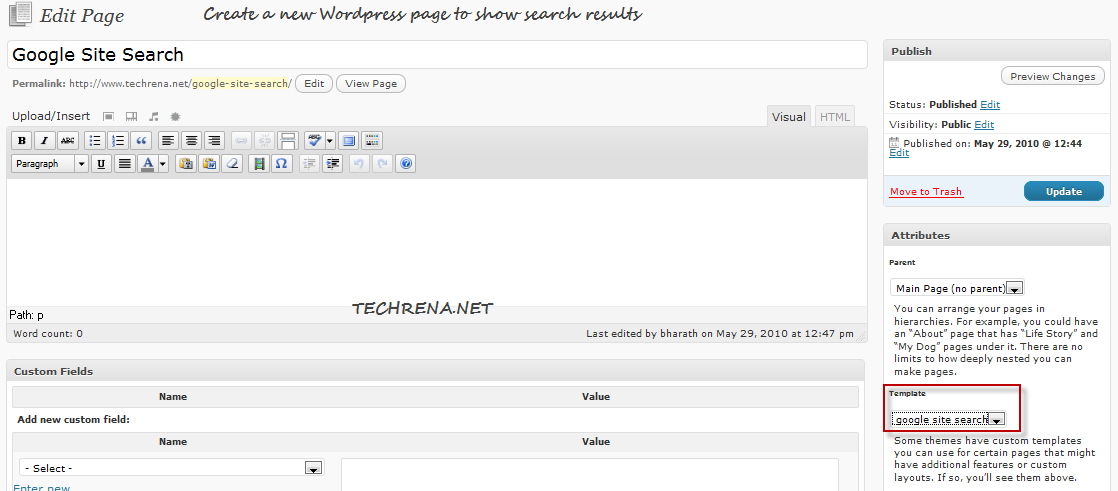
Important: On the right side pane, select the page template that we have created in the first step (google site search).

WordPress page for site search results

Publish the page and note down the URL of the page (ex: www.techrena.net/google-site-search).

Step 3:

Login to your Adsense account and create a new Adsense for search ad.

In the second page of the AFS wizard, enter the above URL from the above step in the text box under “Open results within my own site” option.

AFS search results page

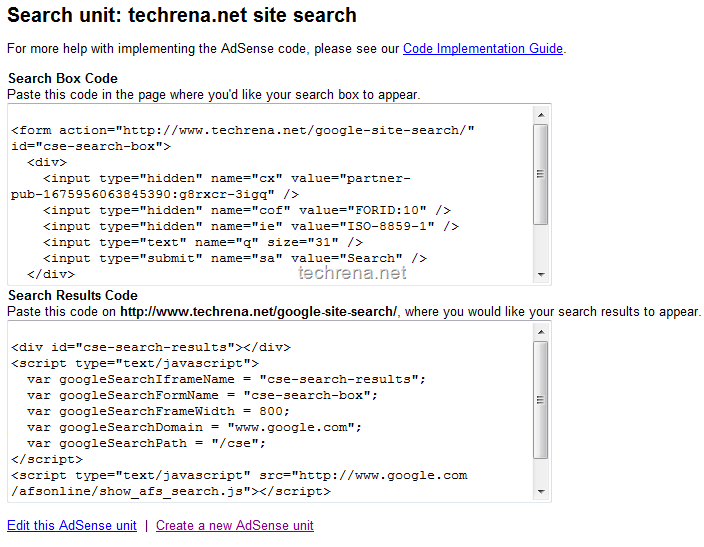
Finish the AFS settings wizard and now you are ready with two separate codes, one for generating Adsense search form and another for generating search results.

Adsense for search code

Step 4:

Copy the Search Results Code and paste it into the page template file (googlesitesearch.php), save it and re-upload it to your current WordPress theme folder via FTP. Now this is your final page template that loads the search results.
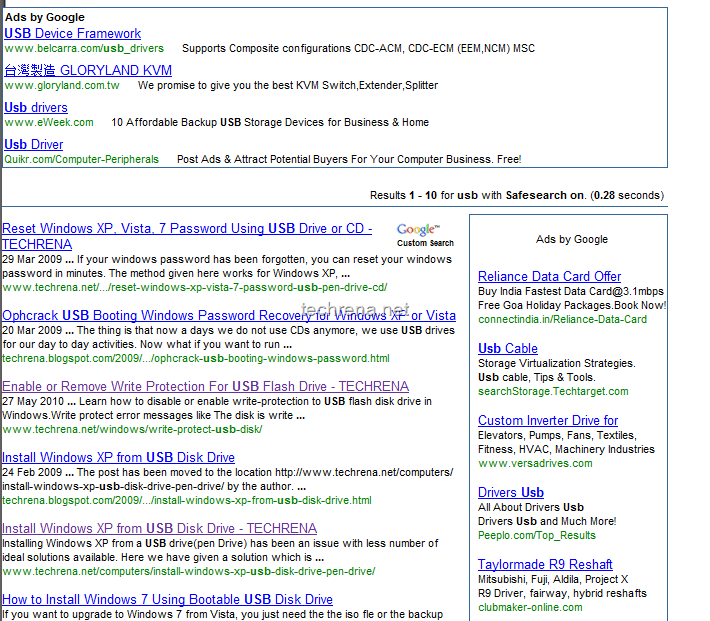
You are done and the sample result page will look like the following:

techrena AFS results page

Let us know, if you face any difficulties in implementing Adsense for search in your WordPress blog.

[How To] Stop or Disable Hotlinking and Bandhwidth Theft using .htaccess file

We found out that many of our copyrighted popular posts have been copied by many of the bloggers. But with so many traffic hungry bloggers around, it is impossible to track and warn each of the bloggers.

Now, our main concern is that many of our copyrighted images are not only copied to other blogs but also hotlinked. This is a serious issue with every popular blog where hotlinking results to bandwidth theft. Now if you are having similar problems of hotlinking or not, you should disable hot linking for sure.

What is Hotlinking or Inline linking?

Inline linking (also known as hotlinking, leeching, piggy-backing, direct linking, offsite image grabs) is the use of a linked object, often an image, from one site into a web page belonging to a second site. The second site is said to have an inline link to the site where the object is located.[wikipedia]

This is when you insert an image to your blog from an image URL of someone else’s site instead of uploading the image to your server. Many people with limited server storage size tend to do this.

How to stop Hotlinking and Bandwidth theft using .htaccess file?

In order to disable hotlinking follow the steps below:

1. Open your .htaccess file by saving it.

.htaccess file is present in the public_html folder of your blog. This can be accessed by using the ftp client like FileZilla. Hope all webmasters know this. Save the file and open it using notepad.

dot_htaccess

2. Add the code to disable hotlinking of your images

Add the following code to your .htaccess file and save it back to your public_html folder.

RewriteEngine On
RewriteCond %{HTTP_REFERER} !^http://(.+\\.)?yoursite\\.com/ [NC]
RewriteCond %{HTTP_REFERER} !^$
RewriteRule .*\\.(jpe?g|gif|bmp|png)$ http://imagehostsite/warning.jpeg [L]

Change the orange colored code according to your need as shown in the example below.

Example: [Click to Enlarge]

disable_hotlinking

The RewriteCond can be added according to your purpose. If you have any other blog where you want to use the images, then add another line with the site’s address as we have done in the example.

Important notes:

1. Backup your .htaccess file before doing the changes.

2. in the RewriteRule line, you cannot use a warning image uploaded to your site because the warning image itself will be blocked. So upload the image to some other servers like blogger or other image hosting sites

3. The RewriteCond can be added according to your purpose. If you have any other blog where you want to use the images, then add another line with the site’s address.

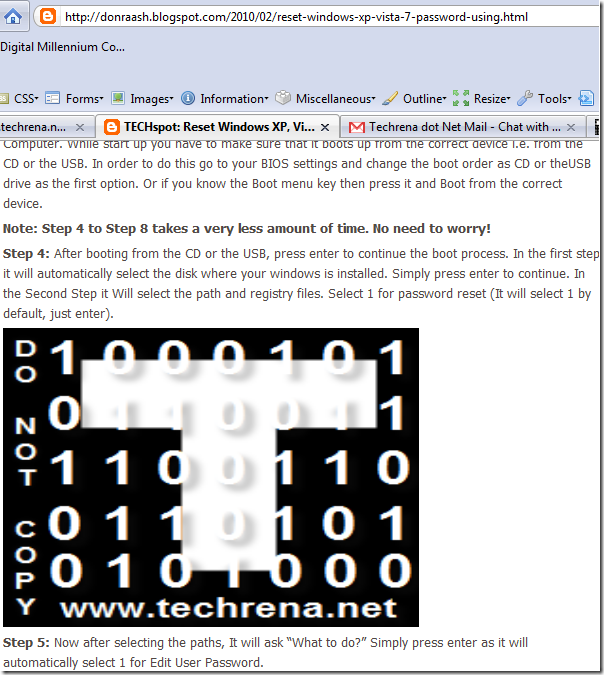
Now after performing the changes, you can check the other site where your images are hotlinked. An example is given below where our most popular post Reset Windows XP, Vista, 7 Password Using USB Drive or CD was copied.

hotlinking_blocked

Hope you have seen something like ours. Any feedback will be appreciated.

You can also see how to protect your wordpress internal files using .htaccess.

You can subscribe to our RSS feed via email for more tutorials under Blogger Tips.

UniverCell Hyderabad IndiBlogger Meet 2010 – A Beautiful Experience

IndiBlogger

I was very much excited for this event as this was my first bloggers meet. The event was interesting in every part of it and didn’t even find a single boring moment (Which usually happens in most of the meets). It was very well organized and beautifully executed. We wholeheartedly thank the IndiBlogger team for organizing such an exciting event and we also thank UniverCell for sponsoring it.

I am putting forward my experience in the whole event below.

Hyderabad IndiBlogger Meet 2010

Image Source: Aditya

Arrival and Startup

I reached the venue at 1:50 PM, which was quite early and I was one of the first bloggers to arrive. The conference hall was almost empty. The IndiBlogger team showed a warm hospitality.

By 2:30 PM the Hall was almost full. But as we were expecting more attendees, the meet started around at 2:40 PM. The IndiBlogger team was introduced to us. We got to know the whole team and got the idea whom to catch if our blog is rejected from IndiBlogger. One of the team member even rode a bike from Mumbai to Hyderabad to attend the meet. The introductory video featuring Adolf Hitler showing his desire for attending the meet to fulfill his hunger for Hyderabadi Dum Biryani was completely superb and hilarious.

30 Seconds of Fame (The Most Exciting one)

We had to introduce ourselves in 30 seconds. I got to know a lot on new people. The blogosphere in Hyderabad included from Movie Directors, Government employees, IT professionals to Mothers, Pensioners, etc. Most of the blogs were about their personal experience, life, social problems. Some were about poetries, songs and others were about jokes, sensible bakwas, humours, nothing, everything and so on.


Some people were nervous about the introduction. And i don’t know why many people compared the intro part with a matrimonial event? It was an exciting one, grey haired people searching for other grey haired ones, jobless people searching for helpers job providers, etc.

Live & let comment

This was another fun part. Mingling with each other, getting to know new people and writing about the person whom you hardly know. Enjoyed every part of it.

My Comment chart was almost filled. So one commenter wrote:

follow@anicode: “This guy is getting a lot of comments. So I am gonna spam!”

My friend Supraja wrote: “Craziest person ever seen”. I didn’t understand why she had to express that I am crazy on the comment chart? Guess she got the guts as it was the IndiBlogger’s meet!

The UniverCell Blogger Quiz by Riyaz Usman

The quiz was an interesting and a well researched one. Many topics and discussions were covered from Wikipedia, facebook, to Tharoor’s Tweet. This part was engaging.

Mingling session / High Tea

We had a good time talking to new bloggers over a cup of coffee. Just felt that we Bloggers had constructed our own identity. As a blogger I felt really happy to see other bloggers around me.

IndiBlogger Forum: Open discussion

In this session we decided an open discussion forum for the Hyderabad Bloggers as hyderabadbloggers.in. Hope we got to meet each other in the forum soon.

At last there was a group photo session. It was fun. Everyone wanted another photo because of the reasons like I didn’t smile!

Confession and A Sincere Apology

I am really sorry that I forgot to return the sketch pen which I got for commenting. Sorry!

Jokes apart, I sincerely thank IndiBlogger and UniverCell for making this event happen. I thank you for the Hospitality and also the T-Shirt. We are looking forward for similar events in future. Our confidence and morale as a blogger has been greatly enhanced after this meet.

Thank You!

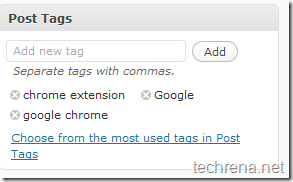
Show Post Tags In Your WordPress Blog Posts Easily

post tags in WordPress

WordPress users might be knowing about Post tags/ template tags or simply the tags that this blogging platform supports.

Many a times themes come up with default feature to show either individual post tags or “tag cloud” in the single post pages.

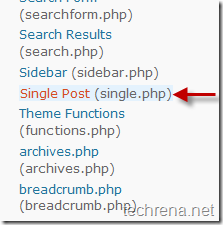
But some themes do not come with showing post tags on single post pages by default.In such cases, follow add these codes to your “single.php” file with in The Loop.

single posts php file

Case-1 : Default Use (Separated by Commas)

<p><?php the_tags(); ?></p>

Case-2 : Tags Separated by  Arrows

<?php the_tags('Social tagging: ',' > '); ?>

You can replace ‘>’ in the above code with a bullet ‘ • ’ to show tags separated by bullet

Case-3 : Tags as lists

<?php the_tags('<ul><li>','</li><li>','</li></ul>'); ?>

post tags example

If you are not using Noindex for tag archives, you must disable showing full post on tag archives to just showing excerpts only.`

WordPress 2.9.2

wordpress logo

WordPress has updated it’s famous blogging platform from earlier version 2.9.1 to 2.9.2.This addresses the problem where untrusted logged in users can secretly look into the trashed posts belonging to other authors.

The reason we should all upgrade our WordPress to 2.9.2 according to WordPress developers:

If you have untrusted users signed up on your blog and sensitive posts in the trash, you should upgrade to 2.9.2.

This is a minor update but considering the fact that it is addressing a security issue, we may not want to take chance, and if you have configured Google friend connect for your WordPress blog, keep in mind that all the users who have subscribed to your blog as members, would be treated as users signed up to your blog by WordPress, and what it means that there’s a possibility that these users when logged in can peek at your trashed posts.

Use Tools>Upgrade menu from your dashboard to upgrade to WordPress 2.9.1 or

Download WordPress Zip file

How To Show ‘Post Excerpts’ Only On Archive Pages In WordPress

If you use a WordPress you would better know that managing archives is very essential in terms of SEO prospective.

It’s a SEO rule that if you don’t use ‘nofollow’ for archive pages, you should use ‘excerpts’ only in your theme archives rather than showing full posts, as it creates the problem of duplicate content for the search engines.

Even though many WordPress themes in recent are coming with just excerpt only pages for archives by default, there are still come classic themes like (WordPress Classic theme for instance) that will show full posts under archive pages.In this post I’ll cover how to disable full posts for archive pages.

[Fortunately for showing excerpts on homepage, we have Homepage Excerpts plugin, but for archive pages, we need to follow the below procedure]

Steps:

This method is very simple and involves a very minor code editing.

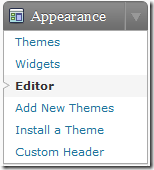
1.First, go to your “Theme editor” page from your WordPress Dashboard.

Theme editor under WordPress dashboard

2.Under the theme files, find and open a template file called archives.php (in some themes, you need to look for tag.php and category.php template files included separately for each type of archives)

In the template file look for something similar to the following line

<?php the_content

Archives php file the_content

3.Replace the above line with, the following line:

<?php the_excerpt(); ?>

After editing:

archives php the excerpt5

Now open your archive pages (tag/category), and you will only see the post excerpts instead of full posts.

Now your archive pages will show first 55 words of the blog post as excerpt.But you can still personalize it.Either you can use ‘Post Excerpt’ field under your WordPress WYSIWYG editor or you use “more” tag present under “HTML” mode in your post editor.

More Tag:

Using ‘more’ tag splits your post into parts, and adds ‘Read More” link

More tag in WordPress Post editorOr use ‘Excerpt’ field under the post editor in WordPress

Excerpt field in WordPress Post editor

Note: If you are using some professional theme, you may not find archives.php or other files in your theme template files.