[Tip] Pin Important Folders To The Top In Windows Explorer

Have you ever wondered how could I keep my most frequently used folder at the top in any Windows Explorer window?

As all of us know, the folders inside any Windows Explorer window are by default sorted by name (alphabetical). So a folder like “important” would always gets listed down in order than say some folder like “abc”.

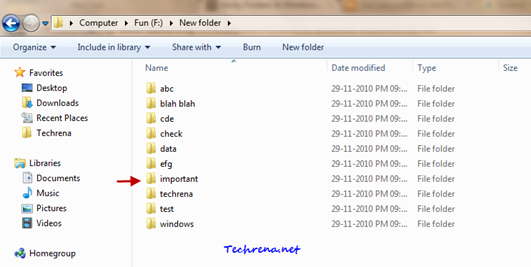
Windows explorer default view

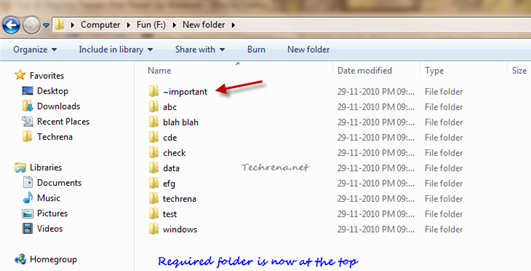
If you can see in the above screenshot, our motto is to get the “important” folder up in the order, right at the top of the list. One simple workaround to get this done is to add some symbols on your keyboard like ~, `, !, #, ^ etc to the folder names that you want to see atop. However please be aware that you can not use symbols like \, /, :, *, ?, “, <, >, | because Windows doesn’t allow these strings to be present in the names of the folders.

Sticky folder at the top of the windows explorer

Try using different symbols in order to use multiple sticky folders at the top of the Windows Explorer. If you use same symbol for any two folders, they are still going to be sorted by their names as shown:

Two folders starting with same symbol

Avoid using digits instead of symbols as the whole name looks a bit cluttered if you prepend a numbers like 1, 2, 3 etc. at the beginning of the name of the file.

[via] Labnol

[How To] Disable Aero Snap In Windows 7

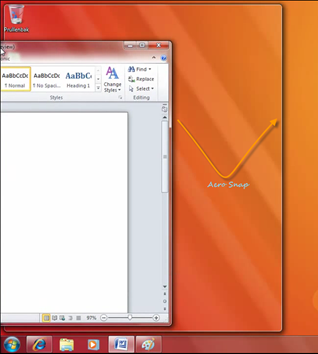
Aero Snap” is a new feature introduced in Windows 7 as part of the windows management. In short what it does is when you drag a window to the top or towards the side of the screen, it gets maximized (when dragged to top) or resized (when dragged to side) automatically to fit that portion of the screen.

Aero Snap

The minor problem here is when you want to hide the window by dragging it to the side of the screen, it gets resized instead. Also this is also a worthless feature of you use multiple monitors. Whatever may be the reason, just in case if you want to disable this feature, read the following guide:

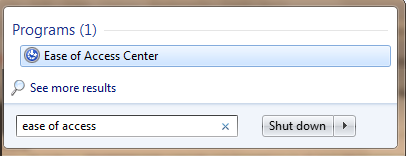
1. Type “ease of access” in the Start Menu search and open the result from the Programs section.ease of access start menu search

You may also open the Ease Of Access Center from the Control Panel menu.
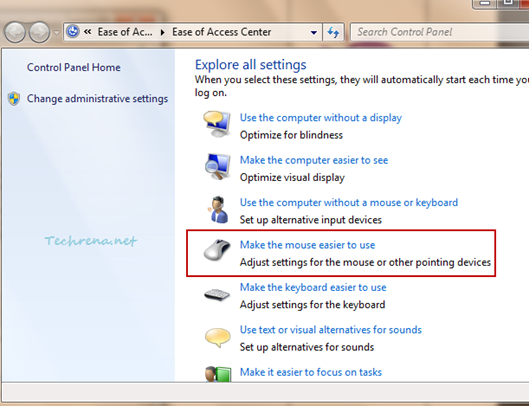
2. In the Ease Of Access Center, scroll down and click “Make the mouse easier to use

Ease of Access Center

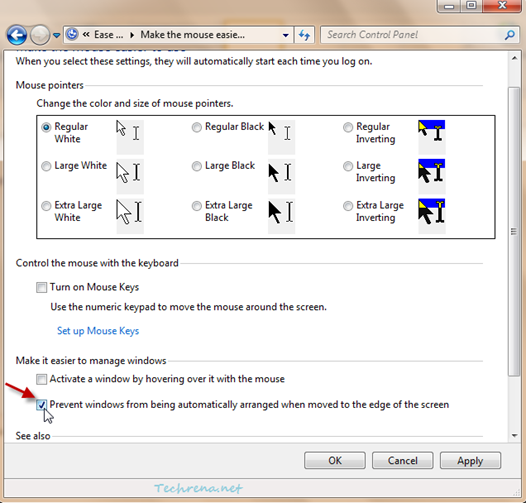
3. A new window (Control Panel \ Ease of Access \ Ease of Access Center \ Make the mouse easier to use) will open up.

Scroll down to the bottom of the window, where you will see “Prevent windows from being automatically arranged when moved to the edge of the screen”. Check against it and click OK to apply the settings and close the window.

Make mouse easier to use settings

That’s it. You have just turned off the Aero Snap on your Windows 7. To enable the Aero Snap feature back on your computer, just uncheck the option in the step 3.

[How To] Enable Offline Files In Windows 7

Offline Files Windows 7

Offline Files is a cool feature available in Windows since the days of Windows XP which allows you to see the files shared over a network even when you are not connected to the network. When you enable offline files, it will tell the Windows to store a local copy of the files on your computer so that you can access them even when you are away from the network. Later, when you come back on to the network, these files will get synchronized with the server to update to the latest version of the files. Follow this guide to enable the Offline Files on your Windows 7 machine.

Please note that the “Offline Files” feature is not available in Windows 7 Starter and Home Premium editions.

Steps:

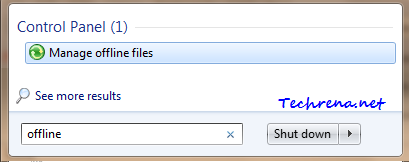
1. Type “offline” in the Start Menu search and open the first result from the Control Panel section:

offline files start menu search

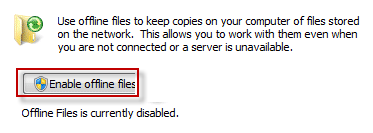
2. Click “Enable offline files” in the Offline Files window and click OK to apply the changes.

enable offline files in windows 7

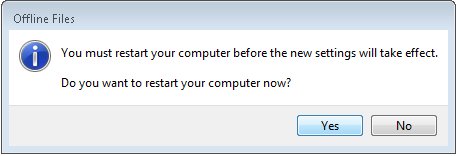
3. And you will now be prompted to restart your computer before these changes could be applied on your machine.

Restart offline files enable

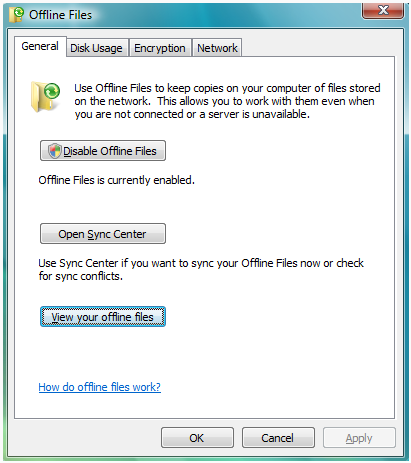
Choose Yes to restart your machine and check back to see the offline files being enabled for you:

Offline files enabled

[Tip] Disable Web Clips Ads In Gmail

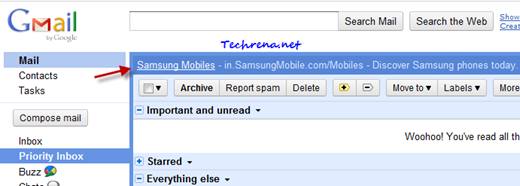
Web clips inside gmail inbox

Google had added Web Clips sometime back originally with the intention of showing some RSS and Atom feed snippets, blog posts, news headlines and above the inbox in Gmail. But seldom you see any useful clips in your Web Clips section as most of the messages that appear in this section are now seem to be just ads (sponsored links). Google however has left the choice to the users to either enable or disable them. If you find them annoying a bit, here is what you need to do in order to get rid of them:

1. Login to your Gmail and open the Web Clips settings page.

2. Uncheck against the “Show my web clips above the Inbox”.

Web clips settings in Gmail

3. Go back to inbox to see the change, the Web Clips should no longer appear above your inbox.

No web clips inside Gmail

[How To] Enable Quick Launch In Windows 7

Quick Launch Bar that used to exist in Windows until Windows Vista was offering an easy way to quickly start a program from the Windows taskbar. However, this feature has been disabled (or ‘hidden’, I would rather prefer to say) in Windows 7. This is due to the latest improvements in Windows 7 that let you to directly pin the programs to the Taskbar for quicker and direct launch. But sooner or later you will understand that if you go on pinning programs to the Taskbar, you would probably left with very little space on your taskbar. Quick Launch Bar has an advantage here as it won’t occupy much space. Anyway if you are all for Quick Launch Bar and want to enable or disable it in Windows 7, here is how you have to do it:

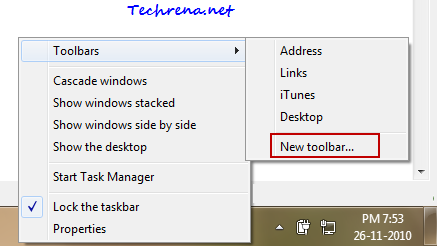
1. Right-click on the Windows 7 Taskbar and choose Toolbars> New toolbar..

new toolbar from taskbar in windows 7

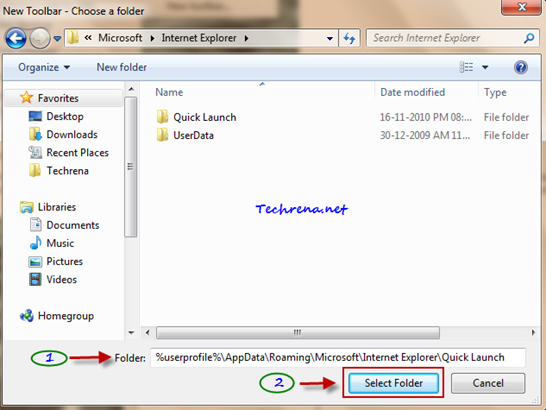
2. A new file browser window will be opened. Copy the following path and paste it into the “Folder” filed click “Select Folder”.

%userprofile%\AppData\Roaming\Microsoft\Internet Explorer\Quick Launch

Select folder for new Quick launch toolbar

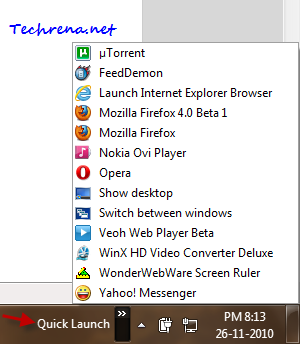
3. Now you will notice the new Quick Launch Bar being added to the Taskbar, just before the System Clock in the system tray.

Disable Quick Launch Bar

Clicking on the arrows icon next to the Quick Launch Bar would open the list of programs that are currently added to the Quick Launch Bar. So you need to open the list and then click the program to run it. Let’s see how can we make this even simpler, to quickly open the programs in the Quick Launch Bar.

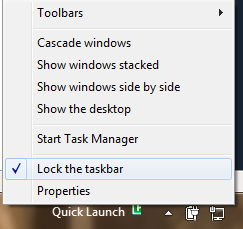
4. Right-click on the Taskbar and uncheck against “Lock the taskbar”.

Lock the taskbar in Windows 7

5. Now you’ll notice that you can actually move the Quick Launch Bar to adjust its position.

move quick launch bar

Just drag it a bit forward to show the program icons in the Quick Launch Bar as shown:

Program icons in the Quick Launch Bar expanded

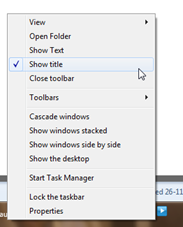
If you want further customization, you can right-click on the Quick Launch Bar position and deselect “Show Title” and then lock the taskbar to see all the Quick Launch Bar icons placed next to each other in a line.

Show title quick launch bar

Quick launch bar icons together

Disable Quick Launch Bar:

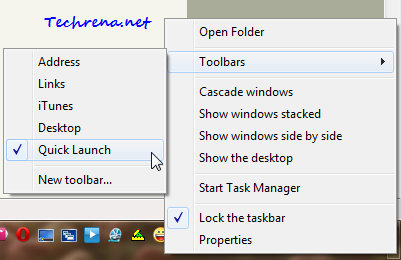
If you want to disable or hide the Quick Launch Bar from the Windows 7 Taskbar, right-click on the taskbar, Toolbars> ..and deselect Quick Launch from the context menu.

Quick Launch bar in context menu

Black Friday 2010 Ads & Deals

Black Friday 2010 Is Here:

Black Friday 2010 is just 4 days away and it’s time to make the most of the wonderful 2010 Black Friday ads (deals). if you are a gadget lover, you have every reason to be ecstatic as there are loads of discount deals available on gadgets like mobile phones, digital cameras, blue-ray players, TVs, laptops etc.

Go through all the available Black Friday 2010 deals to find the deal that suits you the best.

Walmart:

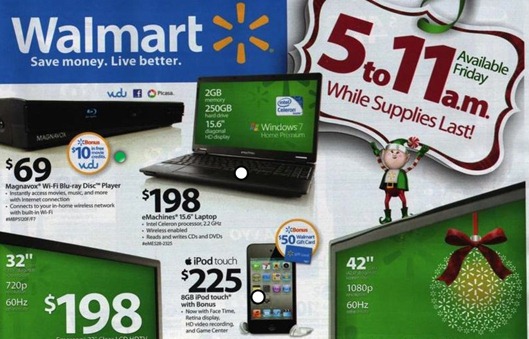
Walmart black friday ads

Wallmart Black friday 2010 deals are out and they look cool! Get an HDTV or laptop starting from $198, while iPod touch is being offered for less than $225.

Visit Walmart.com for more deals.

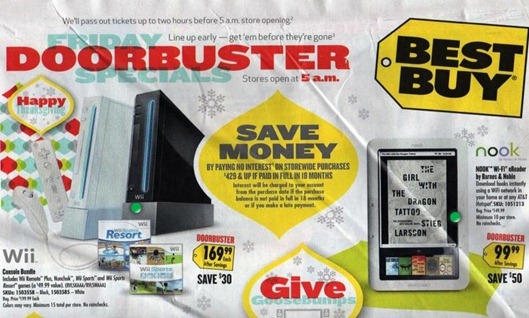
Best Buy:

Best Buy Black Friday deals 2010

Best Buy deals for Black Friday 2010 include the Barnes & Noble’s Nook e-reader Wi-Fi tablet for $99. Visit Best Buy website for more info on deals.

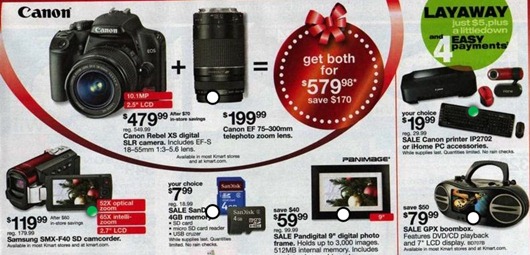
K-Mart:

K-Mart black friday ads 2010

More info about K-Mart Black Friday 2010 discount deals at official website.

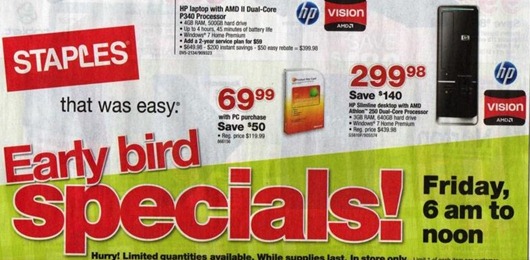
Staples:

Staples-black-friday-deals

More info on the exclusive Black Fridays 2010 deals by Staples at: Official Website

More to follow..

via

[How To] Pin Computer Icon To Windows 7 Taskbar

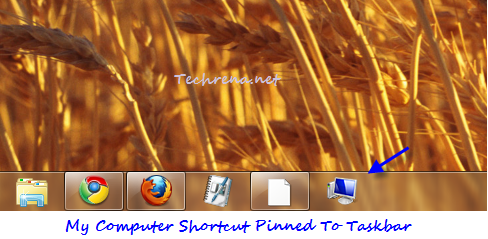
My computer shortcut icon pinned to taskbar

Windows 7 taskbar is really handy and as you might be knowing it allows you to just drag and pin any program shortcut to the taskbar. But have you ever tried pinning the “Computer” shortcut from desktop to the taskbar in Windows 7? Does it get pinned to it? No, right? This what you will end when you try to pin it to the taskbar:

Pin My Computer to Taskbar

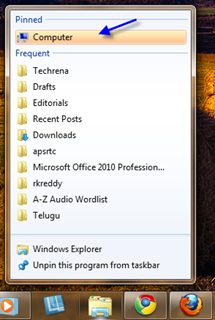
Computer icon pinned to windows explorer

It gets pinned to the “Windows Explorer” and it’ll be shown above the jump lists as shown in the above screenshot. Oh no, wait! not exactly where we wanted it to be! No compromise, we just want it to be pinned to the taskbar no where else! Oh no, problem, problem, problem!!

We are here for you. In this tutorial we are going to talk about workaround to pin the Computer icon to the taskbar. Let’s get started !

Steps:

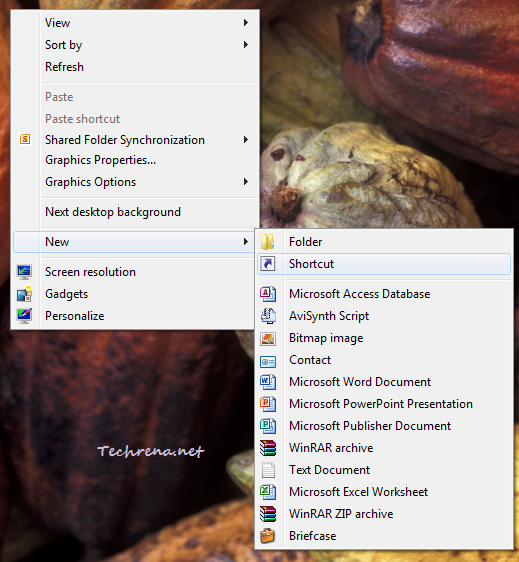
1. Create a new shortcut on your desktop: Right-click on your desktop and choose New > Shortcut.

new shortcut desktop right-click context menu

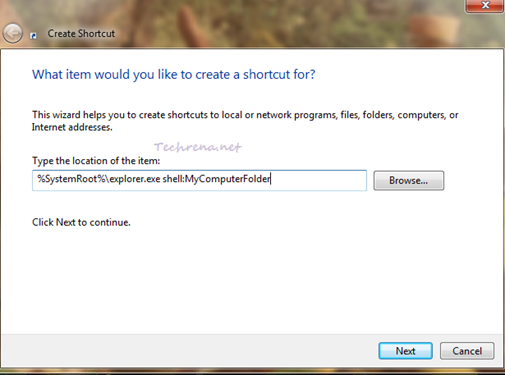
2. In the next “Create Shortcut” window, paste the following string:

%SystemRoot%\explorer.exe shell:MyComputerFolder

create desktop shortcut wizard

Click “Next” button at the bottom of the window

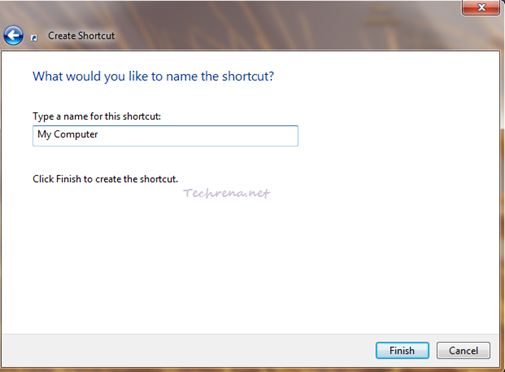
3. Name the shortcut. You can type any name for the shortcut and click “Finish” button to finish the wizard.

create desktop shortcut wizard

4. Now you will have a shortcut for “My Computer” created on your desktop.

My Computer shortcut original icon

5. Now we are going to change the icon for the shortcut and get the original icon (computer) that is normally associated with “My Computer”.

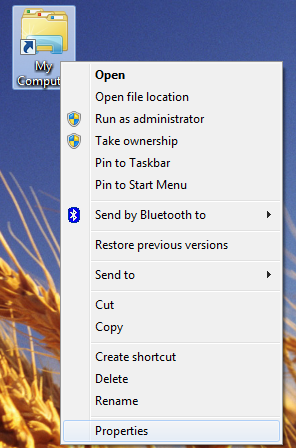
To do this, right-click on the shortcut and select “Properties”.

Right-click context menu for shortcut

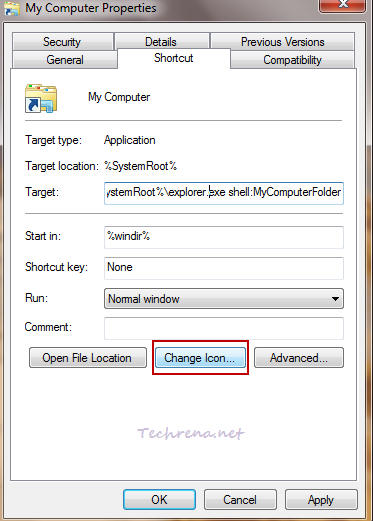
6. Go to the “Shortcut” tab in the “Properties” window and click “Change Icon”.

My computer shortcut properties

7. Paste the following string in the “Look for icons in this file” field and press Enter.

%SystemRoot%\system32\imageres.dll

Change icon for My Computer shortcut

Select the “Computer” icon and click OK.

8. Click OK to close the Properties window.

9. Now try dragging the shortcut to the taskbar and it works!!

Pin My Computer icon to taskbar

You will now have the Computer icon pinned to the Taskbar as shown in the above pic. If you liked this post then chances are that you might also want to checkout Start Windows Explorer With Custom Folder

[Tip] Quickly Resize Desktop Icons In Windows 7 & Vista

If you were used to Windows XP for long time and then shifted to the newer versions of Windows like Windows Vista or Windows 7, one thing you will find a bit annoying the default big size desktop icons that eat most of your computers desktop. Fortunately Windows has made it easier for the users to choose the size of the icons on your desktop. There are plenty ways available to resize the size of the desktop icons in your Windows 7 and Windows Vista based PCs. We’ll discuss a few of them here:

Desktop icon resize

1. Easy: Using Mouse Wheel:

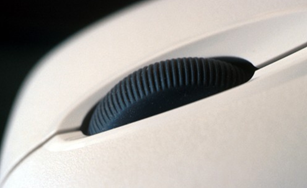
mouse-wheel

This the easy and hassle free way to resize your desktop icons which many of us aren’t aware of. Just hold down the CTRL button on your keyboard, press left button on your mouse initially and then move the scroll button of your mouse to resize the desktop icons as well as icons inside any folder.

2. Usual Method: Right-click Context Menu

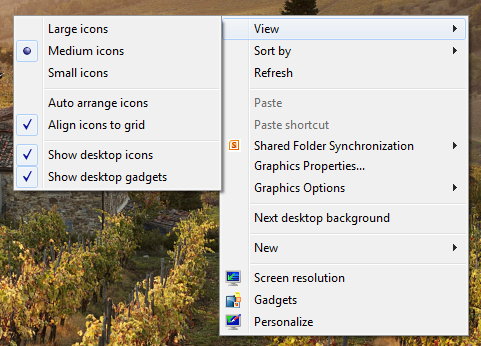
Right-click on your desktop, under “View” list, you can choose resize your desktop icons to small, medium and large icons.

View context menu on desktop

The second method is most common and  majority of the Windows 7 users might be aware of this. However the first method is pretty much simple and handy, highly recommended !!

[Download] Yahoo Messenger 11 Beta

Yahoo messenger smile

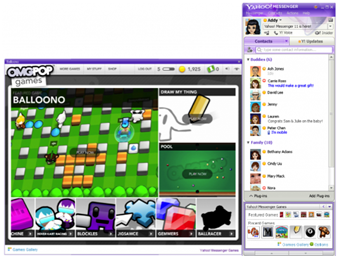
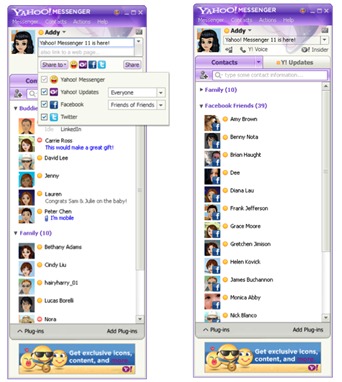
Yahoo Messenger 11 Beta has been released and is now available for download. The latest beta version of the popular IM software shows off many new features and improvements, the biggest among them being the social networking integration.

Yahoo messenger 11

Yahoo messenger 11 social

New features and improvements in Yahoo Messenger 11:

# Play social games with friends (Flashville, Mafia Wars, Balloono, Pool, Draw My Thing, Happy Harvest etc.)

# Manage all your social networks from Messenger: Post or view status updates, comments and like updates from Facebook, Flickr, Twitter etc.

# Post status to multiple social networks simultaneously

# Chat with Facebook friends

# Android support (you can make video calls between PC, iPhone and Android devices too!)*

# Sign in to multiple PCs simultaneously

# Retrieve all IM conversations history

[*] Supported only on devices running Android OS 2.2+ with Yahoo! Messenger Video Add-on installed

Download Yahoo Messenger 11 Beta:

>> Online installer

>> Offline standalone installer [16.75 MB]

[Tip] Download Your Entire Facebook Data

facebook logo

What’s the point of any service where you don’t have control over the data you add through it? This is the first and foremost point that every user considers before using any service and the service provider must be up to it to provide users with full control over their data. Being the most widely used social networking website on the internet, Facebook is no exception. Facebook has recently added a provision through which the users can download their entire personal information that you have posted on Facebook including messages, Wall posts, photos, status updates and profile information etc. You can download all this data with a single click.

Follow these steps to download all your information on Facebook:

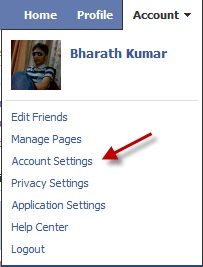
1. Login to Facebook and click “Account Settings” under Account.

Facebook account settings

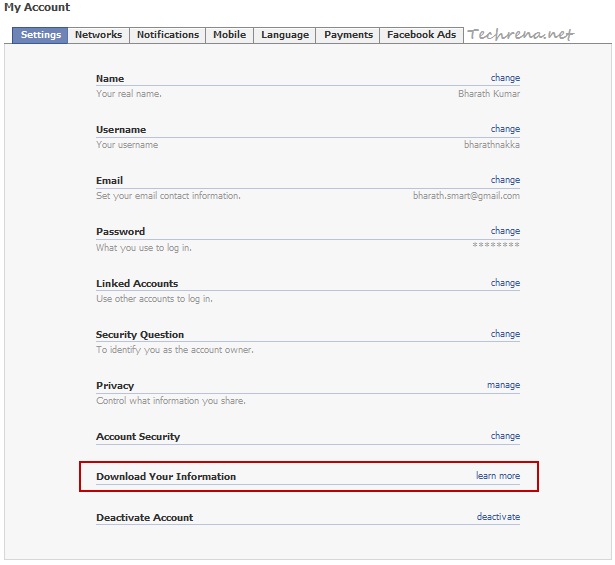
2. Locate “Download Your Information” in the Settings tab and click “learn more” link present right next to it.

Download Your Information in fb account settings

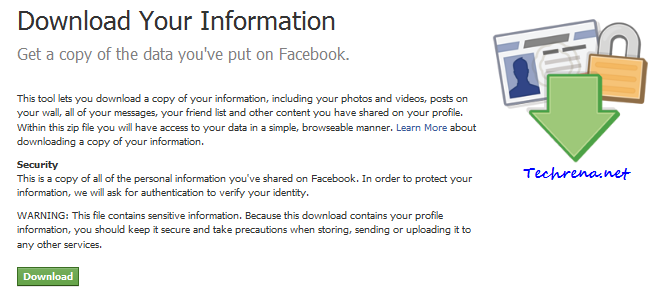
3. In the next page, you will receive a brief message about what the tool exactly going to do along with a brief warning message. Click on the green “Download” button to proceed to the next step.

Download Your Information warning in facebook

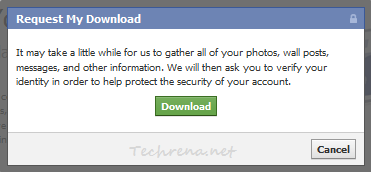
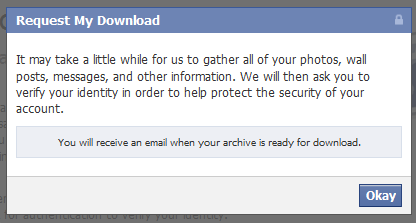
4. A pop-up window (“Request My Download”) appears now. The window tells you to wait till Facebook gathers all your photos, wall posts, messages and other information. Click on the Download button again to proceed.

Request my download window in facebook

Request my download window in facebook

5. It may take a little while for Facebook to gather all your information and you will eventually receive a mail containing a download link for the zip file containing your Facebook account information.

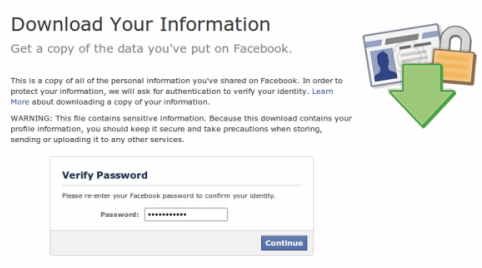
You need to verify your identity by entering your account password before you can download the zipped file.

Download your information fb verification

In the next page you should see a download button along with showing information about the size of the file you are about to download. Download the .zip file and unzip to see the contents of it. You should see sub-folders like photos, html along with index.html and readme files.

6. You are done with downloading your information from Facebook!

Watch the below to video to follow the above steps: