You must be knowing that whenever you open a webpage, the data in the page would be first stored in your computer’s windows internet cache temporary folder and later retrieved from there.This is true in case of YouTube also.
So whenever you open a YouTube video and let it to stream fully, it will be saved in your Windows temp folders as “flaXXX.tmp” file.So now our hack will be using this concept to save YouTube (or any flash content based streaming site for that matter) directly on your hard drive without needing to install any extensions in your browser.
The Process:
1 Step 1: Go to windows temp folder from the following path:
for Windows vista/ Windows 7:
C:\>Users\>User Name\>AppData\>Local\>Temp\
2 Step 2: As said earlier, the temporary flash files would generally be of the format flaXXX.tmp.In my case the required filename is flaDEBD.tmp.This file contains the flash content from YouTube video that you have just allowed to stream fully.
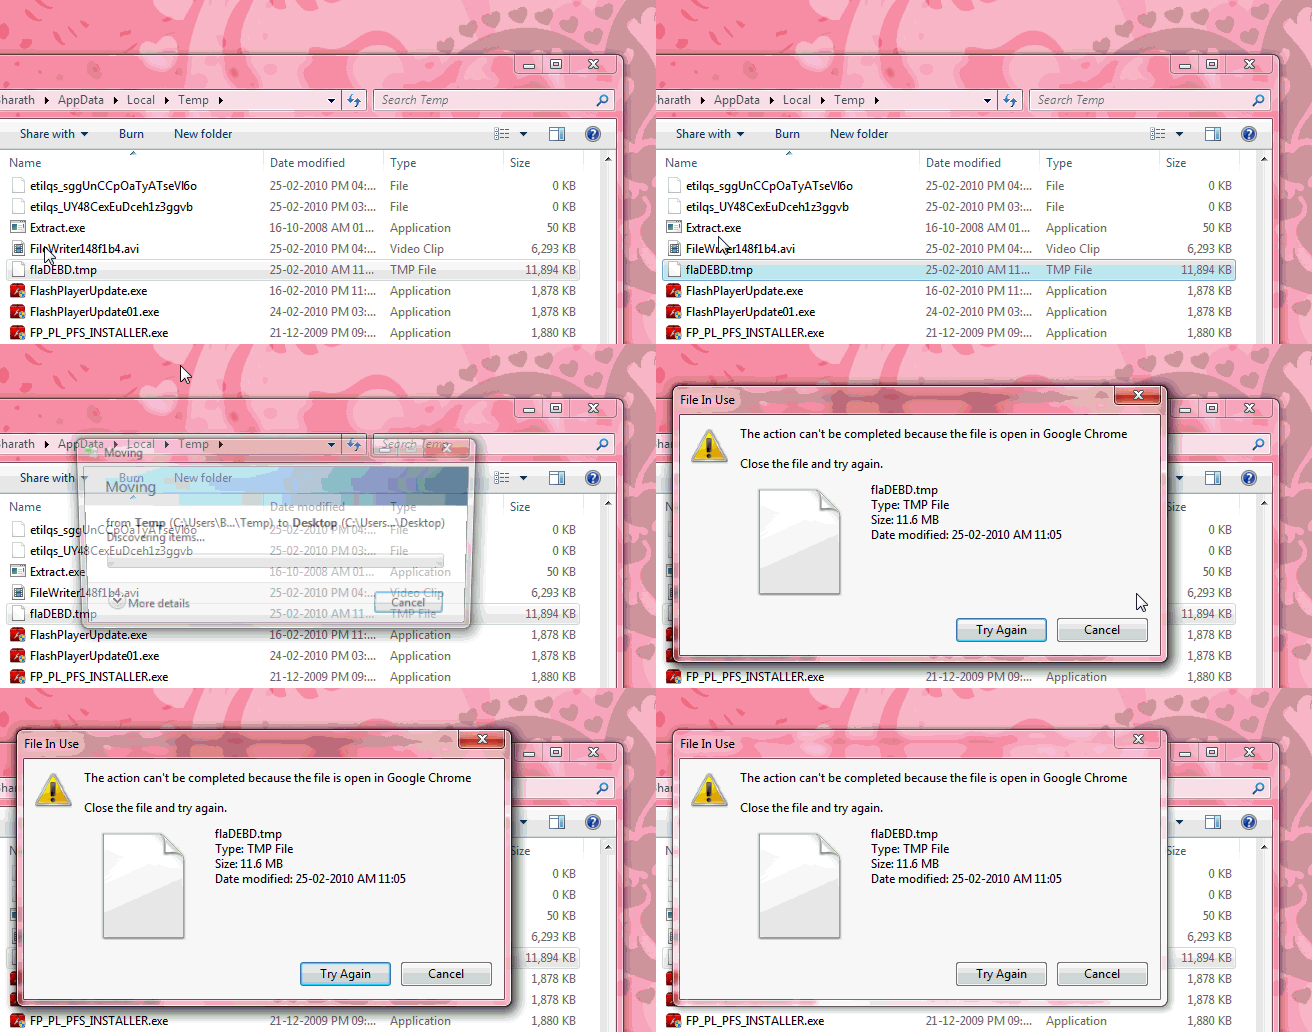
3 Step 3: This is the temp file that we are looking for.If we can copy it to some other location on your PC and rename it as *.flv file, our headache is over, but unfortunately Windows doesn’t allow you to copy a temporary file that is already in use by another application like browser for instance.
The following animated image would reflect the same situation.
4 Step 4: Luckily we have a free open source program called HoboCopy that makes this copying process easier for us.Download the zip file and place HoboCopy.exe in your C:\ drive (or in any directory from where you can actually run this exe file through command prompt).
5 Step 5: Now open Administrator command prompt (Windows XP users can make type cmd in the run prompt but Windows Vista and Windows 7 users have to run cmd.exe using “Run as administrator” from the menu, you can actually figure out the difference between normal command prompt and Administrator command prompt, the window name starts with the word “Administrator” as you can see from the below screen shots.
6 Step 6: Go to C:\ and type the following commands (assuming that you have placed HoboCopy.exe in your “C” drive).
Pass the target file name that you want to copy like flaXXX.tmp at the end of the command.
C:\>hobocopy C:>Users>User Name>AppData>Local>Temp\ G:>FLV-Video> flaXXX.tmp
Replace “User Name” with your Windows administrator user name and “flaXXX.tmp” with your actual target file. In my case the User Name is “Bharath” and the target filename is flaDEBD.tmp
C:\>hobocopy C:\Users\User Name\AppData\Local\Temp\ G:\FLV-Video\ flaDEBD.tmp

Wait till the file gets copied to your target destination.

7Step 7: Now that your required temporary file copied to another folder, you can change it’s extension from “.tmp” to “.flv” so that it can be opened by any player that supports FLV format files.

Download HoboCopy [Sourceforge.net]
Note:
1.The browser I have used here is Google Chrome, you can also refer to our guide on how to download YouTube videos in Google Chrome using greasemonkey scripts.Also make sure that you don’t use Internet explorer 6 for watching YouTube videos.
2.The above whole process has been done in my system which is running Windows 7.The procedure still remains the same for Windows Vista and Windows XP even though there may be changes in the location of Windows Temporary files.
3.HoboCopy actually intended for backing up entire folder(s).But here we are limiting it to just one file by passing the file name argument at the end of the syntax (flaDEBD.tmp in the above pics).So if you do not pass the file name at the end of the syntax, the entire temp folder gets backed up.


