Solve YouTube Rebuffer Problem When You Switch To Full Screen Mode

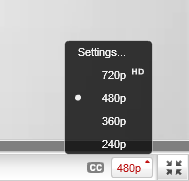
YouTube video resolutions

YouTube lovers on slower internet connection are very much disappointed by a recently changed settings that went into live in the video sharing site. The new settings (known as Auto HD) force the video to re-buffer from the beginning when you switch to full screen mode when watching a video. Just imagine a situation where you load a full video in normal mode in 360 pixels resolution. Now you wanted to watch it in full screen, the video switches from 360p to 480p automatically and starts buffering from the starting point again! Very annoying, isn’t it? Not so much when you are on a high speed internet connection, but if you are on a slow connection, you have every reason to feel so. Though YouTube doesn’t really offer any fix for this, we have few tricks which can solve this issue for you.

Method-1: Changing Settings In Your YouTube Account

Click on the “Settings..” link found atop when you click on the video resolution (240p, 360p etc.) button.
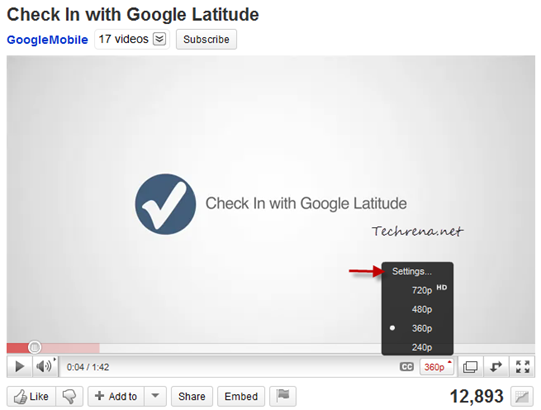
YouTube video resolution settings

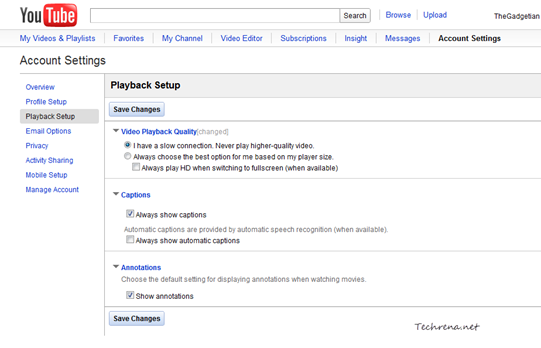
If you are already having an YouTube account, sign in to the account and go to your YouTube account settings page, where you’ll find settings for “Video Playback Quality”. Choose the first option “I have a slow connection. Never play higher-quality video.” and click the “Save Changes” button at the bottom of the page.

YouTube video playback quality settings in account

Now, videos will never get into the higher resolution mode when you switch to the full screen mode. On the downside, this method only works when you play the videos while you are logged into your YouTube account.

Method-2: Using GreaseMonkey Script

Install GreaseMonkey add-on for Firefox and restart your browser. If you are on Google Chrome you need not install any extension.

Install this GreaseMonkey script (YouTube Auto Buffer & Auto HD & Remove Ads) in your Firefox or Chrome browsers and it will take care of the rest. Now test the script by playing and switching any YouTube video into full screen. The problem should have been fixed now!

Display Your Custom Text On Windows Desktop

Windows logo

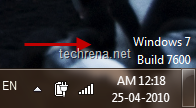
Few days ago we have written a brief tutorial about how to display Windows 7 current version and build number on your desktop (right above the system task tray).The natural question that comes to our mind after performing this trick successfully is :”Can we customize this text so as to display our name for instance?”.

Well, if you have been thinking that way, just stop thinking and read this tutorial and implement it to display your own name on desktop instead of Windows 7 watermark.Follow these steps carefully.

Requirements:

1. You need to know how to take ownership of a file in Windows 7 and Windows Vista.

2. You need to download a small software called “Resource Hacker”.

Download

Steps:

1. Refer to display Windows 7 current version and build number set the settings to display Windows 7 version and build number on your desktop.This is the first step that you need to do.You need to restart your system after this step.

windows 7 build info

2. Once you have completed the above, the remaining task is to change or customise this text.To do this we need to edit the system file called “user32.dll.mui” in  Resource Hacker.
Open windows explorer and copy and paste this in your address bar.

%windir%\System32\en-US

3. If you are using Windows 7 & Vista, the above command will open

C:\Windows\System32\en-US

folder for you.

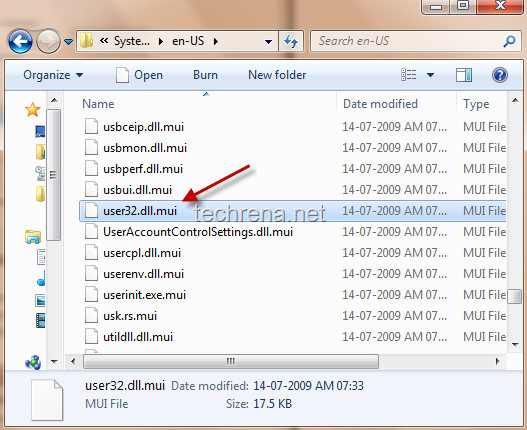
Find the system file called “user32.dll.mui” and take ownership of the files.

user32.dll.mui windows 7

4. Now that you have the ownership of the file with you, you can go ahead and open and edit it in Resource Hacker.Just drag this file into the Resource Hacker window.

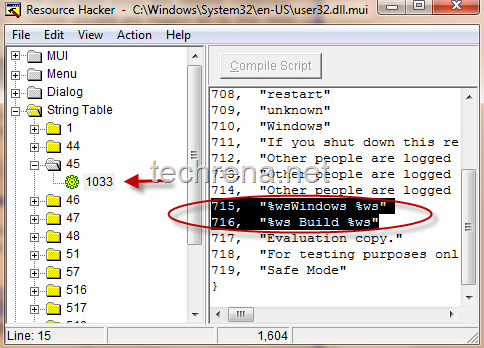
5. In the resource hacker, navigate to “String Table>45>1033”.In the right side of the window, you can see all the values running from 705 to 719.We don’t need to worry about the rest of the values, we just need to edit the values “715” and “716”.As you can see 715 (“%wsWindows %ws”) is responsible for displaying Windows version and 716 (“%ws Build %ws”) is responsible for displaying the build number if your Windows 7.

resource hacker user32.dll.mui edit

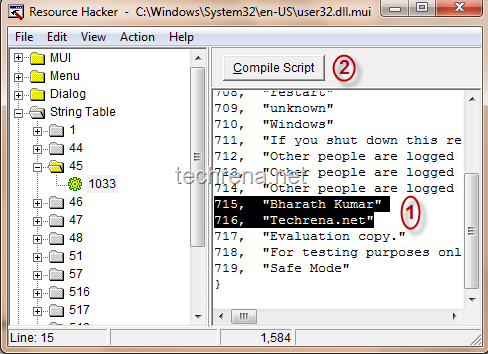
6.Now replace the text inside the quotes(“) in 715 and 716 with whatever text that you want to display on your desktop.

change string table values of user32.dll.miu in resource hacker

Once you have edited it, click “Compile Script” and then save the file (If you don’t have ownership of the file, here you will not be able to save it).

7. You are done, just restart the computer and you can see your own text being displayed instead of Windows version info.

Saving YouTube Videos From Temp File To Your Hard Drive

You must be knowing that whenever you open a webpage, the data in the page would be first stored in your computer’s windows internet cache temporary folder and later retrieved from there.This is true in case of YouTube also.

So whenever you open a YouTube video and let it to stream fully, it will be saved in your Windows temp folders as “flaXXX.tmp” file.So now our hack will be using this concept to save YouTube (or any flash content based streaming site for that matter) directly on your hard drive without needing to install any extensions in your browser.

The Process:

1 Step 1: Go to windows temp folder from the following path:

for Windows vista/ Windows 7:

C:\>Users\>User Name\>AppData\>Local\>Temp\

2 Step 2: As said earlier, the temporary flash files would generally be of the format flaXXX.tmp.In my case the required filename is flaDEBD.tmp.This file contains the flash content from YouTube video that you have just allowed to stream fully.

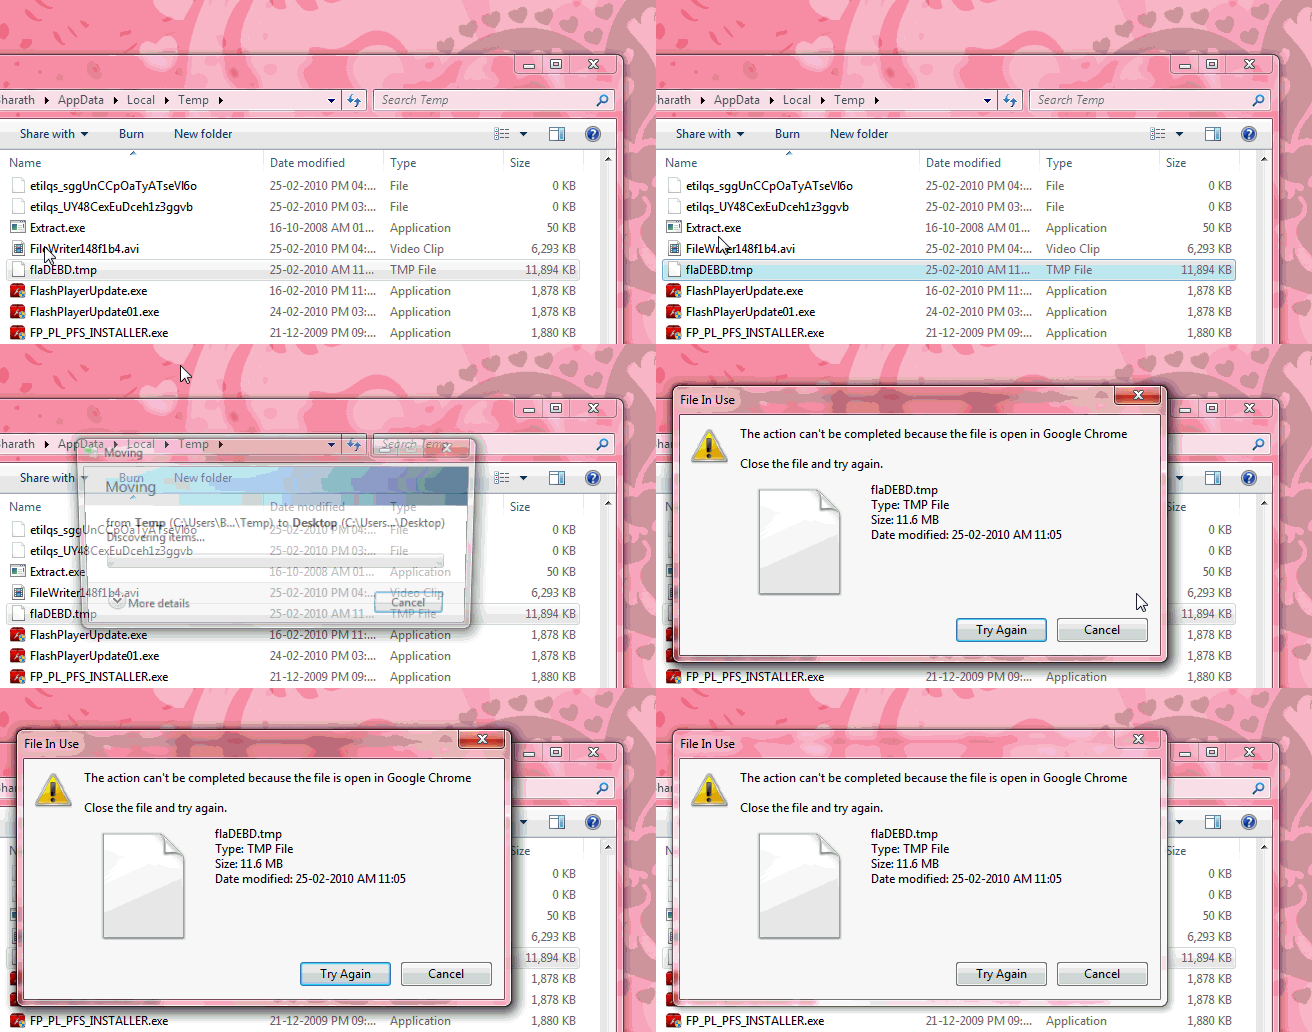
3 Step 3: This is the temp file that we are looking for.If we can copy it to some other location on your PC and rename it as *.flv file, our headache is over, but unfortunately Windows doesn’t allow you to copy a temporary file that is already in use by another application like browser for instance.

The following animated image would reflect the same situation.

Can't copy file

4 Step 4: Luckily we have a free open source program called HoboCopy that makes this copying process easier for us.Download the zip file and place HoboCopy.exe in your C:\ drive (or in any directory from where you can actually run this exe file through command prompt).

5 Step 5: Now open Administrator command prompt (Windows XP users can make type cmd in the run prompt but Windows Vista and Windows 7 users have to run cmd.exe using “Run as administrator” from the menu, you can actually figure out the difference between normal command prompt and Administrator command prompt, the window name starts with the word “Administrator” as you can see from the below screen shots.

6 Step 6: Go to C:\ and type the following commands (assuming that you have placed HoboCopy.exe in your “C” drive).

Pass the target file name that you want to copy like flaXXX.tmp at the end of the command.

C:\>hobocopy C:>Users>User Name>AppData>Local>Temp\ G:>FLV-Video> flaXXX.tmp

Replace “User Name” with your Windows administrator user name and “flaXXX.tmp” with your actual target file. In my case  the User Name is “Bharath” and the target filename is flaDEBD.tmp

C:\>hobocopy C:\Users\User Name\AppData\Local\Temp\ G:\FLV-Video\ flaDEBD.tmp

Command prompt hobocopy

Wait till the file gets copied to your target destination.

Copying windows temp file using hobocopy to another folder

7Step 7: Now that your required temporary file copied to another folder, you can change it’s extension from “.tmp” to “.flv” so that it can be opened by any player that supports FLV format files.

Temp File copying in Chrome using hobocopy

Download HoboCopy [Sourceforge.net]

Note:

1.The browser I have used here is Google Chrome, you can also refer to our guide on how to download YouTube videos in Google Chrome using greasemonkey scripts.Also make sure that you don’t use Internet explorer 6 for watching YouTube videos.

2.The above whole process has been done in my system which is running Windows 7.The procedure still remains the same for Windows Vista and Windows XP even though there may be changes in the location of Windows Temporary files.

3.HoboCopy actually intended for backing up entire folder(s).But here we are limiting it to just one file by passing the file name argument at the end of the syntax (flaDEBD.tmp in the above pics).So if you do not pass the file name at the end of the syntax, the entire temp folder gets backed up.

How To Show ‘Post Excerpts’ Only On Archive Pages In WordPress

If you use a WordPress you would better know that managing archives is very essential in terms of SEO prospective.

It’s a SEO rule that if you don’t use ‘nofollow’ for archive pages, you should use ‘excerpts’ only in your theme archives rather than showing full posts, as it creates the problem of duplicate content for the search engines.

Even though many WordPress themes in recent are coming with just excerpt only pages for archives by default, there are still come classic themes like (WordPress Classic theme for instance) that will show full posts under archive pages.In this post I’ll cover how to disable full posts for archive pages.

[Fortunately for showing excerpts on homepage, we have Homepage Excerpts plugin, but for archive pages, we need to follow the below procedure]

Steps:

This method is very simple and involves a very minor code editing.

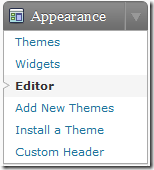
1.First, go to your “Theme editor” page from your WordPress Dashboard.

Theme editor under WordPress dashboard

2.Under the theme files, find and open a template file called archives.php (in some themes, you need to look for tag.php and category.php template files included separately for each type of archives)

In the template file look for something similar to the following line

<?php the_content

Archives php file the_content

3.Replace the above line with, the following line:

<?php the_excerpt(); ?>

After editing:

archives php the excerpt5

Now open your archive pages (tag/category), and you will only see the post excerpts instead of full posts.

Now your archive pages will show first 55 words of the blog post as excerpt.But you can still personalize it.Either you can use ‘Post Excerpt’ field under your WordPress WYSIWYG editor or you use “more” tag present under “HTML” mode in your post editor.

More Tag:

Using ‘more’ tag splits your post into parts, and adds ‘Read More” link

More tag in WordPress Post editorOr use ‘Excerpt’ field under the post editor in WordPress

Excerpt field in WordPress Post editor

Note: If you are using some professional theme, you may not find archives.php or other files in your theme template files.