Are you aware that there are a lot of hidden users in your computer which you do not see in Control Panel. Such kind of hidden users are created by the system for specific uses. For example if you install VMware player to run Windows XP Virtual PC in your Windows 7 PC, then VMware will create a new user in your system for the program to run.
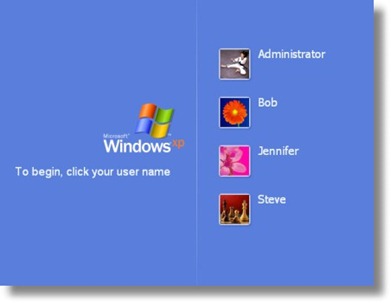
Sometimes we find that after installing a program or virtual machine, even if you have a single User without a password, while startup it may stop in the welcome screen itself. It logs on only when you click on the user. The problem is that even if the users are hidden to you, the system sees it and asks you which user to logon upon each startup. This occurred to me after installing VMware.
Now you can solve any problem with the users in your computer. Read the details further.
Here we use an advanced User management netplwiz to Modify, Disable or Delete any User in your computer.
Using netplwiz you can do many things. Some of the main uses are:
1. Delete a User
2. Modify the user properties, change the level of access like Administrator or Guest etc.
3. Reset Passwords
4. Disable Users
5. Set Secure Ctrl+Alt+Del Logon
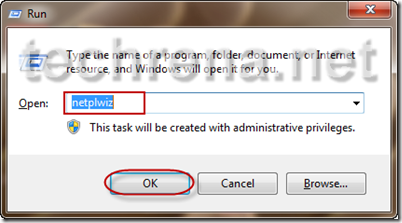
Opening netplwiz User Accounts.
Press Start + R, type netplwiz and Enter.
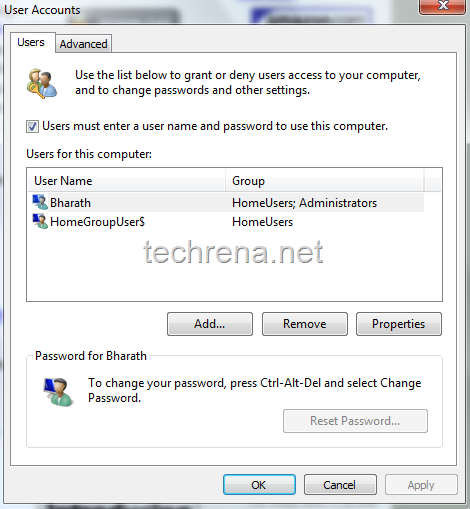
You can see the User Accounts. You can see all the active Users and their Group.
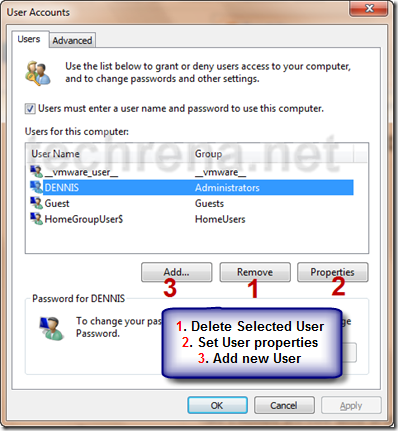
You can Add new users or Remove or Set the properties.
Removing (Deleting) a User.
Select a User and Click on Remove. It will ask for confirmation. Once confirmed all the user and its related files will be deleted permanently.
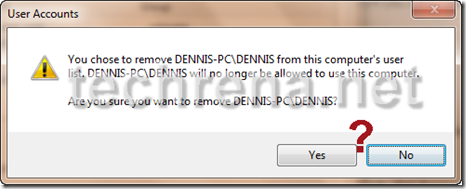
Warning: Make sure that you do not delete any system or program users like the VMware user as seen above. If you do not want any user, you can disable the user instead of deleting it. If you disable the VMware user, it will work fine, but if you delete it, it cannot start any Virtual Machine. See How to Disable a User in Advance User Management Below.
Setting the Properties of a User:
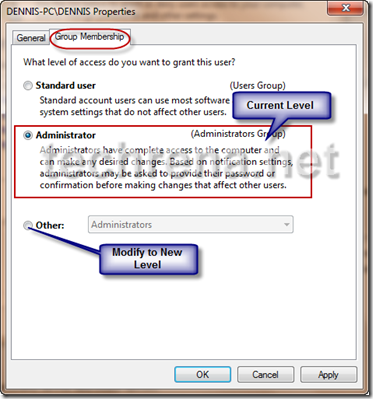
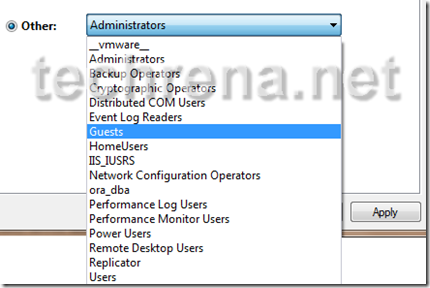
Select the user you want to set the properties. Click on Properties. In the General Tab you can see the Properties. If you want to grant or change the level of access, then go to Group Membership Tab. See the Screen Shot below.
Adding a new user.
You can click on add and type the user name and select level of access(Group)
Resetting A User’s password.
Select the user and Click on Reset Password. It will ask for New Password.

If you are not an administrator then you cannot reset the passwords. Click here to learn how to reset the Administrator password in any Windows PC.
Advanced Properties Tab
In the advanced properties tab you can find advanced user management and secure logon options.
If you want a secure logon feature, which will ask for Username and Password, you can chck the Option in Secure Logon setting.
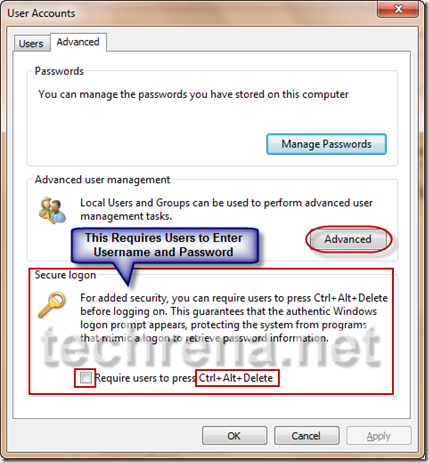
Advanced User Management:
Click on Advanced Button. You can see Local Users and Groups window.
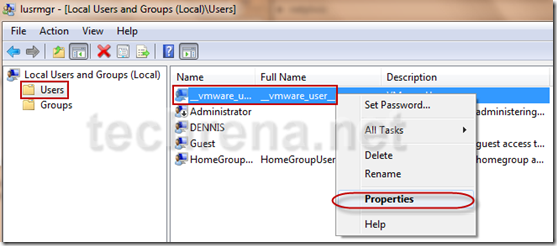
To see the Users Click on Users in the left pane. Now you can set the advanced properties of a user.
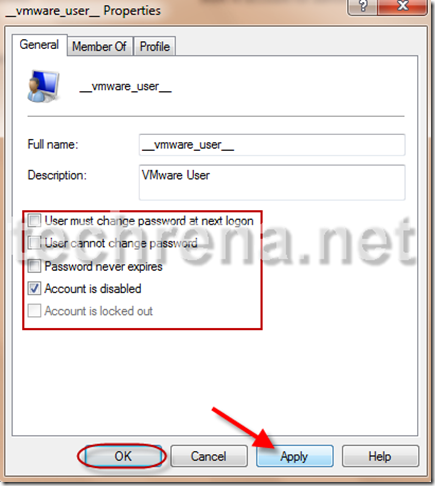
Right Click on a user, Select Properties. Using this you can:
1. Set The user should Change the Password in next logon
2. Set The user cannot change the password
3. Set the Expiry of the password.
4. Disable a user.
5. Lock the user account
If you want to see the list of Groups(level of access) present in your system, then click on Groups in the left pane.
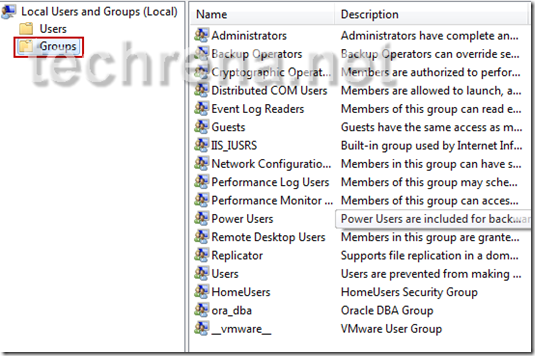
You can see the Group Name and the Description, describing the level of access. Here you can add new users to a specific Group or delete a user from a group. You can also delete a Group.
Now you should be able to manage all the users with ease. Any issues can be raised as a comment below.
PS: All the Above operations were performed as a system administrator. If you don’t have System Administrator privilege you may not be accessible to certain attributes and operations.
