How to Download Video From YouTube in Google Chrome

Google Chrome is becoming popular day by day with the increasing features of customization and user scripts. Using GreaseMonkey in Google chrome is also possible in the newer Version from Google Chrome 2.0 onwards. As for now it stands in the 4th position in popularity.

We know that  to download videos from YouTube is much easier in the case of FireFox, thanks to the number of wonderful add-ons available, but how can we actually do this if you are using Chrome browser, come let’s get into it.

Here we are going to see another user script customization technique for Google Chrome. Everybody uses YouTube for video sharing and all. Now if we want to download the video from YouTube in Google Chrome, we can keep a download link for each video in YouTube. This will download the video in flv format.

YouTube Video Download in ChromeTo Enable the Download Link in YouTube follow the steps below:

Step 1: If you have not enabled GreaseMonkey User Scripts feature in Google Chrome then Enable it using the Guide: Enable GreaseMonkey User Scripts in Google Chrome

If you have already enabled Grease Monkey then skip Step 1.

Step 2: Download the DownloadYoutube.user.js file from the link below: (Right Click and Select Save Link As)

Size: 2 KB

http://www.techrena.net/downloads/Grease%20Monkey/DownloadYoutube.user.js

Step 3: Save the DownloadYoutube.user.js file in your computer location given below:

Windows XP Users:

Documents and Settings\%userprofile%\Local Settings\Application Data\Google\Chrome\User Data\Default\User Scripts

Example: C:\Documents and Settings\DENNIS\Local Settings\Application Data\Google\Chrome\User Data\Default\User Scripts

Windows Vista and Windows 7 Users:

Users\%userprofile%\AppData\Local\Google\Chrome\User Data\Default\User Scripts

Example: C:\Users\DENNIS\AppData\Local\Google\Chrome\User Data\Default\User Scripts
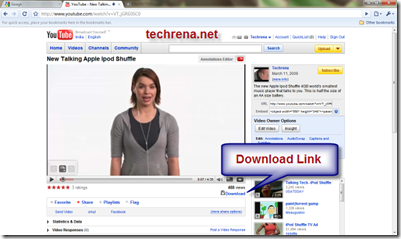
YouTube Video Download in Google ChromeAfter successfully saving the file, open any YouTube Video. You should get the Download Link as shown in the image above.

Important:

1. This method is possible only if you have Google Chrome version 2.0 or higher. To install the Newer version go to: Download Google Chrome 2.0.172.2 Beta Open Source Web Browser

2. It is compulsory for you to enable GreaseMonkey User Scripts for this method to work.

3. You need to show hidden System files and folders in order to find the Application Data folders in Windows Explorer. Otherwise you cannot see them.

Hide Most Visited Sites from New Tab in Google Chrome in Easy Steps

Google Chrome is a web browser developed by Google and based on the WebKit layout engine and application framework. It was first released as a beta version for Microsoft Windows on September 2, 2008, and the public stable release was on December 11, 2008. The name is derived from the graphical user interface frame, or “chrome”, of web browsers. In March 2009, Chrome became the world’s fourth most widely-used browser, with 1.23% usage. In spite of the increasing popularity, chrome lacks user customization and control in some of its features.

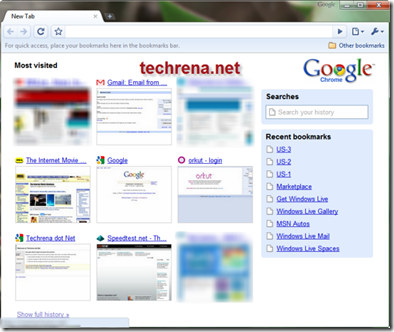
The most visited site of Google Chrome which is displayed while opening a new tab is not under our control, meaning that it will display the top most visited sites in the browser even if we do not want to display some of them as most visited. Most of the users need some privacy settings, like to display the sites which only the users want to display. But as we do not have this control in Google Chrome we are going for this custom technique by using Grease Monkey User Scripts. Till date Google Chrome lacks the feature of customizing the most visited page in new tab, even in the latest version 2.0.174.0 also.

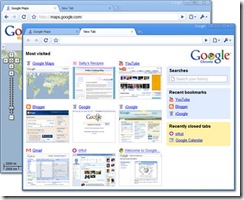
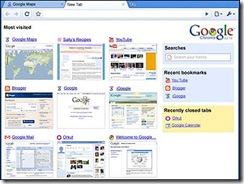
Google Chrome Most Visited site New Tab

It is a simple process. Just follow the steps given below:

Step 1: Enable GreaseMonkey User Scripts in Google Chrome by following the Guide Enable GreaseMonkey User Scripts in Google Chrome

Step 2: Download the Java Script file given below: (Note: Right Click on the link and select Save link as)

Name: NoSpeedDial.user.js

Size: 500 Bytes

Download: http://www.techrena.net/downloads/Grease%20Monkey/NoSpeedDial.user.js

Step 3: After enabling Greasemonkey go to the location below in your computer and save the NoSpeedDial.user.js file in the User Scripts folder:

Windows XP Users:

Documents and Settings\%userprofile%\Local Settings\Application Data\Google\Chrome\User Data\Default\User Scripts

Example: C:\Documents and Settings\DENNIS\Local Settings\Application Data\Google\Chrome\User Data\Default\User Scripts

Windows Vista and Windows 7 Users:

Users\DENNIS\AppData\Local\Google\Chrome\User Data\Default\User Scripts

Example: C:\Users\~User Name~\AppData\Local\Google\Chrome\User Data\Default\User Scripts

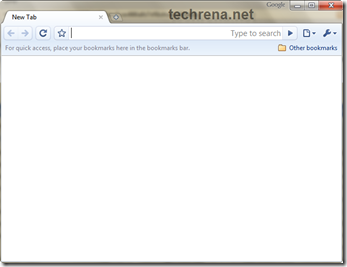
That’s it. Now when you open Google Chrome then you will not find any Most Visited Sites. It will simply show a Blank Page. Even If you click New Tab or Press Ctrl + T then it will show blank page only. No Most Visited sites

important:

1. It is compulsory for you to enable GreaseMonkey User Scripts, otherwise the method will not work.

2. This method will work for Google Chrome Version 2.0 or higher. If you are running a older version then Download the new one and Update it here Download Google Chrome Web Browser

Enable GreaseMonkey User Scripts in Google Chrome

GreaseMonkey in Google Chrome

Greasemonkey is a Mozilla Firefox add-on that allows users to install scripts that make on-the-fly changes to most HTML-based web pages. As Greasemonkey scripts are persistent, the changes made to the web pages are executed every time the page is opened, making them effectively permanent for the user running the script. Earlier versions of Google Chrome did not support Greasemonkey. But from the new version of Google Chrome 2.0, we can make it support Greasemonkey. Greasemonkey can be used for adding new functions to web pages like downloading videos form YouTube or removing the most visited sites from new tab in Google Chrome.

To Enable User Scripts follow the steps given below:

Step 1: Go to the location below in your computer:

Windows XP Users:

Documents and Settings\%userprofile%\Local Settings\Application Data\Google\Chrome\User Data\Default

Example: C:\Documents and Settings\DENNIS\Local Settings\Application Data\Google\Chrome\User Data\Default

Windows Vista and Windows 7 Users:

Users\%userprofile%\AppData\Local\Google\Chrome\User Data\Default

Example: C:\Users\DENNIS\AppData\Local\Google\Chrome\User Data\Default

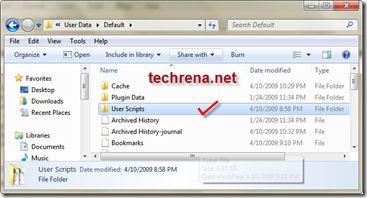
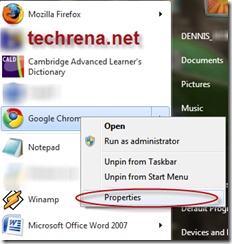
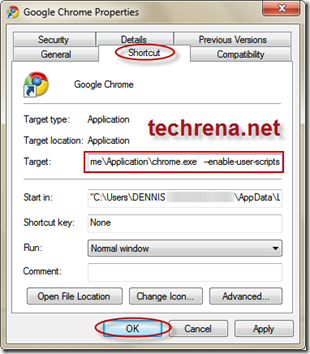
Step 2: In the Default folder Create a new folder and name it as User Scripts. User Scripts FolderStep 3: Now find the shortcuts of Google Chrome in the Start Menu, Taskbar or your Desktop. Right click on it and select properties.

Google Chrome Properties

Step 4:  In the Properties Window go to Shortcut tab and add

--enable-user-scripts

by giving a space after chrome.exe” in the Target text box. Select OK. It is shown below.

Enable Greasemonkey user scriptsNow you can simply save your Grease Monkey scripts in the User Scripts folder that you have created.

For a small test download the script given below in the User Scripts directory

To download Right click and Select Save Link As:

https://techrena.net/downloads/Grease%20Monkey/test.user.js

You should see a Hello World! dialogue when you open Google Chrome from the Start menu or Desktop shortcut. Don’t forget to delete the script after the test has been successfully completed.

Important:

1. GreaseMonkey Scripts will work on Google Chrome 2.0 or higher. To download the new version visit  Download Google Chrome Latest Version

2. You should perform Step 3 for all the Google Chrome shortcuts you have, either in Desktop, Taskbar, or Start Menu.

3. User scrips will be enabled only if you open Google Chrome from a shortcut where you have preformed “Step 3”.

4. For removing a particular Greasemonkey addon, just delete the corresponding user.js file from the User Script folder.

UPDATE on Feb 4, 2010: Google Chrome 4 now officially supports GreaseMonkey User Scripts

Download Google Chrome 2.0.172.2 Beta Open Source Web Browser

Google Chrome is a Open source web browser from Search Engine giant Google.The latest version of the browser, Google Chrome version 2.0.172.2 Beta is now available for download (from April 4,2009).Google Chrome boasts of features and enhancements that make the web faster, safer, and easier.

Google Chrome 2.0.172.2 Beta download


You may also want to remove Google Chrome showing Most Visited sites when you open new tab.

Remove Most Visited Sites from Google Chrome on new tabs

Google chrome,the much settled browser (has been taken out of Beta recently) by now from search engine giant Google boasts of many features.’Most Visited Sites’, which brings all under one tab is mostly discussed among those.Even though many people liked it, but as users were not provided with a feature to remove this feature from their browser, hence it may be annoying at times.Most Visited Sites from Google Chrome

However there’s a little trick to open blank pages in new tabs instead of most visited sites [Even though it may not remove Most Visited Sites].

[UPDATE: There is a much better solution available than this one that makes use of GreaseMonkey user script, check it out at Hide or Remove Most Visited Sites from New Tab in Google Chrome in Easy Steps]

The tick to remove appearing ‘Most Visited sites’ when you open new tabs goes like this:

first type [about:blank] or [javascript:window.open(“about:blank”);void(0)] in your address bar of the browser.

Click on the Star icon on the left hand side right next to the address bar to add this as a bookmark.

Now use Ctrl + Shift and Click on the bookmark to open a new tab with a blank page.google chrome_blank page

You may also edit the home page of the browser in the ‘options’ (add this about:blank as homepage) menu so that a blank page opens instead of annoying most visited sites each time when you start the browser.