Windows 8 Pro Download, Upgrade, and Clean Install FAQs

In my last post you had seen how to download the newly released Windows 8 Pro version from Microsoft. Yes, there are a lot of other question on how do we install it etc. But first of all let me clear some questions which I had in my mind for all of you to see.
Will Microsoft allow Installation of the Upgrade version to any other PC instead of the Windows PC you used while buying the Upgrade key?

YES! Well it is very good in the part of Microsoft that they allow you to keep both Windows 7 and Windows 8 PCs! The FAQs in the Upgrade Offer page says:

“The upgrade offer is tied to a Windows 7 PC purchased between 2 June 2012 and 31 January 2013, but you can choose to redeem the offer and install the upgrade on any compatible Windows-based PC with a qualifying base operating system.”

The last part says “with a qualifying base operating system.” Well this is not necessary when you go for a clean install using the backup media. FYI, the base operating systems Microsoft is talking about is Windows XP, Vista, and Windows 7

Selecting “Keep Nothing” while running Windows 8 Upgrade program mean Clean Install?

NO. Clean install means installing the Windows to a formatted partition, meaning there will be no Data present before. “Keep Nothing” is an option during the Upgrade install where none of your Apps or files will be retained while Upgrading to Windows 8 from your previous Windows.

I selected Keep Files or Keep Apps instead of Keep Nothing while purchasing the Key. Will I be able to do a clean install from the backup media?

YES. Those options are valid only if you upgrade using the Windows 8 Upgrade program. Once you choose to create media instead of Install, those options are no longer  relevant.

I want a 64-bit Windows 8 Pro, but my eligible PC is running 32-bit Windows. Will I be able to get and Install a 64-bit with the upgrade key I purchased?

YES. The upgrade is common for both 32-bit and 64-bit, meaning it works for both. You can download a 64-bit Windows 8 Pro with your key but only from a 64-bit Windows PC. This is because the Upgrade/Setup program will downloads the version which is only compatible to your Base OS. You can follow my last post on How to download Windows 8 Pro.

If you have any other questions while Installing or upgrading to Windows 8, do let me know. Just leave a comment below.

[Tip] Remove Unnecessary Items In Firefox Right-Click Context Menu

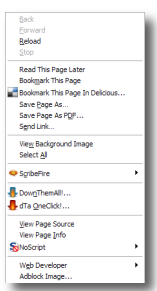
Firefox context menu

One main reason for Mozilla Firefox to get popularity among the internet audience is the comfort ability of adding our favorite add-ons from a host of add-ons available at Mozilla add-ons gallery. But sometimes when you install an add-on, they also add some items to your context menu in Firefox. When you go on installing more add-ons, the number of context menu (which appears when you right-click on any webpage inside the browser) items will become so huge that you can’t even spot the correct menu item at the first sight.

Wouldn’t it be good if we have a control over this context menu items and customize it and remove the unnecessary items from the context menu ? You can actually do it for yourself in two ways. The first and easy option would be to grab an add-on that lets you manage your context menu items. The second way of working around this needs a more of your effort and time. I’m here briefing both the methods, but I strongly suggest you to use the first method, second method is only for those enthusiasts out there who don’t like simple solutions Smile

Method-1:

1. Download Menu Editor Firefox add-on (currently works with Firefox 2 &3) , click “Add to Firefox” and allow it to be installed on your Firefox and restart the browser.

Add to firefox

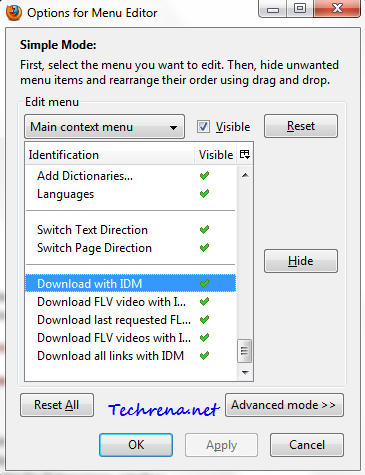
2. Hit Ctrl + Shift + S button to open the Menu Editor options dialog.

Menu editor options

3. Change the items in the menu editor options as you wish (you can click “Hide” button to remove it from the context menu). Alternatively you can rearrange the items to change their order. You can make use of this to Chrome-like options menu for context menu. In Chrome as you know, “Open link in new tab” comes ahead of “Open link in new window” option (reverse in case  of Firefox). You can use this add-on to change your Firefox context menu look similar to that of Chrome and other browsers.

Firefox new tab optionsFirefox new tab options after using addon

4. Click Apply to apply the changes and click OK to close the dialog box.

You will see the changes once you restart your Firefox.

Method-2:

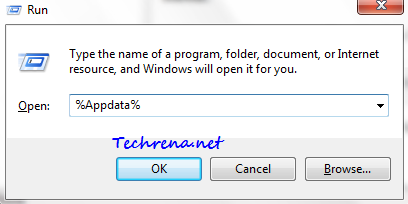
1. Press Start button + R to open “Run” command window and key in %Appdata% in the field and press Enter.

Run command

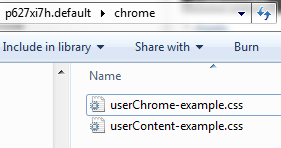
2. A new window will open containing a lot of folders. Navigate to Mozilla > Firefox > Profiles > <default profile folder> > chrome folder.

userChrome.css examples

3. Create a new file called userChrome.css (notice the uppercase ‘C’)inside the chrome folder.

userChrome.css file

4. Open the file userChrome.css in any text editor and add the following lines to it:

#id1, #id2 { display:none !important; }

5. Replace each of the identifiers #id1, #id2,.. with one of the selectors from this Firefox context menus list.

For instance, if you want to disable “View Page Source” and “View Page Info” items from your context menu, you should use the following code:

#context-viewsource,
#context-sep-viewinfo {
  display: none !important;
}

Similarly if you want to remove “Set As Wallpaper…” and “Set as Desktop Background…” menu item in the context menu, that appears when you hover on any image on a webpage, you should use the following code:

#context-setWallpaper,
#context-setDesktopBackground {
  display: none !important;
}

To remove the “Open Link in New Window” menu item, use:

#context-openlink {
  display: none !important;
}

And you can use your custom based on the selectors from the Firefox context menus list.

If something goes wrong just close the browser and delete the userChrome.css file from the chrome folder.

[How To] Save Office 2010 Document As A PDF File

Microsoft Office 2010

It’s quite common nowadays that we convert any document into a PDF file , as PDF files are really portable and can be opened on any computer running on any OS with light weight and free software (like Foxit reader for instance). PDF is also the standard file format that is mostly being used for e-books, other official release and taking printout of the documents as the elements inside the PDF file can’t be edited and will uphold their properties unlike other documents which can be easily edited or sometimes even render in a different way in different computers.

After assessing the quick popularity that the PDF file format is getting among the users, Microsoft was supposed to include a direct “Save as PDF/XPS” option in Microsoft 2007 itself, but Microsoft was apparently chose not to do so because of threat of lawsuit from Adobe. However, they were offering such feature in Office 2007 via “Save to PDF” & “Save to XPS” add-in.

Now I guess many of the users like me has already started using Microsoft Office 2010. The good news is that you no longer need to install any add-on for your Office 2010 as, Microsoft has officially included an option to save any document as an PDF / XPS file.

There are two ways in which you can save a file in Microsoft Office Word 2010 into an PDF or XPS file.

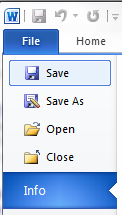
Option 1: Just open the file that you want to save it as PDF and click Save (or Save As) button.

Save_file_office_2010

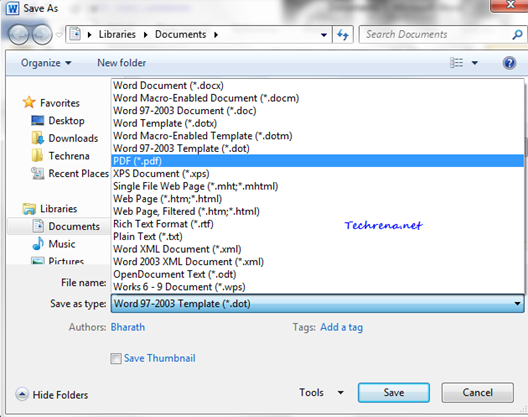
Once you click on Save button, you will be asked to choose the location where you want to save it and the type of file you want it to be. Choose the PDF (*.pdf) from the drop down and click Save.Save file as PDF in Word 2010

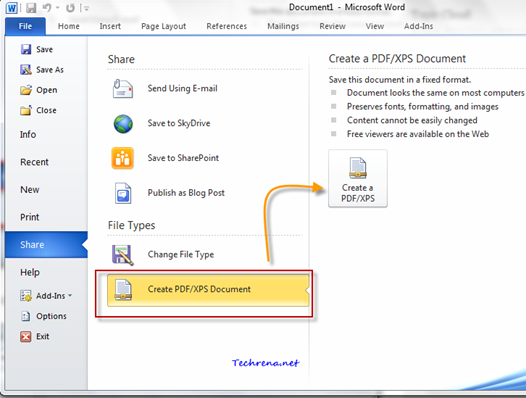
Option 2: Open the file that you want to convert, click on the “File” icon and click on the “Share” button in the menu. Now click on “Create PDF/XPS document “ and click on “Create a PDF/XPS” button on the right hand side.

Share as PDF or XPS document in office 2010

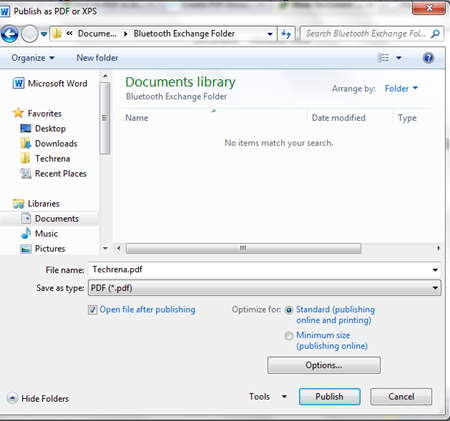
In the next step, choose the location where you want it to be saved.

Save as PDF in Word 2010

PDF saved with office 2010

Bonus Tip:

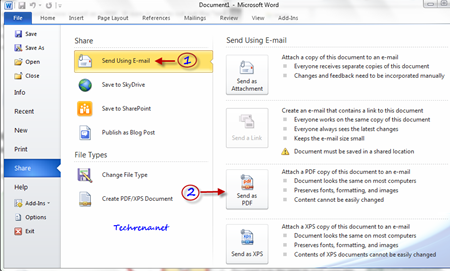
To convert the document into PDF and send it as an email attachment in MS Office 2010 (via Outlook 2010), just click File > Share > Send Using Email and then select Send as PDF option.

Send Email as PDF in office 2010

In this way you can convert any document to PDF file using in MS Office 2010 (Word 2010 and Excel 2010 have this Save As PDF option built-in).

[How To] Type The Rupee Symbol Using Your Keyboard

Indian_Rupee_symbol

With the release of the Rupee symbol (`), everyone in India is excited and curious of how to use this new symbol. Well, here we are suggesting a unique way of how to type this new symbol using your keyboard.

With the release of the Rupee font by Foradian Technologies, it is easily possible to type the new symbol in your computer.

Follow the simple steps below:

Step 1: Download the Rupee font from the link below:

Download: Rupee Font Version 2

Size: 60KB

Step 2: Copy the Rupee_Foradian.ttf file from the location you have saved.

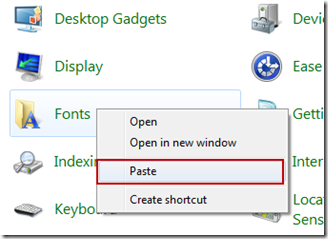
Step 3: Go to Control Panel with non category view. Find Fonts, right click and paste. The font gets installed automatically.

install_font

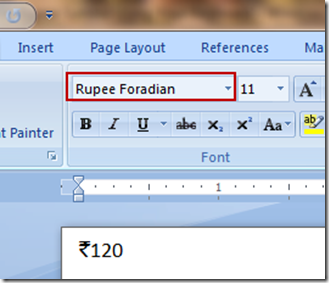
Step 4: Now you can use the ‘~’ key which is in the left of ‘1’ key to type the font. First, whenever you want to type the Rupee symbol, change the font to Rupee Foradian and press the ‘~’ key without shift.

type_rupee_symbol

After typing the symbol, you can change the font to the normal one. We are hoping that this symbol is included in the keyboard soon. Hope you have got to know how to type it now at least for the time being.

[How To] Enable All Tabs Preview In Firefox 4

firefox logo

As Mozilla has made Firefox 4 Beta to be available publicly. My Firefox lovers have already downloaded it and managed to get a first look of what’s in store for the upcoming Firefox 4. Whie we still learn about all the major and minor features introduced in Firefox 4, we thought we would share this minor and handy feature that may interest you. This feature is called “All tabs preview”. It is similar to taskbar-tabs preview, but built right into the Firefox without needing to install additional add ons. By default this is not active in Firefox 4.0, but you can always activate it by following the steps briefed below:

All_tabs_preview_firefox_4

Steps:

1. Type “about:config” in your Firefox address bar and press enter.

2. Accept the warning that you get under “This might void your warranty”. Click on “I’ll be careful, I promise”.

this might void your warranty firefox

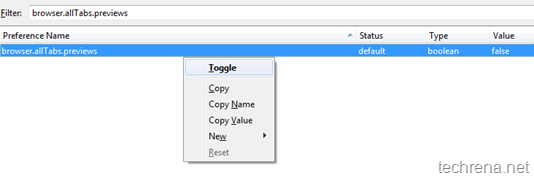
3. Now type “browser.allTabs.previews” and look for a entry with the same name (Preference Name).

All_tabs_preview_firefox4
By default, this has been set to “false” which disables the All Tabs Preview feature in your Firefox 4. To enable this, double click on it or right-click and choose “Toggle”, change the value to “True”. Close the about:config window.

4. You can now spot a new “List All Tabs” icon at the top right hand side, just below the close icon of your window. click on the icon to see the preview of all the opened tabs of your Firefox.

All tabs preview firefox 4 icon

To disable this feature, go back to the third step and change the value of browser.allTabs.previews back to “false”.

Tip: Learn how you can run two different builds of Firefox on the same computer.

[How To] Disable or Enable Registry Editor In Windows 7

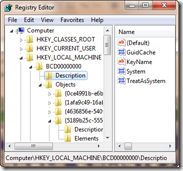
regedit

With viruses trying to attack your system and change the registry, why don’t we try disabling the registry editor now itself before the viruses do it?

Yes, this question is a clear one and why don’t you disable the registry editor by yourself before someone changes your registry and mess with your computer.

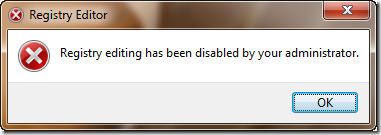
regedit_disabled Well we have a lot of methods to disable or enable the registry editor. Some of the easiest ones are given here.
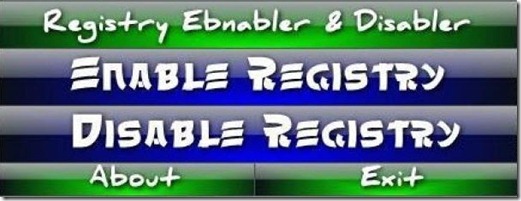
1. Disable or enable Registry Editor using Registry Enabler & Disabler 3

Registry Enabler & Disabler 3 is a freeware which can be used to enable or disable Windows Registry editor. It is a safe program.

Download: Registry Enabler & Disabler 3

Size: 276 KB

Registry_Enabler_Disabler_3

By using this program, you can directly enable or disable the Windows registry editor.

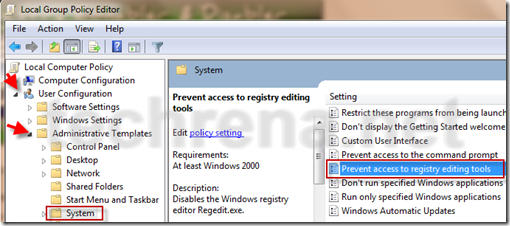
2. Disable or enable Registry Editor using Local Group Policy Editor

Press Start + R and type gpedit.msc and press Enter.

In the Local Group Policy Editor go to the location:

User Configuration—> Administrative Templates—> System

Under System, find Prevent access to registry tool. Double click on it and set Enabled to disable access to registry editor.

disable_registry_editor

Set it to Disabled to enable access to Registry Editor.

Note: Local Group Policy Editor which is not available in Home versions of Windows

3. Enable Registry Editor Using VBS script.

This method is given in techrena.blogspot.com. To read more visit:

How to enable Registry Editor (REGEDIT)

You can subscribe to our RSS feed via email for more tutorials under Solutions.

How To Deal With “Firefox is already running..” Error ?

You might have observed this error message many times while trying to open Firefox too soon after it was closed or may be due to closing Firefox abnormally (without deleting the lock file) or not shutting down the Firefox properly or when your Mozilla can’t find profile folder in the expected location

“Firefox is already running, but is not responding. To open a new window, you must first close the existing Firefox process, or restart your system.”

Firefox not responding

An article in Firefox Knowledge Base explains why this error occurs:

This error can occur in Firefox 3 because of a delayed shutdown, if you try to reopen it too soon after it was last closed

Solution 1 : End processes

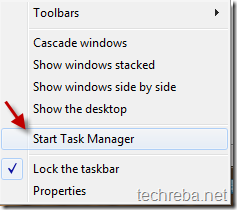
The one popular and easiest solution to this is to kill the process in the Windows task manager.To do this right click on your Windows taskbar and choose “Start Task manager”.

start task manager

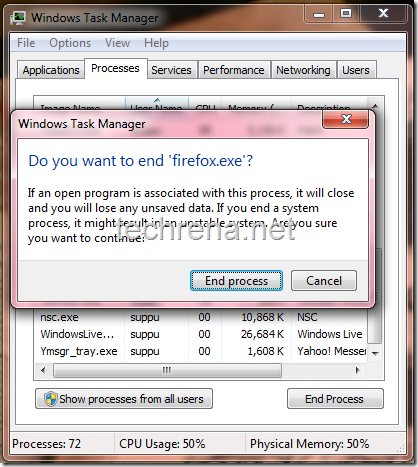
Locate the process called “firefox.exe” (each instance of Firefox when running multiple pages) in under the processes tab:

processes in Task manager

Right click on the process and choose “End Process” or simply use “delete” from your keyboard.

End a process in Task manager

And now re open Firefox browser and it’ll also recover tabs from your last session that you have just ended abruptly by stopping the firefox.exe process.

Solution 2: Remove the profile lock file

This requires finding the location of the Firefox profile in your computer and deleting the lock  files under your profile.

Step 1 :

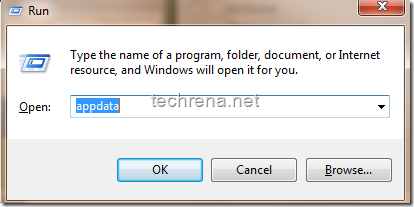
Press Windows+R button to open run command prompt, type “appdata” and click ok

appdata run command


Step 2:

Now a windows explorer window will open up then navigate to the following folder by the give paths:

C:\Users\<user name>\AppData\Roaming folder  — Windows 7 and Windows Vista

C:\Documents and Settings\<user name>\Application Data folder – Windows XP and Win 2000

Navigate to Mozilla >Firefox >Profiles from there

Step 3:

Delete the file “parent.lock” from your profile folder.

parent lock firefox profiles

via [Matt Cutts]

Note:

The methods given here are exclusively for Windows based systems.

Note that this will only solve the current issue with Firefox, however we can’t guarantee that Firefox will not behave like this in future.

Blogger ‘Blog Pages’ Allows You To Create Pages In Blogger

Blogger has just rolled out another feature which has been available in blogger in Draft till now.

This one of the most requested features in Blogger.Now you can publish static information on stand-alone pages like you can create “About Us” or “Contact Us” or “Privacy Policy” pages on blogger (like you do in WordPress) easily.

You can have at most 10 pages in your Blogger blog.Writing these pages is very similar to the way you normally do in the case of posts.

This tutorial guides you to create a simple static page in you Blogger.com blog.

STEPS TO FOLLOW:

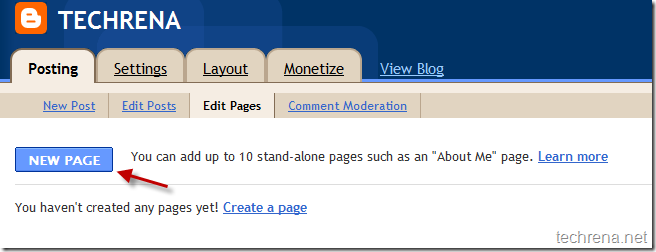
Step 1: Visit Dashboard of your blog in blogger.com and go to the “Posting” tab, under which you find “Edit Pages’ tab

new page link in dashboard

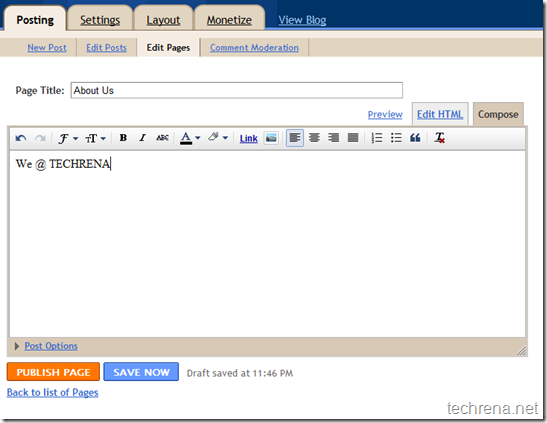
Step 2:Click on “New Page’ to start composing a new page like “About Us” for instance.Similar to writing a new post.Hit the “Publish Page” button once you are done with writing.

Composing new page in Blogger dashboard

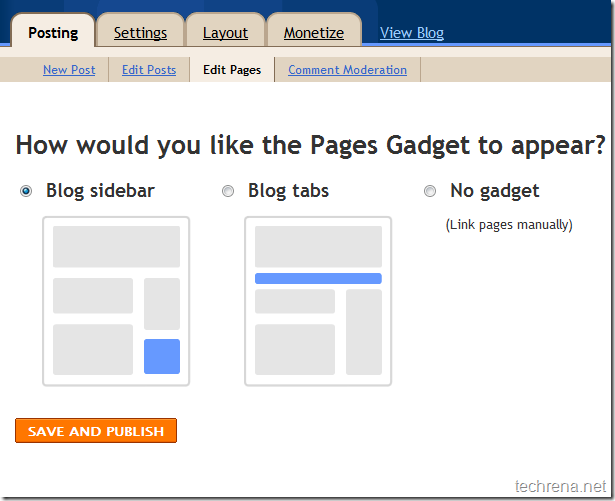
Step 3: Now choose the position where you want the Pages Gadget to appear.You can either chose it to appear along the blog sidebar or on the blog tabs.

Blogger Page Gadget

Pages Gadget in Blogger

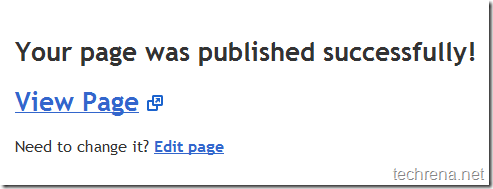
Step 4: Now you can see the page you have composed in browser.

Blogger page published

published page in Blogger test in browser

If you have liked this, why not take time to read about our guides on Optimizing Blogger blogs for better SEO.

Swapping Blogger blog title and post title -Blogger SEO tweak

How To Verify Blogger blog in Webmaster Tools

WInRAR 3.80 Free Licence Key Giveaway

Well, WinRAR is the best file archiving tool that I have ever used.WinRAR works well with RAR, ZIP archives and can also be used in unpacking ARJ,LZH,TAR,GZ,ACE,UUE,BZ2,JAR,ISO,EXE,7z, & Z archives.WinRAR started supporting Windows Vista from version 3.70 and the latest version WinRAR 3.90 support Windows 7 as well.

The WinRAR version for which you can get key through this process is ‘version 3.80’.The key obtained through this tutorial is absolutely legitimate and it is offered by a German tech magazine.

Follow These Steps:

  • Step 1: Download Winrar 3.80
  • Step 2: Visit this German proxy site, as the offer is valid only in German and hence we have to use proxy with German server and not any other proxy site like hidemyass.com.

Proxy site LINK

  • Step 3: Enter this URL ‘https://covermount.win-rar.com/pcwelt0310/’ in the form and hit  ‘GO’ button.
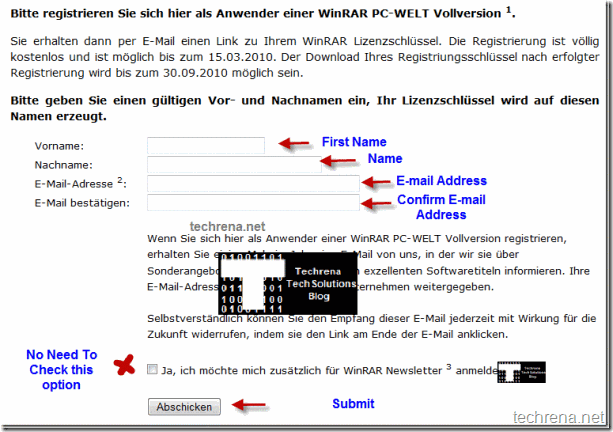
  • Step 4:  Now it’ll take you to the German website, scroll down to the registration form as shown in the screen shot

WinRar Free Licence Give away site Regsitration form in Germany

Checkout this image, which shows the same page in English if you are still finding it difficult to fill-in.

  • Step 5: Enter the your details in the form follow the above screen shot for reference and you can either check or uncheck the option below the form(that’s for subscribing to their newsletter) and click the button which reads “Abschicken” (which means ‘Submit’ in German).
  • Step 6: Check your email, and find the link similar to below:

https://covermount.win-rar.com/pcwelt0310/download.php?email=user@mail.com

[Your email address would be present in place of ‘user@mail.com’]

  • Step 7: Open the link in new tab and this open a webpage where you’ll find a download link:

Downloading WinRar key REG file

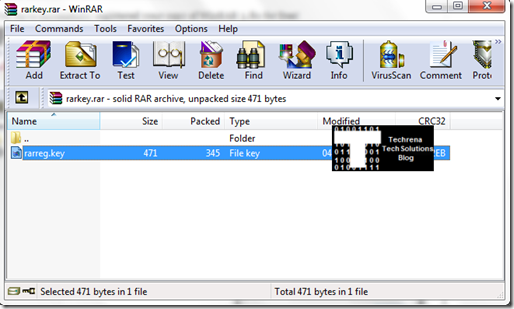
  • Step 8: You will be asked to download a file called “rarkey.rar” which contains rarreg.key which is the key that you wanted.

WinRAR key file in rarkey

Now double click the key file to install the key and now you have a full licensed WinRAR 3.80 version and this key is valid till 30.09.2010.

Leave a comment if you have any troubles while going through these steps.

Remove Most Visited Sites from Google Chrome on new tabs

Google chrome,the much settled browser (has been taken out of Beta recently) by now from search engine giant Google boasts of many features.’Most Visited Sites’, which brings all under one tab is mostly discussed among those.Even though many people liked it, but as users were not provided with a feature to remove this feature from their browser, hence it may be annoying at times.Most Visited Sites from Google Chrome

However there’s a little trick to open blank pages in new tabs instead of most visited sites [Even though it may not remove Most Visited Sites].

[UPDATE: There is a much better solution available than this one that makes use of GreaseMonkey user script, check it out at Hide or Remove Most Visited Sites from New Tab in Google Chrome in Easy Steps]

The tick to remove appearing ‘Most Visited sites’ when you open new tabs goes like this:

first type [about:blank] or [javascript:window.open(“about:blank”);void(0)] in your address bar of the browser.

Click on the Star icon on the left hand side right next to the address bar to add this as a bookmark.

Now use Ctrl + Shift and Click on the bookmark to open a new tab with a blank page.google chrome_blank page

You may also edit the home page of the browser in the ‘options’ (add this about:blank as homepage) menu so that a blank page opens instead of annoying most visited sites each time when you start the browser.