[How To] Remove The “Test Mode” Watermark From Windows 7

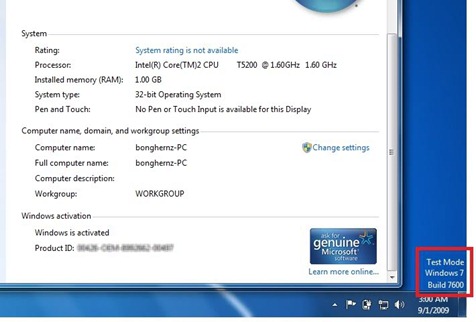
Test Mode Windows 7 Watermark

Legitimate Windows 7 users who are using the original and activated copies of Windows 7 versions are lately getting kind of weird “Test Mode Windows 7 Build 7600” watermark/message on the bottom right corner of their desktop just above the time zone area in the taskbar. This is really annoying as it appears suddenly anytime, users hardly knowing anything about the reason why it’s being showed up.

This message may appear when you follow one of the methods to disable driver signature checking in Windows 7. While implementing the method you may accidentally use the following commands

bcdedit.exe -set loadoptions DDISABLE_INTEGRITY_CHECKS

bcdedit.exe -set TESTSIGNING ON

and these commands are found to cause this problem. Having known the cause of the problem, we just need to do the reverse (enable “Integrity_checks” and set “Testsigning” off). Let’s see the full solution to disable this message on your Windows.

Solution:

1. You need to first run the command prompt as an administrator before you could proceed to the next steps. Refer to this old post at Techrena to know how you can run the command prompt program as an administrator.

2. In the command prompt window type the following command

bcdedit.exe -set loadoptions ENABLE_INTEGRITY_CHECKS

and press enter and you must see “the operation completed successfully” message

now enter the following command and hit Enter again

bcdedit.exe -set TESTSIGNING OFF

and again you should get the same above success message. Refer to the screenshots posted below:
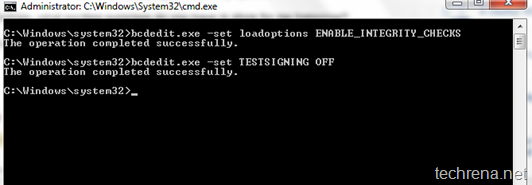
removing test mode cmd

3. Reboot your Windows and see the changes, the “Test Mode Windows 7 Build 7600” watermark disappears. That’s all.

[How To] Make Older Programs Compatible With Windows 7

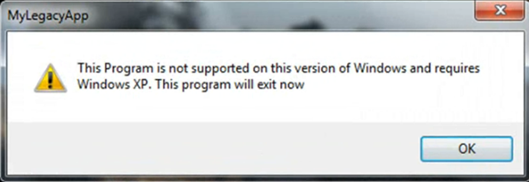
program not supported in Windows 7

Many users still use Windows XP and not upgrading it to the Windows 7, the one reason that we can think of is that they are worried about their favorite programs that they run in Windows XP without any issues might fail to run smoothly in Windows 7. While this may be true to some extent but the truth is that Windows 7 does offer a way to run these kind of programs.

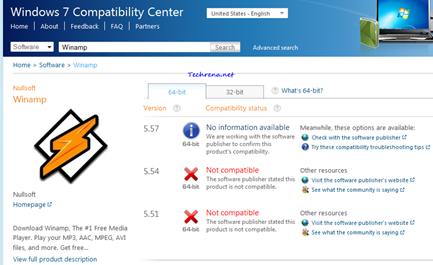
It is always suggested that you check the compatibility of the program that you want to run, at Windows 7 Compatibility Center.

Windows 7 compatibility center program check

Let us look at the alternatives that let us run older software in the newer Windows 7:

1. Run the latest version of the software: It sounds straightforward and easy, the fact that almost all the software makers who produce programs intended for Windows XP upgrade their versions to make them compatible with Windows 7. Hence you should always find the latest version of the software before you decide to run it on your Windows 7 machine.

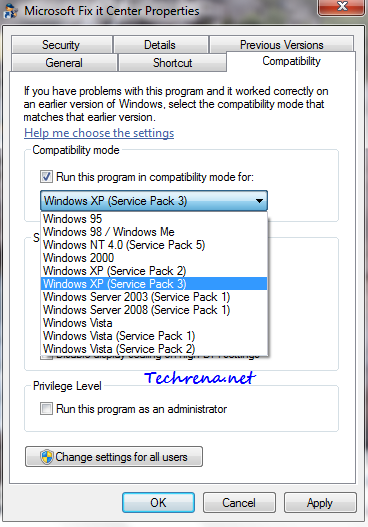
2. Using Compatibility Mode: As I said earlier, Windows 7 does have compatibility mode to run programs in compatibility mode for all the way back to Windows 95 to the Windows Vista (Service Pack. You can easily run any Windows XP based program using this feature in Windows 7.

Run windows xp compatibility mode in Windows 7

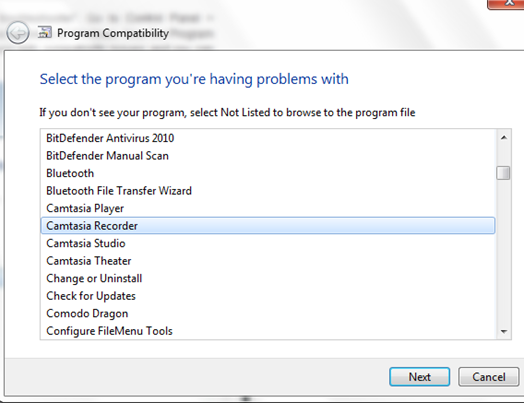
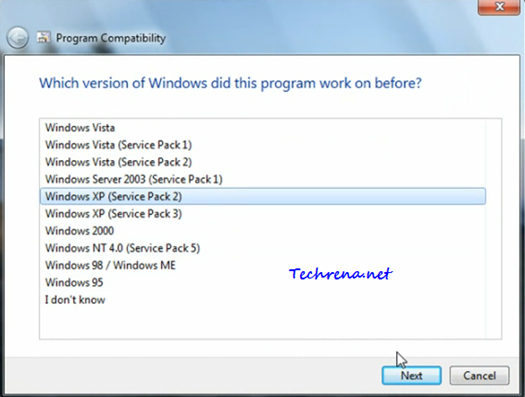
3. Another alternative is to use “Program Compatibility troubleshooter”. Go to Control Panel > Troubleshooting > Click “Run programs made for previous versions of Windows. Now the Program Compatibility wizard opens up and scans for the programs with compatibility issues and you can then select the program for which you want to changes in compatibility settings.

Program Compatibility wizard

Program compatibility in Windows 7

4. Using Windows XP inside Windows 7: Consider this option if all the above alternatives discussed fail. You can use Windows XP along with your Windows 7 in two ways: 1) Install Windows XP in another drive and dual boot it with Windows 7 2) Use Windows 7 Virtual PC and Windows XP mode in your Windows 7 PC.

[Download] Google Chrome 6 (Stable) Offline Installer

google chrome logo

Google Chrome has recently celebrated it’s second birthday and it’s has been a great journey so far for the most simplest browser in the world. Google is all proud to release Google Chrome 6 stable version of the browser. The latest version available as of the time when this post is written is 6.0.472.53.  Stable version of the Google Chrome 6 can be downloaded now from Google.com/chrome.

Google Chrome 6 poster

Google Chrome 6.0.472.53 includes the following new features and updates:

  • New Updated User Interface
  • Form Autofill
  • Extensions and Autofill data Sync
  • http:// will not be shown in the address bar
  • “Go” button Chrome_go_buttonhas been removed
  • Increased speed

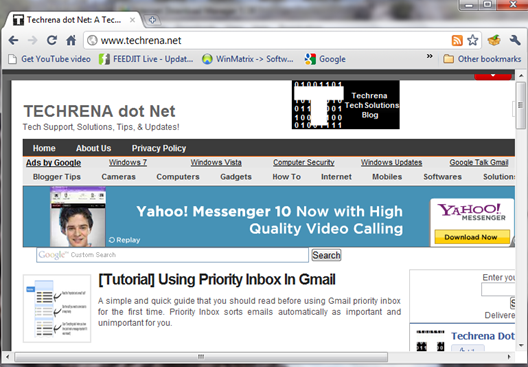
Screenshots:

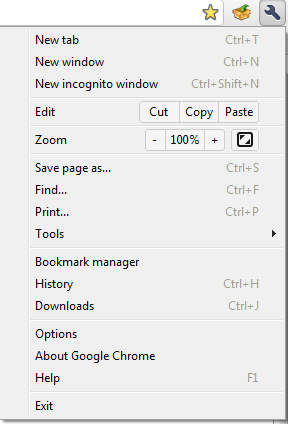
Google Chrome 6 screenshot

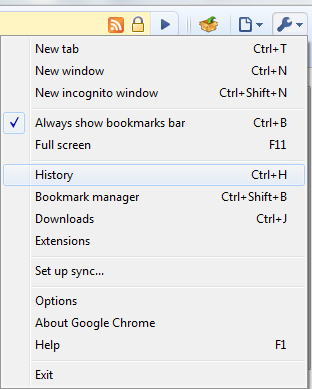
Settings comparison: Google Chrome 5 Vs Google Chrome 6

Chrome 5 settingsChrome 6 settings

Download Google Chrome 6.0 Full Offline Installer:

Even though this new version can be easily downloaded from the Google chrome online installer which automatically downloads and installs Chrome on your Windows and Mac, at times offline installer is what you want to use it on the other computers without needing to download again and again.

We have found a link for the Google Chrome 6 (Stable) standalone offline installer which is 19.52 MB in size. Use the direct download link included below to download it.

Google Chrome 6.0 Offline Installer

[Tutorial] Using Priority Inbox In Gmail

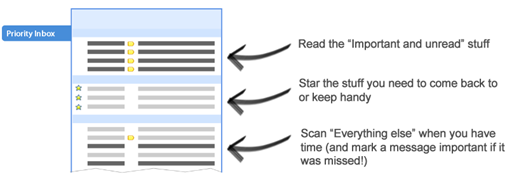
Gmail priority inbox overview

Google has just launched this brand new “Priority Inbox” feature inside their popular email service Gmail. The above an illustrative image taken from the official Gmail blog shows the quick overview of the what this new feature has to offer for you. If you are one of those who gets thousands of emails most of which are “not really” important, Gmail’s priority inbox lets you organise them in a better way by showing the emails that you should probably be reading first in a sorted manner based on your priority and on Gmail’s knowledge of picking the important mails based on your reading over the time. Without wasting much time, lets get straight into the details on making it ready for the first time for your inbox.

Steps:

Find “New! Priority InboxBeta” link in red at the top right corner of your Gmail inbox window.

New priority inbox

When you click on the link, a window with a video pops up, quickly go through the video to get to know about this new feature or you may totally skip it as well.

Click on “Try it now!” link at the bottom of the video and you will be shown a initial configuration window.Priority inbox beta getting started

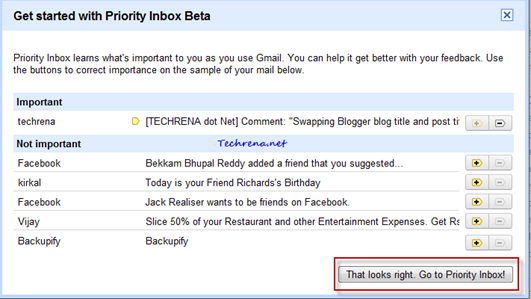
The window will show some of your mails that Gmail thinks as “Important” or “Not Important”. If any one of the mails are shown in the wrong category, you can tell the Gmail it by clicking on the appropriate buttons : click on minus sign Priority minus signin case if the mail is wrongly placed in the “Important” category and click on plus signPriority plus signif there is any wrong mail in the “Not Important” category.

Once you have done the required changes, click on the “That looks right. Go to Priority Inbox!” link at the bottom of the window. Be patient until priority inbox gets activated for you.

Activating Priority inbox

Priority inbox first use

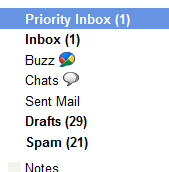
Here you go…Priority inbox has been activated and a new “Priority Inbox” label appears just above the classical “Inbox” label inside your Gmail.

Priority inbox label

And here’s how your new priority inbox should look:

Gmail Priority inbox look

It will have three sections: “Important and unread”, “Starred” and “Everything else”. You can still click on Priority plus and minus signsat the top of your mail to train Gmail work smart in choosing the important and unimportant mails for you.

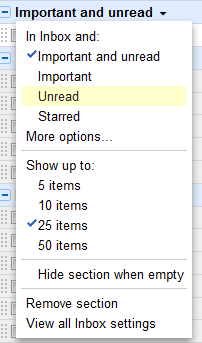
You can still customise your inbox from the pop-up window that appears when you click on any of the sections mentioned above. For instance, if you click on the down arrow present next to “Important and unread” label, you will see the following set of options:

Priority inbox pop-up options

Let us know your feedback on the new Gmail priority inbox through your comments.