How to send webpages from Google Chrome to your phone?

Do you have multiple  devices that you work on and want to continue reading  a web page that you are reading on your PC ? We already have multiple extensions in Google Chrome to achieve the same. How about having this feature  in-built in your Google Chrome browser? That’s exactly what Google has done to your favourite browser. Google has started rolling out update to Google Chrome which will bring this handy feature across multiple platforms. This means that you don’t have to worry about switching webpages across all your devices without worrying about working on technalities to get this job done. This is pretty straight forward and doesn’t require any third party extension. Let’s see how we can send a web page from your PC or Mac to your Android/iPhone or Vice-versa!

Step 1: update your Google Chrome browser right away.

Step 2: open any page from your Chrome. 

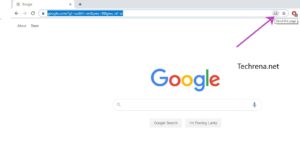
Step 3: now go to the address bar and highlight the URL. 

Google Send this Page Icon

Step 4: You will find a small ‘Send this page’ icon towards the right extreme corner of the address bar.

Send this to your devices

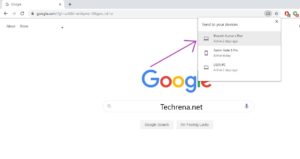
Step 5: Clicking on the icon will open the list of devices on which you are using Google Chrome with your account and you can send your current page to any of them. Viola !

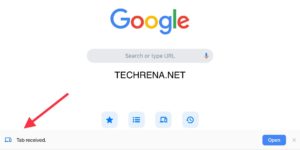
Send the webpage from Google Chrome to iPhone

As you can see from the above, the tab has been received from my Google Chrome on PC to Google Chrome on my iPad. I can now continue reading the webpage on my iPad from whete I left off on my PC previosuly. It works seemlessly.

[How To] Password Protecting Excel Workbook

Microsoft Excel logo

Welcome back readers, it’s been a while since we posted any tutorial. It’s been a hectic year for me and I’m glad that finally I could find some time to write a yet another tutorial.

Microsoft Office suite does provide all of us with the most brilliant productivity tools that would foster our business/professional growth through their vast line up of dedicated software.

And the Microsoft Excel is a vital part of the office suit which often finds its regular usage among business organizations, educational institutions, government offices, and all other locations where the emphasis will be on storing some important data.

Having known the vital role that the Microsoft Excel plays in the business process, it would really be a big blunder on part of the users who use Excel if they don’t learn the security aspects related to the software. To make sure the data stored in a Excel sheet is opened or used by a competent authorised party, the creator of the Microsoft Excel sheet should take care of certain security measures which are incorporated within the Excel suite.

Any Excel worksheet can be secured in two ways:

1) Protecting the entire worksheet (asks password when the file is opened)

2) Protecting the data inside the worksheet (file can be opened but password will be required to view the worksheet elements)

The second type of the protection is perhaps the most widely known as the option for the same is available within the workbook menu items.

In this tutorial we are concerned with protecting the entire workbook rather than the individual elements inside the worksheet. The reason why anyone would need this kind of protection is simple: they don’t want others to see the worksheets in the first place.

Protecting the Excel Workbook:

Step 1: Open the the Excel workbook for which you want to add password protection.
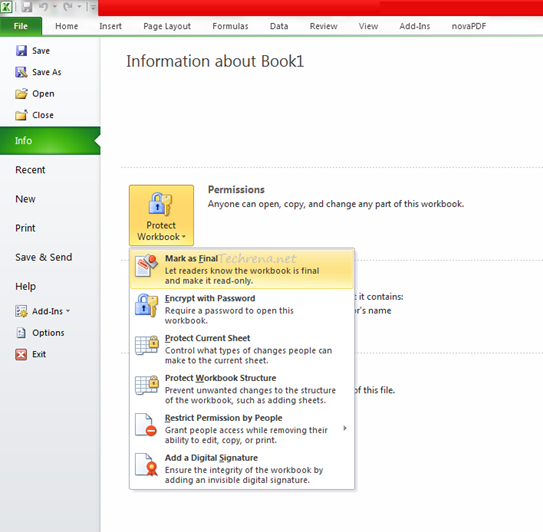
Microsoft Excel Menu Info options

2. Click on the “File” menu item. Locate “Info’ heading under the “File” menu and click on it.

3. Under the “Info” sections, you will have three options: Permissions, Prepare for Sharing and Versions. Click on the item “Permissions” (on the “Protect Workbook” dropdown item).

4. You will be presented with various options. You need to click on the second item on the list i.e, “Encrypt with password”.
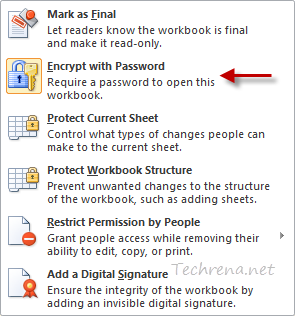
Encrypt Excel workbook with password

5. It will then ask you to enter a password for encrypting the workbook. You may need to reenter the password to affect the change.
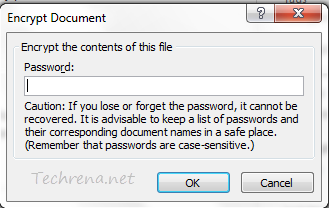
Encrypt Excel document with password

6. Save the workbook and try to open again. It will now show this kind of message and asks you to enter the password.
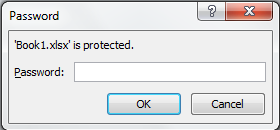
Excel Workbook password open

The same result can be achieved by a slightly different step. Click on the “Save As” button under the “File Menu”. It will now take you to the choosing the location window. Click on “Tools” dropdown menu on the left of the “Save” button.

Under the “Tools” dropdown menu, choose “General Options”.
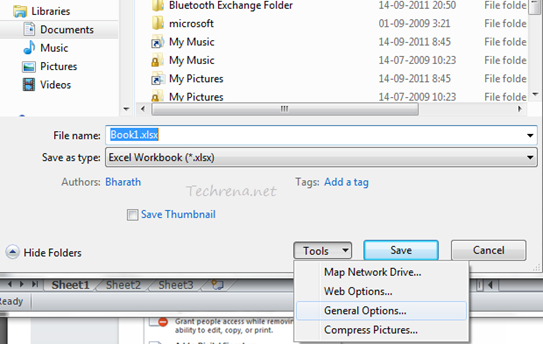
general options tools save as in Excel

It will now ask you to enter a password that needs to be entered to open (or ‘modify’) the workbook.
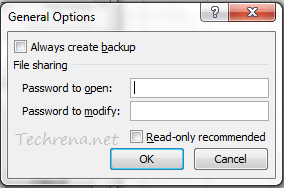
General options open Workbook in Excel

Once entered and saved, the workbook becomes password protected and the same needs to be entered on each instance when trying to open the workbook.

Note: This tutorial is based on Microsoft Excel 2010 earlier version and may not be suitable for earlier versions.
Facebook Timeline Is Now Available For Everyone; Here’s How To Get It For Your Profile

Back in September this year, Facebook announced the new feature called “Timeline” and made it available to the developers initially. Facebook Timeline is basically a new way to list your entire activity of your life in a Chronological order, right from your birth to the present moment. With a neat and visually appealing interface, the Timeline lists all your major events in your life in the chronology. No wonder some call it as your virtual biography (though we differ!).

Facebook timeline

The Timeline, which up until a few days ago was in “beta”, got its public rollout to the users in New Zealand last week. And today the social networking giant has announced that the Facebook Timeline will be available to the users across the globe starting today. The company has also said that those who activate the feature will initially get a 7-day review period during which they can review and choose what content should appear to their friends.


How To Get The Timeline For Your Profile:

We have published a detailed guide earlier on how to activate the Facebook Timeline for your Facebook profile. But this feature was in “beat” stage at that time and it we had to use a hack to get it enabled. Now that this feature is available for all, the process is much simpler and straightforward.

Navigate to this page on Facebook, and click the “Get Timeline” button that you see at the bottom. This will automatically activate the Timeline for your profile.

Get TimeLine

Facebook Timeline View As

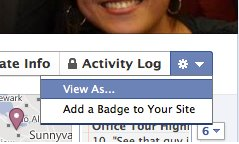
The next thing you have to do is to view your Timeline and manage the content that is visible to your friends. To do this, find and click on the gear menu which will be present near your profile name in the Timeline view. Select “View As…” from the dropdown menu. This will show how your profile will appear to a specific friend or public once it gets published.

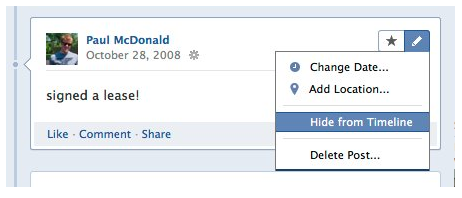
Go through the events/posts on your profile. Should you decide to hide a particular post from your friends (or specific friends) or public, all you need to do is to click on the “Edit” pencil icon right next to that post and choose “Hide from Timeline”.

Hide Post from Facebook Timeline

Supposing that you have activated Facebook Timeline today i.e December 15th, you are allowed to edit, finalize and publish your Timeline to your profile. In case you choose to wait, your Timeline will get published automatically on December 22nd (i.e., on the seventh day). If you feel your Timeline is ready to go public, you can always hit the “Publish Now” button to publish it.

Facebook timeline publish now button

We suggest you watch this video to make yourself acquainted with the features of the Timeline.

[Tip] How To Activate Facebook Timeline

Facebook timeline ad

Facebook has launched a new feature called Facebook Timeline, which is basically portrayal of your entire activity on the Facebook in a chronological order. This is pretty much different from the regular  profile view and offers a new and interesting insight into what you have been up to on the Facebook.

Sadly, Facebook hasn’t enabled this feature for all the users right now. However, the feature has already been activated for the open graph developers. If you are a normal user like me on the Facebook, you may have to wait a few more weeks to get this feature enabled for your account. But if you are curious enough to get it immediately, TechCrunch has come to your rescue.

As there is no direct way of enabling this feature right now for your profile, we’ll have to use the workaround suggested by Greg Kumparak. The process involves enabling developer mode and creating a dummy developer app which will be accessible only to you. Though the entire process isn’t a single button-click-enable thing, but yes, it is very straightforward indeed. All you need to do is to follow the steps briefed below:

Steps:

1. Login to Facebook with your credentials.

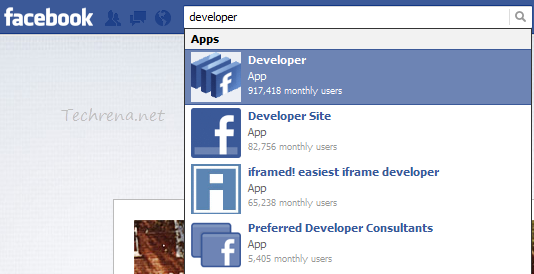
2. Type “developer” in the search box and hit the first result (Developer, type: App) under the Apps section.

Facebook Developer app search

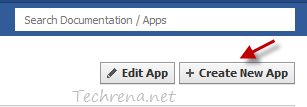
3. Click the “Create New App” button on the right corner of your screen.

Create-new-app-Facebook-Developer-app

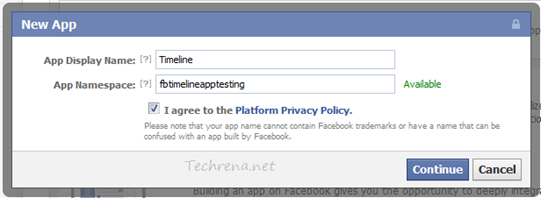
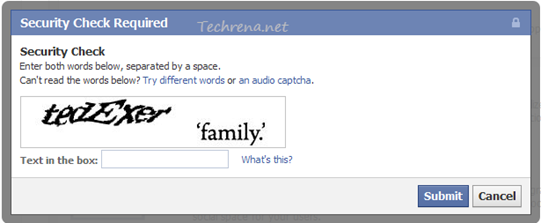
4. Choose a display name and namespace for your new app. Keep in mind that the chosen namespace should be unique and is subject to availability (Don’t use words like ‘Facebook’ or ‘FB’ in the App Display Name as they are not allowed). Read and agree to the Facebook Platform Policies and click Continue, complete the security check to proceed to the next step.

Facebook Developer new app parameters

Facebook new Dev app security check

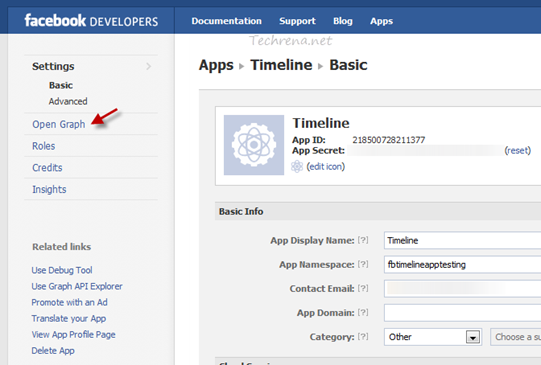
5. Now you will be taken to the ‘Basic Settings’ page for the app. Look for “Open Graph” link on the left sidebar and click on it.

Facebook developers new app Open Graph Link

6. You will be then asked to edit the action properties followed by object type settings and another page to create an aggregation. Just keep the default values and in each one and proceed to the next step.

7. Now open the Facebook homepage and you will then notice an invitation to access Timeline.

8. You are done.

Facebook timeline screenshot

Facebook Timeline Start Tour or Publish now

Your Facebook’s Timeline right now will appear only to you. You can always click the “Publish Now” button or wait for a week’s time for your timeline to go live. You cal also access your timeline by pasting the following URL on your browser:  http://www.facebook.com/username?sk=timeline.

Changing Google Chrome’s Default Search From Regional Google To Google.com

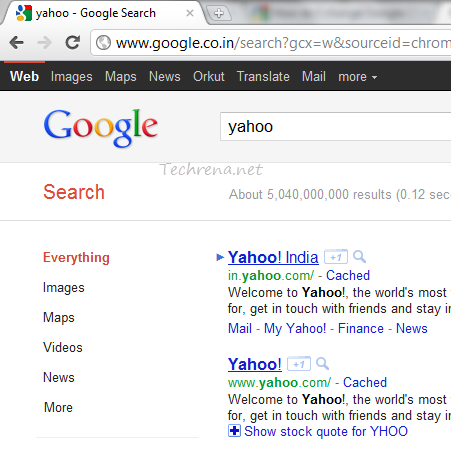
If you use Google Chrome much and love searching right from the address bar, you might be knowing that any search you perform from the address bar will take you to a regional Google search like Google.co.in or Google.co.uk etc.

Google Chrome Addess bar Search regional

In case you want the search results from the more generic version of the Google (i.e google.com) and are looking to change the settings so as to reflect the same in the Google Chrome’s address bar default search, here are the steps you need to follow:


Steps:

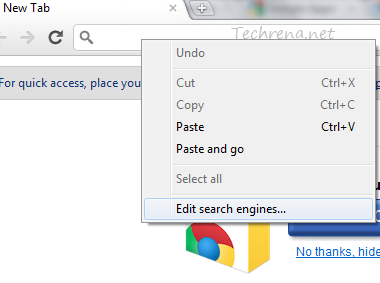
1. Right click on the address bar and choose “Edit Search Engines”.

Google Chrome Edit Search Engines

Alternatively you can access the search engines settings by typing the following URL in the address bar:

chrome://settings/searchEngines

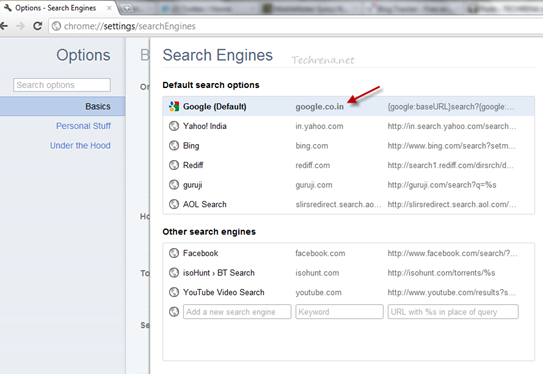
2. You will notice that the regional version of the Google search engine has been set as your default search engine under the ‘Default Search Options’ as shown in the following screenshot.

Google Chrome Search Engines list

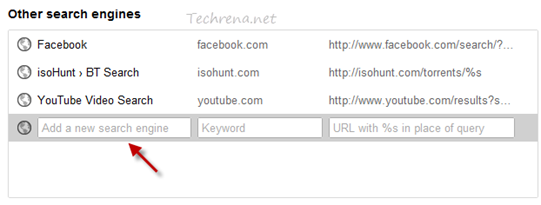
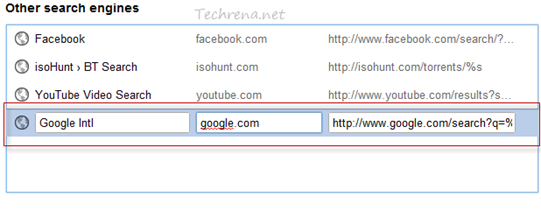
3. We need to add a new custom search engine (in our case the international version of the Google) and then make it the default search engine.

Google Chrome add a search engine

To do that type the name of your new search engine in the empty box and then type the keyword (There are no rules in filling these two boxes). That now leaves you with the URL box which holds the key. As we need a international version of the Google to serve us, key in this value (and hit Enter):

http://www.google.com/search?q=%s


Google Chrome Search Engines add new Google

4. Now that we have added a new search engine, we are now left with making it the default search engine. Hover your mouse over the newly added search engine and you will now see an “Make default” option right next to the search engine entry. Click the ‘Make default‘ button as shown in the screenshot:

Google Chrome Search engines newly added


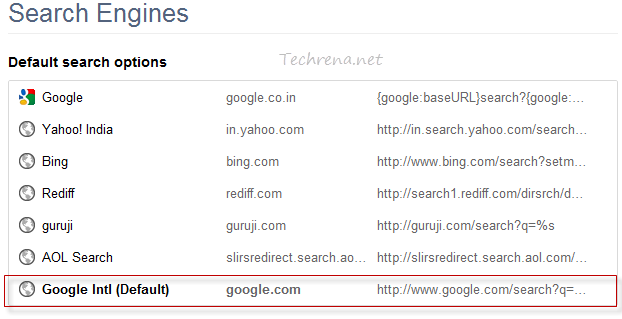
5. You will now notice that your newly created search engine has been made the default search engine and is found under the ‘Default Search Options’ listing.

Google Chrome Search Engines new default search options

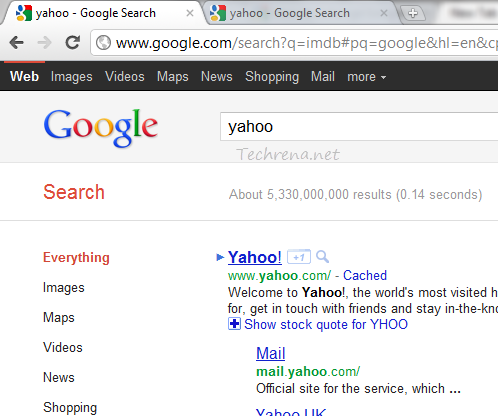
6. You have successfully changed the default search engine of your Google Chrome and you might want to test it.

Google-Chrome-Addess-bar-Search-international

Perfect! Isn’t it?