Security Bulletin MS10-046 (Critical) & Update KB2286198

Windows Update

Microsoft has released (on August 2, 2010) a new security bulletin MS10-046 (rated critical) addressing the vulnerability in Windows Shell that could allow remote code execution (RCE).

MS10-046 security update resolves a publicly disclosed vulnerability in Windows Shell that could allow RCE through, through display of an icon of a specially crafted shortcut.

The affected operating systems include Windows XP, Windows Server 2003, Windows Vista (SP1 & SP2), Windows Server 2008, Windows 7 (32-bit and 64-bit) and Windows Server 2008 R2.

Windows users can download Microsoft update KB2286198 as part of the Microsoft Security Bulletin MS10-046 that fixes the above said issue. United States and Canadian users can also get a free support via telephone by calling 1-866-PCSAFETY or by contacting local Microsoft subsidiary.

Find the KB2286198 update download links for your Windows operating system below:

KB2286198 Download Links:

Windows 7 x86 (4.4 MB) x64 (6.7 MB)
Windows Vista x86 (4.3 MB) x64 (6.7 MB)
Windows XP x86 (2.9 MB) x64 (11.8 MB)

[How To] Remove Virtualapp/didlogical Credentials In Windows 7

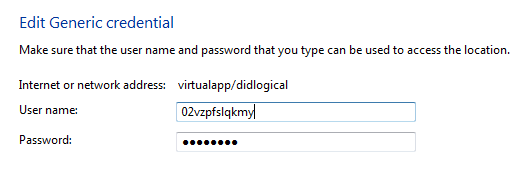
Virtualapp Didlogical user credentials

Have you noticed a suspicious entry under Credential Manager in Windows 7 ? Wondering how it could enter it without your permission ? Want to know what it’s all about and how to get rid of it? Read on..

Virtualapp/didlogical user is created in Generic credentials, when you install any particular program that requires authentication to start. Please do note that these Generic credentials are different from that of Windows credentials. These generic credential programs (or websites) would need a username and password to initialize. The user values stored in the Generic credential manager are meant for long-term use and prevent user from needing to enter these credentials too often.

However there could suspicious or unknown unknown entries at times (ex: virtualapp/didlogical) users being created under this. It is strongly advised unless you are sure about the application or software to which that user belongs, you would better off delete it from the list.

Many users who have noticed this Virtualapp/didlogical user entry under Generic credentials are not sure as how it could get into that list. Some believe that it might come up due to Windows Live applications, it is however not confirmed. Perform a thorough scan of your computer to see if you could find any suspcious/spyware/keylogging or malware programs so as to be on the safer side.

virtualapp didlogical credentials

Solution:

Option 1: The straightforward solution is to go for the kill.Delete the suspicious entry from the list by clicking “Remove from vault” the button. While this worked for some users, but for some others who had deleted this from the list were surprised to find it reappear again.

Option 2: Uninstall all the Windows Live apps from your system and this would most probably be deleted from the list as confirmed by many Windows users.

These are the two possible solutions available as of now. If you know anything better than this, do notify us through the comments below.

[Tip] All You Need To Know About Windows 7 Calculator

Windows 7 Calculator

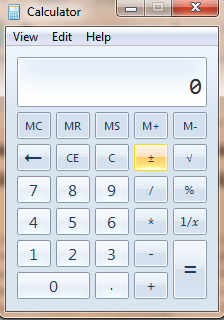
Windows has always been coming with a default calculator for performing simple math calculations. However the users have always preferred to use other third party software for performing their day-to-day calculations as Windows calculator had limited functionalities or rather I’d say many of us weren’t aware of the full functionalities of it. The scene has changed now, Windows 7 now has the most powerful calculator with a some good new features embedded into it. Let’s look at those new features one by one:

1. Calculations History:

The Windows 7 promising new calculator gives for the users to view the history of calculations performed on it. Either press CTRL+H or pick “History” option from the “View” menu in the calculator.
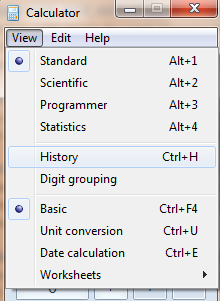
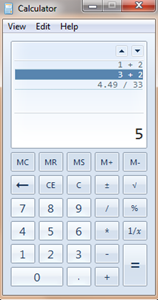
Calculator history in Windows 7calculator_previous_calculations

Shortcut: Ctrl+H

Use Ctrl+Shift+D to cleat the calculation history or F2 to edit the calculation history.

2. Programmer mode:

This would be the feature that you would appeal to all those IT professionals around the globe who need to often perform basic programming conversions for the programs that they are developing (For instance converting a value from Decimal to its equivalent Hex code etc.), this is where the new “Programmer Mode” option in Windows 7’s calculator could help. Go to View> select Programmer to work on this mode.

Shortcut: Alt+3
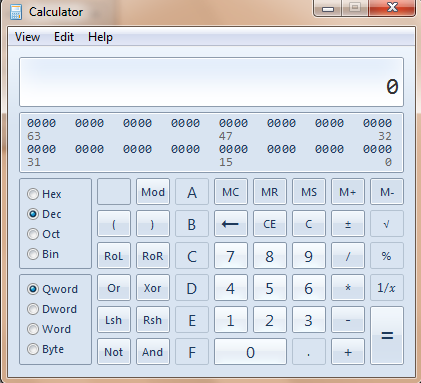
Windows 7 Calculator programmer mode

3. Statistics mode:

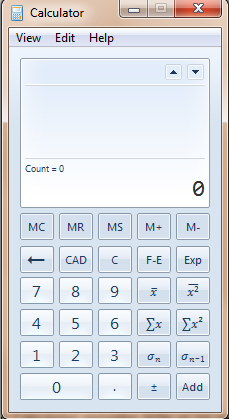
Windows 7 Calculator statistics mode

Statistics mode helps you in your day-to-day statistics calculations like finding the average of your monthly expenses, finding standard deviation, standard deviation of population etc. Use add button to first add the numbers from your data, then click on the corresponding button to let the calculations done.

Shortcut: Alt + 4

Additional Functionalities:

Apart from the above main features, there have been some enhanced functionalities built into the Windows calculator:

Date calculation:

You have two basic options to perform under this: they are

1. You can calculate the difference between two dates

2. Add or subtract days to a specified date

Shortcut: Ctrl+E
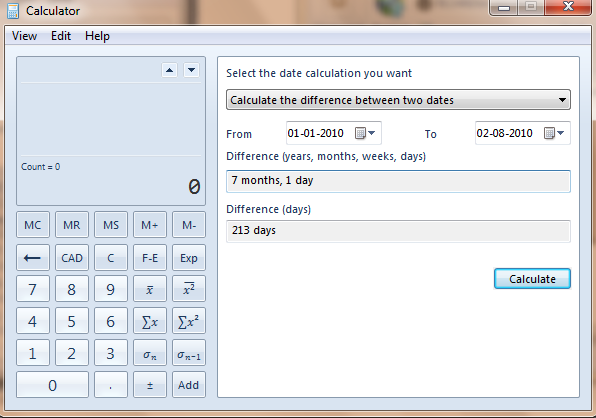
Windows 7 Calculator Date Calculation

Worksheets:

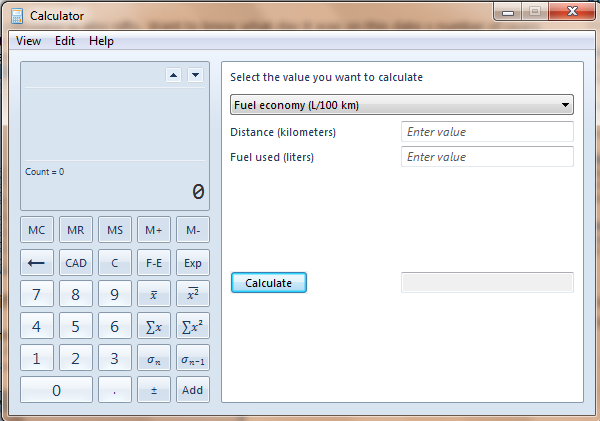
You can perform Mortgage, vehicle lease, fuel economy calculations using Worksheets option.
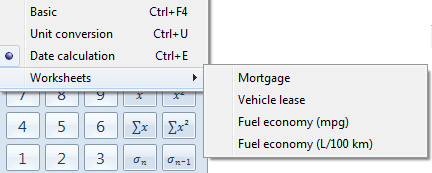
Windows 7 Calculator worksheets menu
Windows 7 Calculator fuel economy

Unit Conversion:

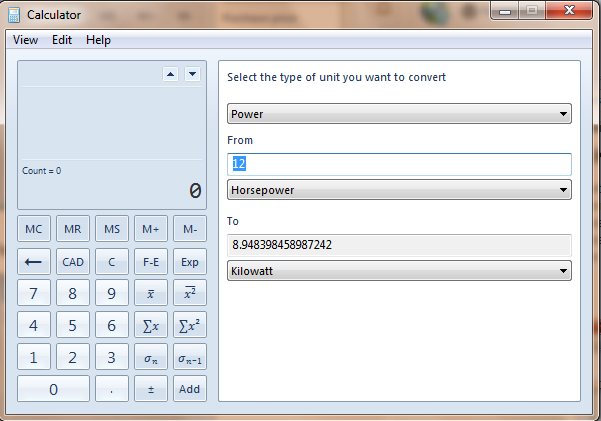
Windows 7 Calculator unit conversion

Unit conversion lets you perform various conversions from one unit to another..the available units include: Angle, Area, Energy, Length, Power, Pressure, Temperature, Time, Velocity, Volume and Weight.

Shortcut: Ctrl + U

Windows 7 Calculator Keyboard Shortcuts:

Click here for a full list of keyboard shortcut keys that you can use with Windows 7 calculator.

For more tips and updates on Windows 7, you can subscribe to our RSS feeds via email.

[Download] Microsoft Security Essentials V2 Beta

Microsoft connect

Microsoft has released a new beta version of Microsoft Security Versions 2.0. If you are running your PC on Windows OS and couldn’t afford to buy an anti-virus software, it is strongly recommended that you download and use this free security tool from the Microsoft folks.

According to a blog post by Brandon LeBlanc, the new version of MSE (build 2.0.0375.0) is coming with the following new features:

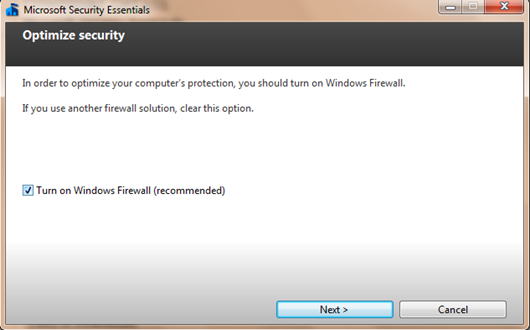
1. Windows Firewall Integration

Windows firewall in MSE

2. Protection for web-based threats

3. New protection engine

4. Network inspection and protection system for Windows Vista and Windows 7

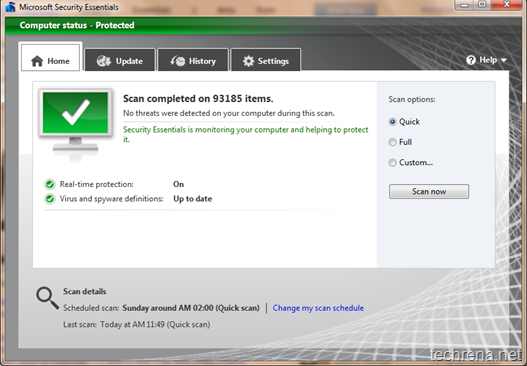
Microsoft Security Essentials 2 Beta

Microsoft Security Essentials v2 beta is now available as free download via Microsoft Connect for both 32-bit and 64-bit versions of Windows. MSE will protect your Windows PC against viruses, spyware, root kits, and Trojans. Security Essentials was launched in September 2009 replacing Windows Live OneCare.

Download:

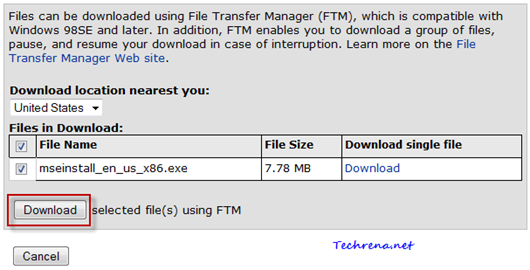
Register yourself for Microsoft Connect to proceed to the download. There are some download issues if you go for a direct download. It is recommended that you use Microsoft File Transfer Manager (FTM) to download the file mseinstall_en_usx86.exe(7.78 MB for 32-bit) or mseinstall-en-us-amd64.exe (9.82 MB for 64-bit). This beta version is currently available in English (U.S.), Israel, and Brazilian Portuguese .

Security Essentials download

[Download] Free “Operation guide for Microsoft Office 2010” Ebook From Microsoft

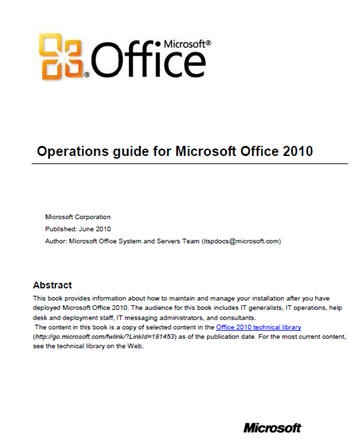
Office 2010 guide

Microsoft Office 2010 RTM has been made available to public in June 2010. For the convenience of it’s Office 2010 customers, Microsoft is giving away a free e-book titled “Operation guide for Microsoft Office 2010”. Authored by the Microsoft Office System and Servers teams, the 28-page book offers all the basics that you need to know, starting from the installation to customization.

The “Operation guide for Microsoft Office 2010” digital e-book highlights:

# Maintaining and updating MS Office 2010 and available updates

# Office 2010 Administrative Template files and Office Customization Tool

# Group policy settings (GPS) and preventing conflicts with earlier versions of GPS; Installing the settings

# Managing Outlook 2010

# Add or remove languages after deploying Office 2010 (Modify an existing installation, deploy language packs, remove language packs, identify installed languages)

#  Manage users configurations for Office 2010

# Customizing an existing Office 2010 installation

Download Links:

PDF format

DOC format

XPS format

[Tip] Get Free Gmail Email Alerts Via SMS

Gmail via SMS logo

If you want to get all your new Gmail messages to your mobile phone via SMS text messages, there are already enough no of services and tools have been developed to serve the purpose for which you need to share your Gmail password. Even though most of these services are genuine, still you might not always want to share your Gmail personal credentials with those services for security concerns. Here I’m coming up with an alternative where you need not give access to your personal Gmail to any unreliable third-party service. All you need is an Gmail account and a Windows Live Mail (Hotmail account). If you still haven’t got an account at Live Hotmail, get a new account here. Now follow the steps mentioned below:

Steps:

1. Connect a mobile device to your Hotmail account and set up Hotmail Email SMS alerts.

2. Login to your Gmail account, go to settings page.

3. Go to Forwarding and POP/IMAP tab, find the “Forwarding” tab.

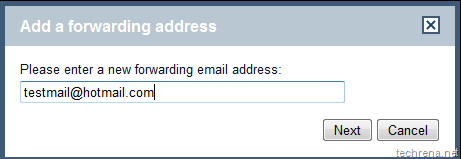
4.  Add a new email address to your forwarding list by selecting “Add new email address..” option for the drop down box. Enter the new forwarding email address. It should be something like username@hotmail.com

Add new email address Gmail forwarding

forwarding_address_gmail

5. Click Next and complete the verification process. Enter the verification code that you receive via SMS.

Verfiy forwarding mail in Gmail

6. Now that you have successfully verified your new forwarding hotmail address, you will now receive each and every mail from your Gmail inbox to the new forwarding hotmail address (we selected “keep Gmail’s copy in the inbox” option). As you had also setup your Hotmail Email alerts to be sent to your mobile via SMS, in effect you get all your new mails in your Gmail inbox directly to your mobile.

7. But some operators in India like Airtel have a limit on the number of free text messages that you can receive through Hotmail (The current limit for Airtel is 300 !). So you might want to filter out some unimportant mails to wasting these free messages count. Luckily we have “filters” in Gmail that makes this task easier for us.

8. First of all disable the forwarding under your Gmail’s “Forwarding and POP/IMAP” settings.

disable forwarding in gmail

Now go to Filter tab and create a new filter:

Filters tab in Gmail

9. Under the filter settings filter out Emails based on senders or words or based on subjects of the mail that you receive. I have chosen not to receive alerts for mails from Facebook alerts, Twitter alerts etc. You can setup your own criteria for filtering the mail.

Creating Filter in Gmail

Click on “Next Step” once you are done.

10. Now select the fifth option i.e “Forward it to:….@hotmail.com”. And click “Create Filter”.

forwarding using Gmail filter

That is it. You are done with configuring your Gmail inbox to receive SMS alerts for important mails in your Gmail.

Note:

Windows Hotmail Email SMS alerts is currently available only in few countries. This tutorial is based on the such service offered in India,and thus this trick may not work for you if you are located in a country where Hotmail SMS service is currently not available.

[How To] Configure Windows 7 Action Centre Warning Messages

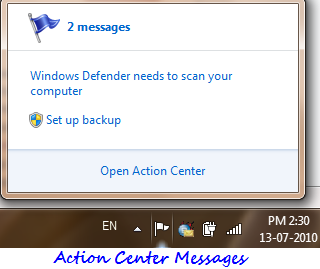
Windows 7 Action Center messages

Action Center in Windows 7 offers warning messages relating to your computer. You can find these messages in your notification area in the form of a flag. They include important security messages, virus protection alerts, Windows Update, Internet security settings, Spyware and related protection, User account control, troubleshooting, windows backup etc.

It is highly recommended that you keep these messages enabled as they include some important security issues as well. However you might not want to see Windows Backup warning messages when you are using an external third-party backup software. And you do check for updates according to your convenience. In such cases you might not want to get annoyed by warning messages about these simple things. This tutorial explains how you can configure the settings for these messages or even to completely turn off (not recommended) these action center messages in Windows 7.

Steps:

1. Click on the flag icon in your notification area or type “action center” in the start menu search box and open the Action center.

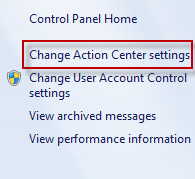
Action Center Windows 7 home

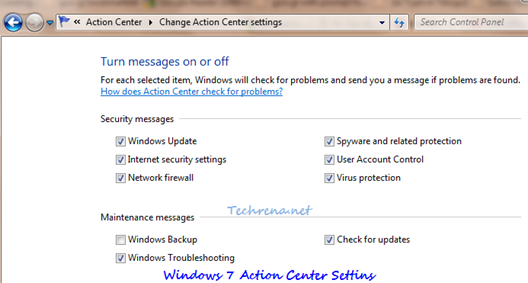
2. Under the “Action Center Settings”, you can choose for which categories Windows Action center needs to check for problems. Uncheck all to completely turn off the entire Action Center alerts which is obviously not recommended.

Windows 7 action center settings

Click OK and close the window. You will no longer receive warning messages from the categories you have unchecked in the previous step. The white flag icon however stays there without any warning messages.

[How To] Block A Website Using Content Advisor In Internet Explorer

site blocked

Blocking certain websites that may not suit the audience mainly in the case of children or workers has always been one such compulsory feature. In case you haven’t spotted yet, there’s one such option in Internet Explorer too. Here are the steps to block any website in Internet Explorer using IE’s content advisor.

Steps:

1. Go to Tools > Internet Options in the Internet Explorer.

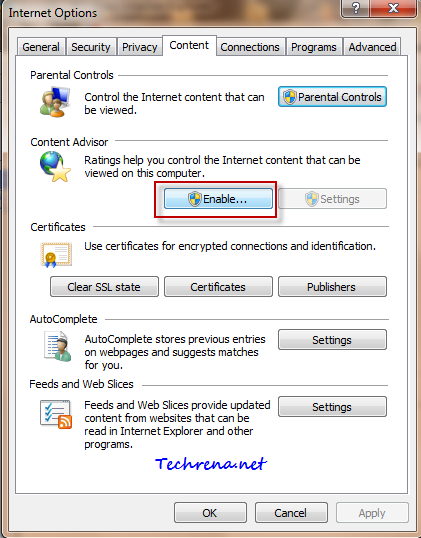
2. Go to “Content” tab under the Internet Options. Find “Content Advisor” under this tab. By default it would be set default. Click “Enable” option opposite to it.

Content advisor in Internet Options

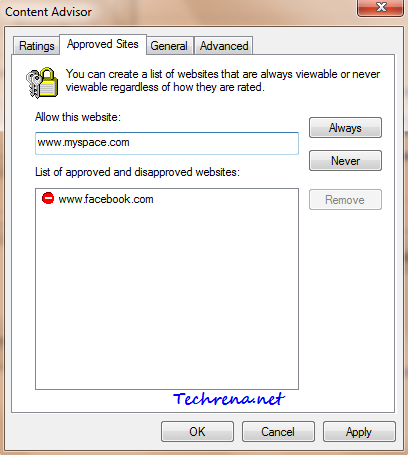
3. Go to “Approved sites” tab in the Content Advisor window. Type the URL of the website that you want to block in the text box and clock “Never” button. See the screenshot below:

Approved sites in Content advisor

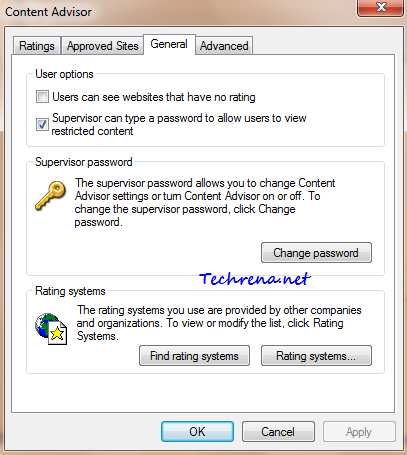
4. Click “Apply” once you are done and then go to “General” tab. Here you can choose whether to password protect the blocked sites that you added. Once configured, click “OK’ to close the window.

Content advisor General options

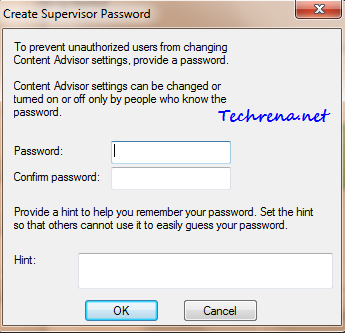
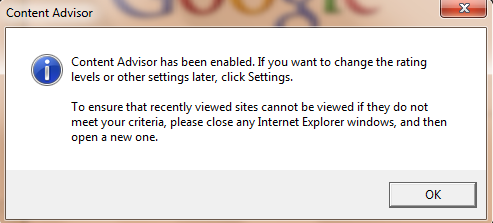
You will now be asked to enter the supervisor password for the content advisor settings.

5. Create a supervisor password and add a hint (recommended) which is helpful in case you forget the password in future. Close the window once you have done that.

Supervisor password for content advisor

Content Advisor settings done

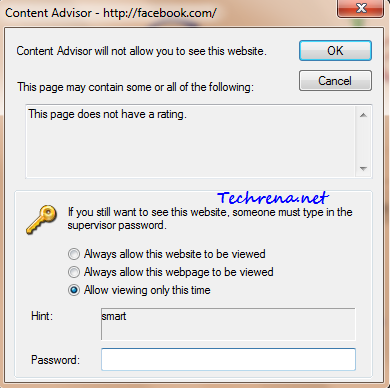
6. Now try to open any website that you have added in the block list. You will see the following prompt window, asking for you to enter the supervisor. User can view the website only if he knows the supervisor password.

Content advisor prompt window

7. You can disable the content advisor any time by clicking the “Disable” button under the “Content Advisor”. You will however need to authorized to do that by validating through the supervisor password.

For more tips on software, subscribe to Techrena’s RSS feeds via email.

[Tip] Show Additional Windows Clocks

Mutiple clocks in windows 7

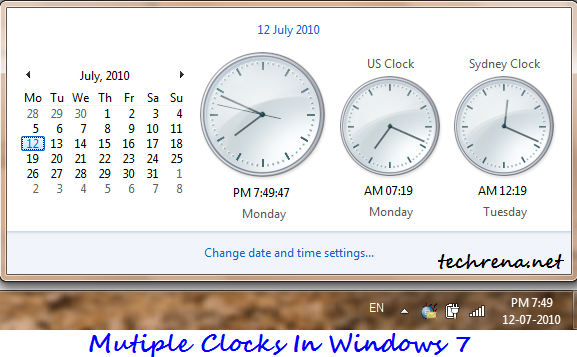
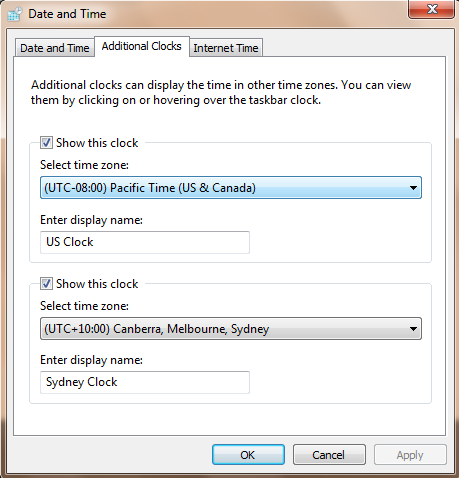
Windows by default shows one clock next to the calendar, based on your location in the world. Sometime you might want to see the what’s the time in your best pal’s place located somewhere in other part of the globe. This tutorial explains how you can show multiple or additional taskbar Windows clocks.

Steps:

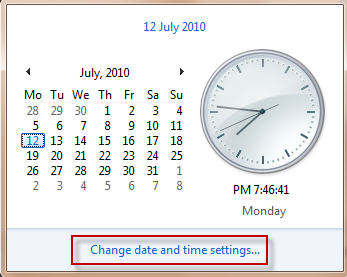
1. Open the Windows calendar by, click on “Change date and time settings..”.

Windows 7 clock

2. Under date and time settings, click on “Additional Clocks” tab. Here you can select one or more additional clocks from different cities across the world. You can also name the clocks as you would want them to be.

Additional clocks in date and time settings

3. Click OK and close the window. Now you can see the additional clocks popping up when you click on the date and time area in your Windows taskbar.

That’s it. Please note that this tutorial also applies to Windows Vista.Find out for more how-to tutorials from us on Windows 7, or subscribe to our RSS feeds via email.

[How To] Disable Firefox Taskbar Tab Previews

Multiple tasbar tab previews

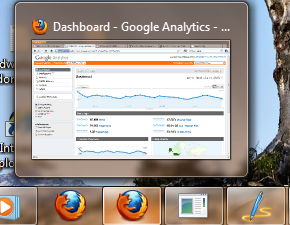
Taskbar tab previews is a great feature introduced in Windows 7, with the help of which you can access any opened tab right from your taskbar without opening the browser. This feature was first meant for Internet Explorer only, but later it was adopted by almost all the browsers.
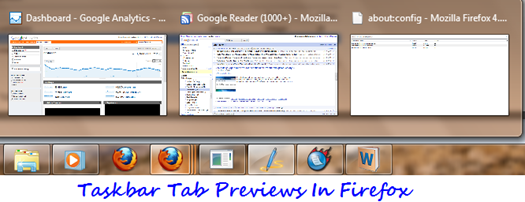
Even though this is a great feature, however it may sometimes annoy you particularly when you open a lot too may tabs in the browser. That’s why we posted a tutorial on how to disable the multiple taskbar tab previews in IE, Firefox and Google Chrome. Now that Firefox 4 is coming with this taskbar tab previews feature enabled, we thought we’d revisit and bring to your attention if you are looking for a way to get this feature disabled in your Firefox. Follow the steps carefully:

Steps:

1. Type about:config in the Firefox address bar.

2. Accept the warning message and proceed (Click “I’ll be careful, I promise) to the configuration page.

Firefox about:config warning

3. Type

browser.taskbar.previews.enable

in the filter and look for the entry with the same name as shown in the following screenshot.

Firefox 4 taskbar previews config
4. Change the value to “false” by double-clicking. That’s it. You will only see a preview of the one (active) tab preview instead of the multiple taskbar tab previews.

Firefox taskbar tab previews disabled

You might also want to read our tutorial on how to enable All Tabs Preview in Firefox.