Quick Tip: Show Or Hide Bookmarks Toolbar in Chrome

google chrome

Usage of bookmarks is surely on the rise these days, the fact that so many bookmarking related services are now increasing also explains this fact.  Google has a dedicated bookmark bar just below the address bar. Bookmarks bar in Google Chrome is pretty much useful to quickly add, or open your favorite links stored under the bookmarks folder. However you might want to have a choice whether to show the bookmarks bar or not in your Google Chrome. It’s pretty much simple and most of the Chrome users might be already knowing this tip. In case you don’t, read on..

google chrome bookmarks bar

Small tip logoTip: By default bookmarks bar is shown in Google Chrome. To toggle between enable or disable the bookmarks bar, just press Ctrl + Shift + B.

no bookmarks bar in chrome

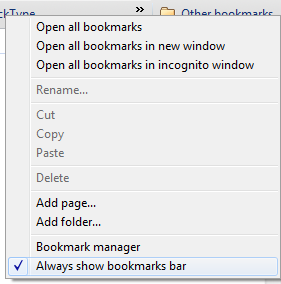
>> Alternatively, you can right-click on the bookmarks bar and choose uncheck “Always show bookmarks bar” option to hide the bookmarks bar. Once hidden, you need to use the above said keyboard shortcut to enable the bookmarks bar again.

Always show bookmarks bar in Google Chrome

[Tip] Enable Web Apps In Chrome 8

chrome web store

Google has recently launched the Chrome Web Store, where you can find number of web apps  , extensions and themes for Google Chrome. If you want to enable the web apps in the recently released Google Chrome 8 (they’ll show up when you open a new tab), follow these steps:

1. Make sure Google Chrome is not running on your computer.

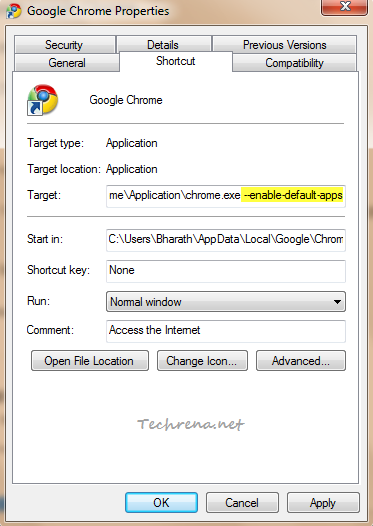
2. If you are on a Windows machine, right-click on the Chrome shortcut, and choose “Properties” from the context menu. In the “Target” filed under “Shortcut” tab, append it with   “ --enable-default-apps" (without quotes but with the initial space). In general, the target field should look like this:

C:\Users\<User Name>\AppData\Local\Google\Chrome\Application\chrome.exe --enable-default-apps

Chrome shortcut properties

3. Click “OK” to save the settings and close the properties window.

4. Click  the wrench icon, chrome tools menuTools > Extensions.

5. Expand the “Developer modeDeveloper mode iconicon.

6. Click on the “Update extensions now” button.

chrome extensions page

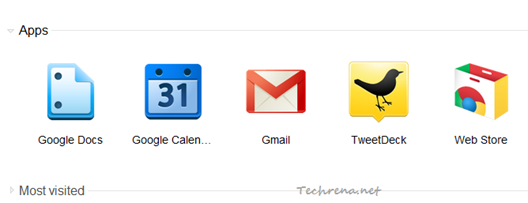
7. Open a new tab and now you must see the all the web apps that are currently enabled for your Chrome. The default web apps are Google Docs, Google Calender, Gmail etc.

Apps page in Google Chrome

This tutorial is intended for Google Chrome 8 running on Windows machine, if your are on Mac or Linux, you might want to read the original story at  Google OS blog.

Get A Cr-48 Chrome Notebook As Part Of The Google’s Pilot Program

Google Chrome OS

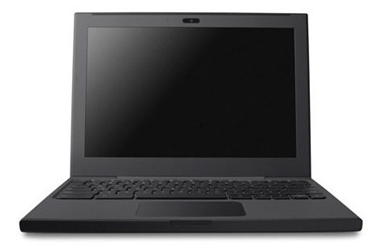
Google has yesterday officially announced the details of the upcoming Google Chrome OS and also showcased the first ever Chrome OS laptop called “Cr-48 Chrome Notebook”. The netbook will have a 12.1-inch screen with a full sized (but tweaked a bit) keyboard, Qualcomm Gobi 3G chip (Verizon-only in US), Wi-Fi, more than 8 hours of usage on battery, a webcam and flash storage. The keyboard has been made such a way that there are no traditional “Caps lock” and “function” keys on it. Instead a new “Search” key has been added in place of the “Caps lock” key, which lets you quickly access the Google search just with a click. The full keyboard looks almost similar to that of Apple’s keyboard.

Cr-48 Chrome OS laptop

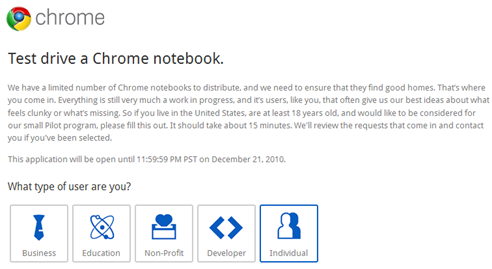
Google has launched a Chrome OS Pilot Program, through which it will initially distribute the Cr-48 Chrome OS laptops to those who are really interested in testing them out. Later, by mid-2011, laptop makers Acer and Samsung should be coming up with their own laptop models based on the Chrome OS. If you want to get this laptop, go here and apply.

Test drive Chrome notebook

Google is giving away only limited number of models for testing to interested users and if you are lucky (if you are in the US, chances are high!) you could also be one of those who get their hands on this notebook even before most of the others could get, Good luck!

via Engadget

Related: Is Chrome OS virus free?

Upgrade To Facebook New Profile

facebook

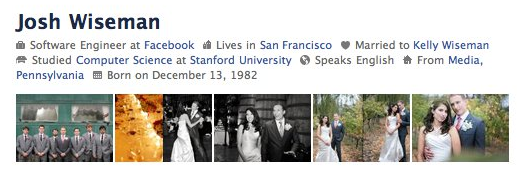
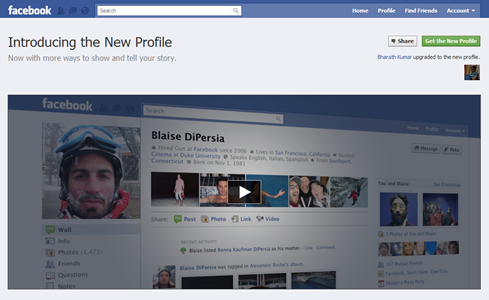
Facebook has finally decided to give a facelift to the Facebook profiles. The new Facebook profile page will have basic information like where are you from, where you studied, your work location etc. Below that, there are some recent pictures where you have been recently tagged.

Facebook new profile look

Below your profile pic, you will find some of your featured friends. Facebook lets you to choose the features friends from your list of friends, whom you feel are more important to you. You may create new groups of friends or may also choose to feature existing friend lists.

Featured friends in facebook

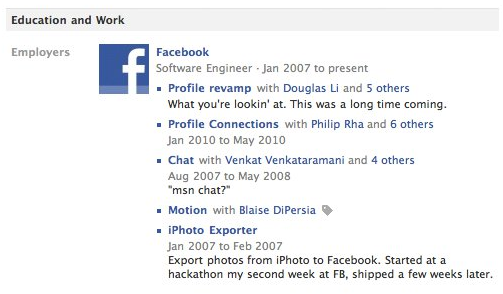
The new Facebook profiles also enables you to share your interest and activities. You can list the projects that you worked for your employer (you can also tag co-workers who worked with you!), favorite music bands, sports teams, political affiliations, and your favorite people you admire etc.

Facebook new experiences

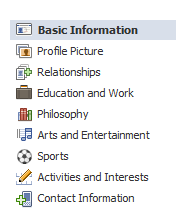
Facebook new profile sidebar

Facebook’s new “infinite scroll” feature lets you easily browse your photos. You can now search in the Friends page with number of dimensions like: search by name, hometown etc.

How To Start Using New Facebook Profile ?

1. Go to facebook.com/about/profile and click “Get the New Profile” button.

Facebook new profile

2. The page will list some of your information that Facebook already has. Click the “Edit Profile” link to add some more details about you.

Add information in new Facebook profile

When you are done, your new profile page will look like the one shown in the above pic, and all of your friends will be notified showing that you now have the new profile.

Have new Facebook profile

Please note that once you upgrade to new profile, there is no option to get back to the older version of the Facebook profile as of now. All the Facebook profile pages of your friends will be shown in the newer format no matter whether they are using the new profile version or older one.

via Facebook blog

[Tip] Force Chrome To Use Flash Player 10.2 Beta

Google Chrome logo

Adobe has recently updated the Flash Player and released the beta version of the Flash Player 10.2. The newer version included a major feature upgrades like Stage Video hardware acceleration which decreases your CPU utilisation when playing HD videos. When you download the flash player and install, you will understand that it’s only going to be used by all the browsers except Google Chrome. You may wonder why is Google Chrome left alone! But the fact is that Google Chrome (32-bit browser) includes a built-in Adobe Flash Player. Chrome automatically updates the Flash Player whenever there is new version of Chrome is released.

So even though you have installed the beta version of Flash Player 10.2, Chrome still uses the stable version of the flash player. To make Google Chrome use the 10.2 beta version instead, follow these steps:

1. Open Google Chrome, type about:plugins in the address bar and hit enter.

2. Expand the “Details” details button in chromebutton on the upper right corner

3. Under the “Flash”, you should see two versions, one is the integrated plug-in and the other is the system plug-in file.

If you are on Windows, the location of the integrated plug-in would be :

C:\Users\<UserName>\AppData\Local\Google\Chrome\Applications\<version>\gcswf32.dll

location of the system plug-in would be:

C:\Windows\system32\Macromed\Flash\NPSWF32.dll

If you are on other platforms, these are file names for the integrated and system plug-ins:

Platform

Integrated Plug-in

System Plug-in

Windows

gcswf32.dll

NPSWF32.dll

Mac OS

Flash Player Plug-in for Chrome.plugin

Flash Player.plugin

Linux

libflashplayergc.so

libflashplayer.so

4. To force Chrome to use the beta version of the flash player, you must disable the integrated plug-in gcswf32.dll (i.e the plugin that is found in the Chrome folder) as shown. Click “Disable” button against it.
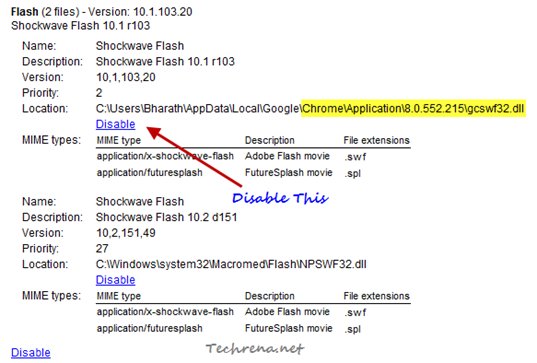
Disable integrated flash plugin in chrome

And when you have done that, it should look like this:
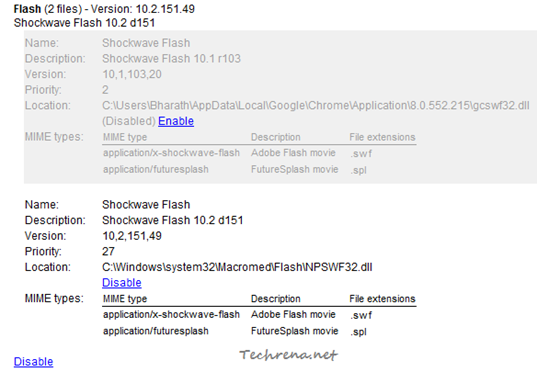
Disabled integrated flash plugin in chrome

That is it! Restart Google Chrome and see if the browser is able to load the flash content on the pages( ex: this Stage Video). If it is able to do, then it is to understood that the it is making use of the beta version of the flash player.

Note:

If you disable the Google Chrome’s integrated flash player plug-in, you will no longer receive the important security updates for the built-in plug-in and you need to use the system installed plug-in which has to be updated manually. Also, disabling this built-in Chrome plug-in will disable the Google Chrome’s sandboxing techniques incorporated to make the plug-in more secure. It is highly recommended that you use the integrated plug-in unless you really want to test some features using flash player beta on Chrome.

If you want to enable the integrated plug-in back, enable it in the step 4 to make run Chrome using it.

[via]

[Tip] Start YouTube Video From A Specific Time

youtube logo

We all love YouTube and the ever increasing millions of videos continually posted on it. We like to share the videos with friends over various social networking platforms (yeah, for the same reason, youtu.be URL shortening service was launched by Google!). Everything is fine and cool, no problem with sharing and watching as long as videos that you share are short in length. But what do you do when you need to share a video which is a bit longer and you wanted to emphasize on only specific portion of the video? Yeah, YouTube has added support to quickly skip or start any video from specific time frame. To do this, you just had to append the time (“t=”) parameter to the URL of the video. Where you can specify the time in seconds (or in minutes) to instruct the video to load from that particular time.

http://www.youtube.com/watch?v=suTDT6-Q8NE#t=61s                
                     or
http://www.youtube.com/watch?v=suTDT6-Q8NE#t=1m1s

If you open the above URL in your browser, you can see that the video starts from 1 minute 1 second mark.

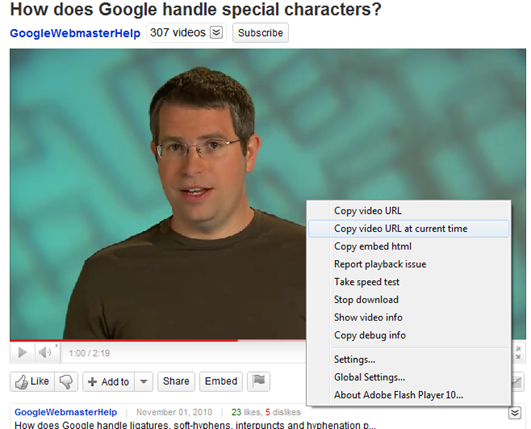
Now YouTube has decided to cut down this manual work on the users’ part. When you watch any video, just right-click on it and you will see a new “Copy video URL at current time”. You will now have the URL with “t= “ parameter appended to the video automatically corresponding to the point of the time in the video at which you selected this option.

Copy Video URL at current time

[Via] Labnol

[How To] Block A Contact From Sending Emails To You In Gmail

Block email from sender

Sometimes you receive dozens of mails from someone whom you don’t really know personally (spammers) or there may also be instances where in you don’t want to receive mails from your ex girlfriend / boyfriend etc. Whatever may be the reason, if you wish to block a particular sender from sending an email to you in Gmail, this guide is for you!

Fact: Before beginning the guide, let me make it clear that Gmail as such doesn’t have a default mechanism to block messages from specific addresses or domains. As described in the Gmail help section, the only way to block such emails is to create a filter to route all such unwanted email messages to Trash.

Steps:

1. Sign in to your Gmail account.

2. Open the email message that you have received from the unwanted sender.

3. Towards the right hand side, click on the small down arrow next to the “Reply” button

4. Choose “Filter messages like this” from the options menu.

Filter messages like this option inside gmail

5. The “From” field automatically gets filled by the email address of the sender from whom you received the unwanted mail. Making sure that the field has been filled, click “Next Step” to proceed to the next step.

Creating filter in Gmail

6. You will see the possible actions for the filtered messages. The options are “Skip the Inbox (Archive it)”, “Mark as read”, “Start it”, “Apply the label: ”, “Forward it to: ”, “Delete it”, “Never send it to Spam”, “Always mark it as important”, “Never mark it as important”. As you to trash all the message from that sender, the best option here would be “Delete it”.

Gmail filter advanced settings

You may also choose to apply the filter to already existing conversations as well. When all is set, click “Create Filter” button.

7. The filter is now successfully configured. Once it is created, review the filter settings from the “Filters” tab under the “Settings”.

gmail filter created

All done now! Should the above sender send you any email message in future, it automatically gets deleted without showing up in your inbox. Please note that if the same sender starts  from another email address, you need to repeat all the steps starting from the beginning. If you reach a stage where in you loose patience for all the harassment by the sender, you can always complain about it to the Cyber Police in your locality.

Share Files With Your Pals Instantly With Ge.tt

Gett logo

Ge.tt, is a new file-sharing service with a difference. With Ge.tt, not only you can share your files instantly but you can also share the link with your friends immediately without needing to wait till the upload gets over. You can share the links in real-time with your friends over Facebook, Twitter and email. This innovative web-app doesn’t use any additional plugins and is as simple as it can get.

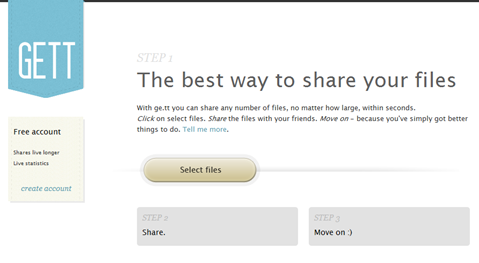
Select files in Gett

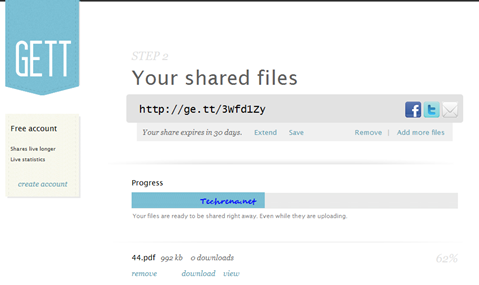
To get started with Ge.tt, head over to the homepage. Creating an account is not mandatory, Ge.tt still keeps you files on the server for a period of 30 days. But by signing up for an account, you can extend the time till which the files reside over the server. Click “Select Files” button and start uploading (you can also drag-and-drop in supported browsers). Wait for a while till the shortened link for your shared file appear. You can see that the download URL for the shared file appears even while the uploading of the file is still under progress.

Shared files in Gett

When you share the download link with your friend, he can also see the status of the file upload and the advantage here is that he can immediately start downloading the files before the whole uploading process could even get finished. On the other end, you can go on adding as many files as you can after you share one file and all these files will instantly appear to your friend at the other end without even refreshing the page. Ge.tt doesn’t clearly mention any limits for the size of the file being uploaded, but they do have rules for the nature of the files that are allowed to be uploaded.

Checkout, Ge.tt

[Tip] Disable Web Clips Ads In Gmail

Web clips inside gmail inbox

Google had added Web Clips sometime back originally with the intention of showing some RSS and Atom feed snippets, blog posts, news headlines and above the inbox in Gmail. But seldom you see any useful clips in your Web Clips section as most of the messages that appear in this section are now seem to be just ads (sponsored links). Google however has left the choice to the users to either enable or disable them. If you find them annoying a bit, here is what you need to do in order to get rid of them:

1. Login to your Gmail and open the Web Clips settings page.

2. Uncheck against the “Show my web clips above the Inbox”.

Web clips settings in Gmail

3. Go back to inbox to see the change, the Web Clips should no longer appear above your inbox.

No web clips inside Gmail

Black Friday 2010 Ads & Deals

Black Friday 2010 Is Here:

Black Friday 2010 is just 4 days away and it’s time to make the most of the wonderful 2010 Black Friday ads (deals). if you are a gadget lover, you have every reason to be ecstatic as there are loads of discount deals available on gadgets like mobile phones, digital cameras, blue-ray players, TVs, laptops etc.

Go through all the available Black Friday 2010 deals to find the deal that suits you the best.

Walmart:

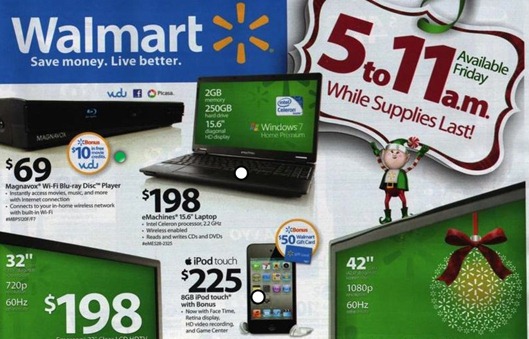
Walmart black friday ads

Wallmart Black friday 2010 deals are out and they look cool! Get an HDTV or laptop starting from $198, while iPod touch is being offered for less than $225.

Visit Walmart.com for more deals.

Best Buy:

Best Buy Black Friday deals 2010

Best Buy deals for Black Friday 2010 include the Barnes & Noble’s Nook e-reader Wi-Fi tablet for $99. Visit Best Buy website for more info on deals.

K-Mart:

K-Mart black friday ads 2010

More info about K-Mart Black Friday 2010 discount deals at official website.

Staples:

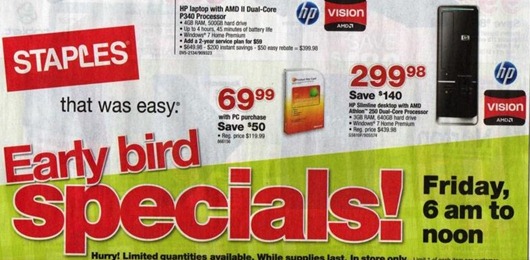
Staples-black-friday-deals

More info on the exclusive Black Fridays 2010 deals by Staples at: Official Website

More to follow..

via