[Tip] Reset Internet Explorer Settings

Internet explorer logo

If you have been using Internet Explorer (IE7, IE8 & IE9) for long, it’s quite obvious that you might have added many customizations, add-ons etc. You have become its master, it does what you instruct. But a day comes where the scene goes out of your hand, Internet Explorer does respond and behaves in an unexpected manner. Doesn’t open the websites, throwing errors at your face which you never want to see like “Internet Explorer has “encountered a problem and needs to close” or “ Visual C++ “runtime error” has occurred in Iexplore.exe”, it either stops responding or even worse, it crashes! Whatever may be the cause of these errors, they are really annoying. The first thing that you should do in such a situation is to disable the add-ons that are known to cause these problems. Even though, this may solve the issue for now, the ideal option however is to reset the IE settings. This will automatically deletes all the add-ons and customizations and makes your Internet Explorer like a freshly installed version. Follow the steps explained below to reset the IE settings on your computer.

Steps:

1. Start the Internet Explorer.

2. Open Internet Options via Alt button> Tools. Go to Advanced tab in the Internet Options.

3. Click on the Reset button available at the bottom of the window to reset your IE settings.
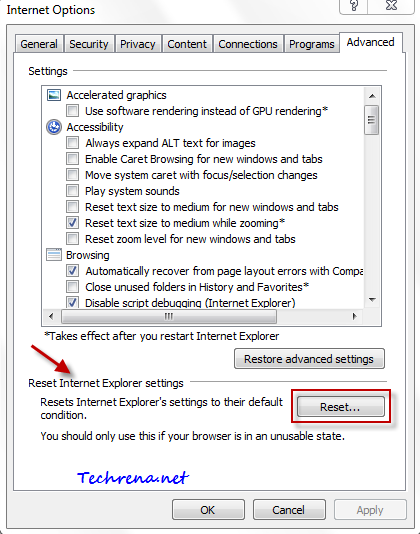
Reset IE settings in Internet Explorer

4. IE will start resetting the settings, wait until it gets finished and click Close in the Reset Internet Explorer Settings dialog box.

Restart your Internet Explorer to see the changes. IE should behave in the usual way from now on.

[Download] IE8 & IE9 Compatibility View List

Internet explorer logo

Even though we are in the age of Internet Explorer 9 , there are still handful of websites that were designed specifically for use with IE7 (or even IE6!) and which may break when rendered in the Inter Explorer 8.

To solve the issues with such websites, Microsoft has included “Compatibility Mode” in IE8. Whenever the browser finds that the URL entered by the user points to a website that is mostly compatibility with IE7 and older versions, the browser will quickly switch to the Compatibility Mode to render the content as it would be seen in the older versions of the Internet Explorer.

IE8 (as well as IE9) maintains a native list of websites that are to be rendered “Compatibility Mode”. To view this Compatibility view list in your browser, type the following in the address bar:

res://iecompat.dll/iecompatdata.xml (IE8)

File:\\%LOCALAPPDATA%\Microsoft\Internet Explorer\IECompatData\iecompatdata.xml(IE9)

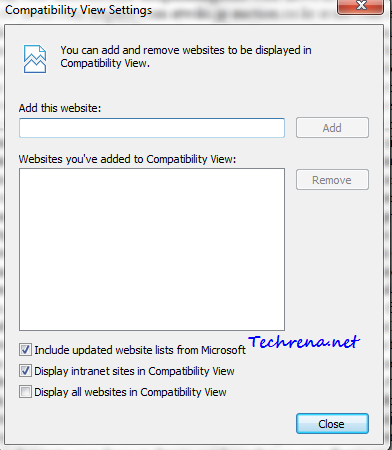
You can also add your own websites  to the list (IE8 or IE9) by clicking on the Alt button > Tools > Compatibility View Settings:

compatibility view settings

Microsoft now and then updates the Compatibility View List by including or removing websites to the list. It is rather surprising to find that websites from Microsoft own domain are featured in the list (Microsoft.com and Live.com). Download the latest Compatibility View lists in (xls format) for IE8 and IE9 from the links given below:

IE8 Compatibility View List (Updated on 04/17/11 – Link expired)

IE9 Compatibility View List

Disable Internet Explorer First Run Welcome Screen Pop Up

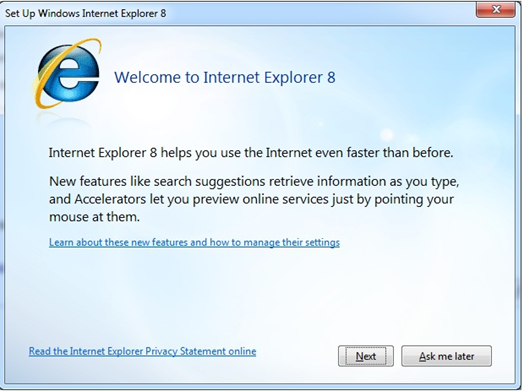
When you install Internet Explorer 8 or IE9 and launch it for the first time (or even when you reset the settings), you might have noticed the Set Up Windows Internet Explorer 8 (applies to Internet Explorer 9 as well) screen (Tour and RunOnce) appears asking you to go through a few steps to change the configuration of the search and accelerator settings.

IE8 Set Up Welcome Screen

You might not want to see this popup every time you install IE (IE8 or IE9) or reset settings in IE. Unfortunately Microsoft hasn’t made it easier to disable this initial set up. However there are workarounds to achieve the same.

In this post, I’ll discuss about different methods to disable this initial set up popup:

Method-1: Using Group Policy Editor:

If you are using Professional, Ultimate or Enterprise versions of Windows 7 or Vista, you can tweak Group Policy Editor (gpedit) to disable the initial set up for Internet Explorer 8/9.

1. Press Start button + R and type “gpedit.msc” in the text field and press Enter to launch the Group Policy Editor.

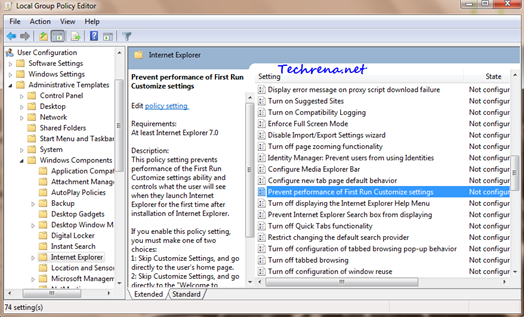
2. In the left pane, expand User Configuration, then find and expand Administrative Templates, next find Windows Components under it and expand it. Then finally find “Internet Explorer”, click on it.

So the path would be: User Configuration> Administrative Templates> Windows Components> Internet Explorer

4. On the right pane, find “Prevent performance of First Run Customize settings” and double click on it. A new settings window will open up.

IE settings in GPEDIT

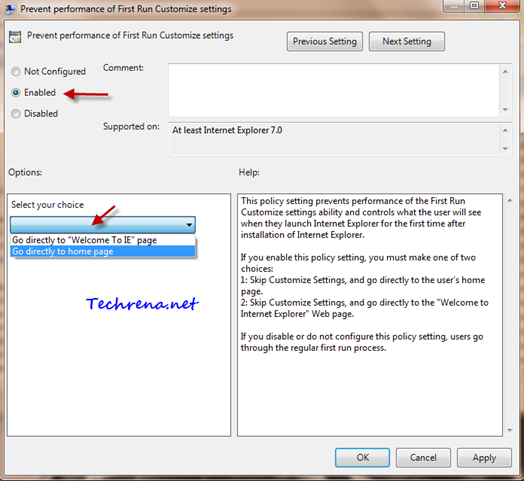
Prevent Performance of First Run Customize settings

5. Set the value to “Enabled” and then go for the options section. You will have two options from the dropdown menu:

i. Go directly to “Welcome To IE” page

ii. Go directly to home page

Select the first option (i) to skip the IE first run Customize Settings and go directly to your home page.

Select the second option (ii) to skip the IE first run Customize Settings and and go to the “Welcome to Internet Explorer” page directly.

6. Click Apply to save the settings then click OK and close the Group Policy Editor window.

Method-2: Using Registry Editor:

Warning: Using Registry Editor to modify Registry settings without much knowledge is deemed dangerous as it may cause some serious problems. Proceed to the Registry Editor at your own risk.

1. Press Start button + R to open run command dialog box. Type “regedit” and press OK to open the Registry Editor.

2. Before we work further, save a backup of the Registry Editor. Go to File > Export and save the .reg somewhere on your Hard disk or USB disk drive.

3. Navigate to the following path carefully in the Registry Editor:

HKEY_LOCAL_MACHINE\>Software\>Policies\>Microsoft\>Internet Explorer\>Main

4. Right click on the right pane and select New > DWORD (32-bit) Value.

IE8 regedit

5. Give it a value DisableFirstRunCustomize as shown:

DisableFirstRunCustomize

6. Now right-click on it and choose “Modify”.

DisableFirstRunCustomize modify

7. Modify its DWORD (32-bit) Value to “1” from “0” and click OK.

DisableFirstRunCustomize edit DWORD

8.Exit the Registry Editor.

Note: If you follow the Group Policy Editor method, the settings will be applied to all the users accounts, where as if you follow the Registry Editor method, the settings will effect only the currently logged in user account.

[Tip] Change The Default Menu Bar Position In Internet Explorer

Internet explorer logo

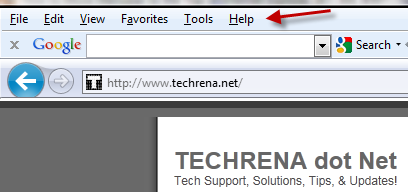
If you are using Internet Explorer 7, 8 or even the latest IE9 beta, you might have noticed the change in position of the menu bar from IE or even from other browsers like Firefox, which shows the menu bar above the address bar. Of course, even though there’s no harm when the menu bar is at the top or beneath the address bar, but given the fact that you might have been accustomed to using it at the top. Here we have come up with a small tweak involving registry editor, which can change the position of menu bar in the Internet Explorer.

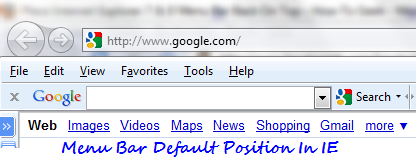
Default menu bar position in IE:

menu bar position in IE

As you can see the menu bar is located beneath the address bar (location bar) in the Internet Explorer. Follow the steps mentioned below to change its position:

Steps:

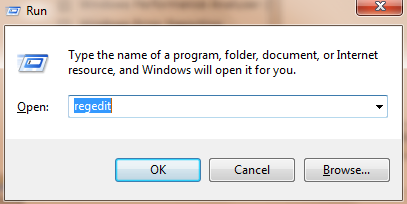
1. Press Start button + R to open the run command bar. Type “regedit” and press enter.

regedit run command

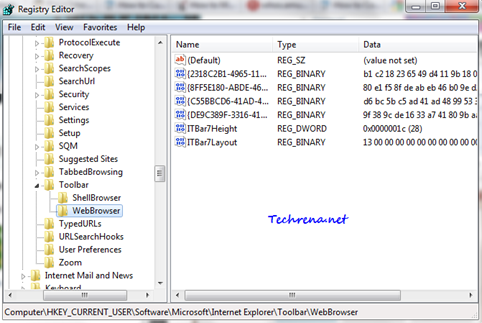
2. In the registry editor, navigate to the following path:

HKEY_CURRENT_USER> Software> Microsoft> Internet Explorer> Toolbar> WebBrowser

Registry Editor webbrowser

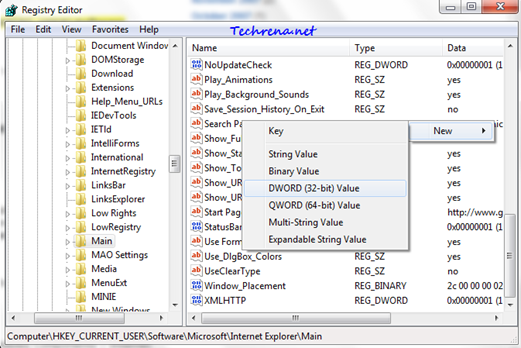
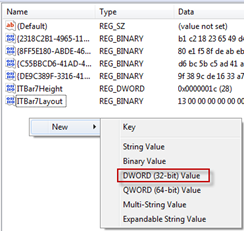
3. Right-click on the right hand side pane and select “New > DWORD (32-bit) Value“.

New DWORD

4. Give the DWORD value ITBar7Position:

ITBar7Position

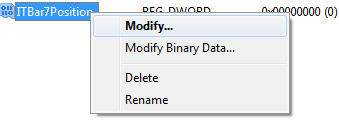
5. Right click on ITBar7Position and choose “Modify”.

Modify DWORD ITBar7Position

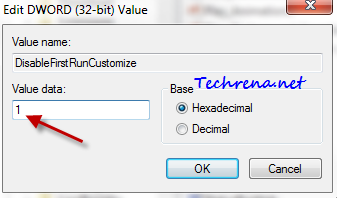
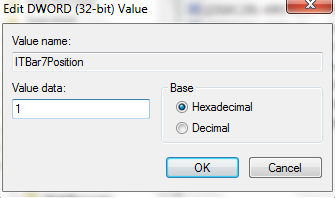
6. Enter “1” under the value date filed instead of “0” and click OK. Close the Registry Editor.

Editing DWORD Value Data

You are done with the tweaking. Open Internet Explorer now and you should see the IE menu bar being moved to top like this one:

Menu bar at top in IE

Warning: If you are a novice user of Windows and doesn’t know much about Registry Editor, stay away from this tweak. A wrong edit at the wrong place in Registry Editor can make your Windows corrupt. Always take a backup of the registry editor before working with it (use File > Export > save location).

How To Open IE In Private Browsing Mode By Default

Internet explorer logo

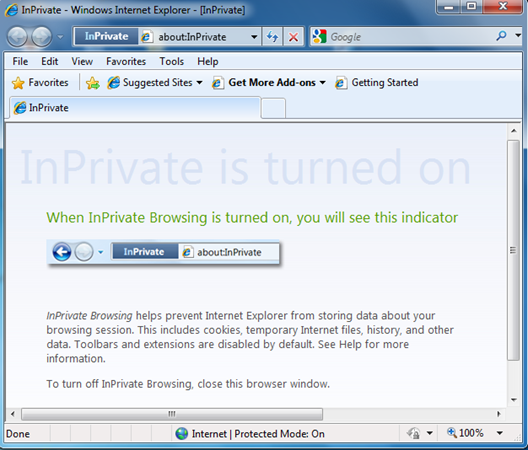
In Private Browsing Mode IE

Private browsing mode” is idle for those who don’t want other users on the same computer to see sites that he had visited and other information. In private browsing mode, the browser will not store your browsing details in cookies or in browsing history.

But for some reasons this private browsing mode is hidden in the browser windows and is not that easy to access (even though you can use a keyboard shortcut to open it, I’d still want a better way) this mode. Even if we create a desktop shortcut for Internet Explorer, it’ll only create a shortcut for normal browsing mode, not the private mode. But here’s a tutorial for you which explains you how to add a private browsing mode desktop shortcut.

1. Create a desktop shortcut as you would do normally.

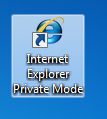
IE private mode shortcut

[I just renamed the shortcut to “Internet Explorer Private Mode” to reflect its purpose]

2. Right-click on the shortcut now and you will be under “Shortcut” tab by default. You can find a field “Target” under the Shortcut tab.

3. Append the following string to the target location present in the filed:

-private

Now the string will look like:

IE private mode shortcut

"C:\Program Files\Internet Explorer\iexplore.exe" -private

4. Click OK to save the settings.

You can now use this shortcut to start Internet Explorer in “Private Browsing Mode” by default.

Windows 7:

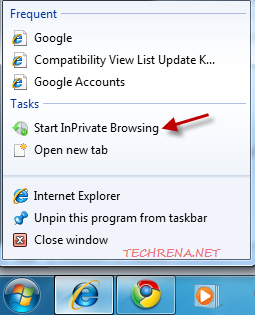
If you are using Windows 7, you need not worry about going through all the above listed steps to create a shortcut as Windows 7 by default will have a shortcut to start InPrivate Browsing. Just right-click on the IE shortcut present in the taskbar and choose “Start In Private Browsing option” from the list.

Windows 7 IE start inPrivate Browsing