Create A Facebook Page For Your Website [How To]

facebook_logo

Facebook is undoubtedly the no.1 social networking site in the world.According to Alexa data, it’s next only to Google.It is very much true that majority of the traffic to the most of websites on the internet comes through Google mainly.Similar it is always essential for the website owners to look at sites like Facebook also as traffic sources for their blogs, provided they offer pretty good lovable content that the users on the Facebook like to read.Facebook has made it easier for all the webmasters to integrate Facebook into their sites easier courtesy the Facebook “Like”.

If you are a webmaster the you may be want to know how to create a Facebook page for your website or blog.So we are coming up with thus tutorial that will guide you to create a page for your site in Facebook in 10 simple steps.

Steps:

#1. Go to Facebook.com and login with your ID.If you don’t have an account yet, you must be living in another world, just come back to our world and signup for Facebook now.

#2. Go to Facebook create new page link.

#3. You will now find 3 options:

  • Local business
  • Brand, product, or organization
  • Artist, band, or public figure

Choose the 2nd option, and select “Website” from the drop-down menu.

#4. Give your page a name and click “Create Official Page”.

#5. Now you have created a simple page which is just having name nothing else.So we need to start editing the info about your website.

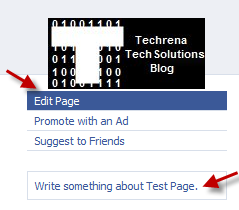
#6. Add a picture to your website page and edit other information as well from the Info tab.

Change facebook page picture
edit facebook page

#7. Go to page settings> find a section Notes under Applications.Click on Notes to open and edit notes.
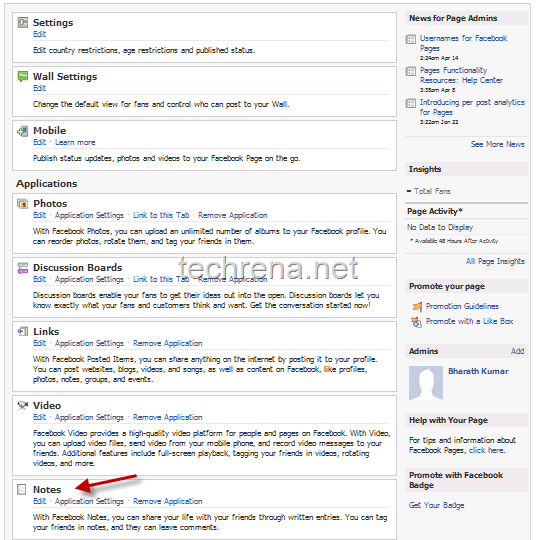
Notes in Facebook page settings

#8. Under the Notes settings, click on Import a blog.
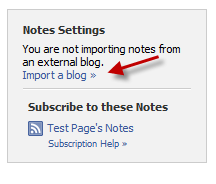
Notes settings in facebook page

Enter your blog URL in the Web URL field (you can even enter your blog’s RSS feed address) and click Start Importing.
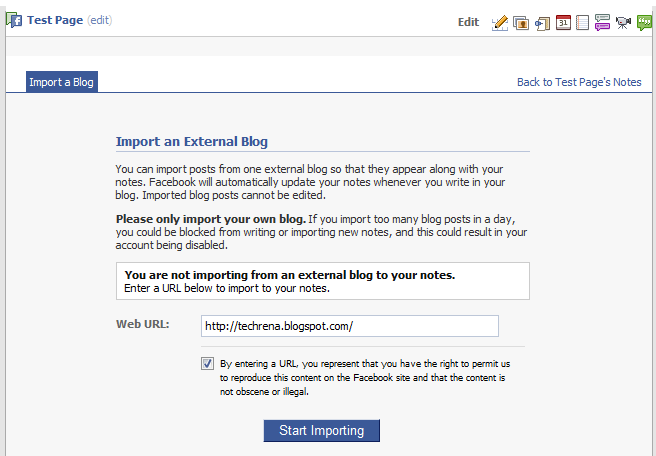
Import a blog in Notes settings in Facebook page

#9. Now you will be shown the preview of the imported blog.Click Confirm Import to finish this step.

Facebook page blog import preview

#10. Now you are done with creating a page for your blog.You can also click on “Write Something about your page” link as shown in step #6 to write a brief introduction to your site page.Now your page looks like this, add yourself to the Facebook page by clicking the Like button.
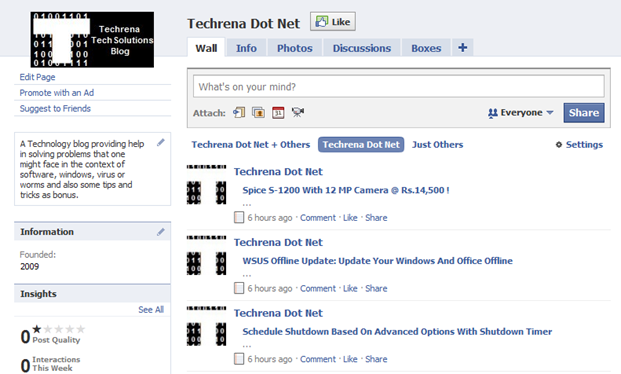
techrena.net facebook page

May be you should also start following our blog in Facebook by clicking the Like button or by visiting Techrena Dot Net Facebook page.

Pinging Your WordPress Blog To Google Blog Search

wordpress logo

Is new your new WordPress not appearing in Google blog search results? Learn how to include your WordPress blog in Google blog search results.

Google Blog Search Ping Service – The manual way

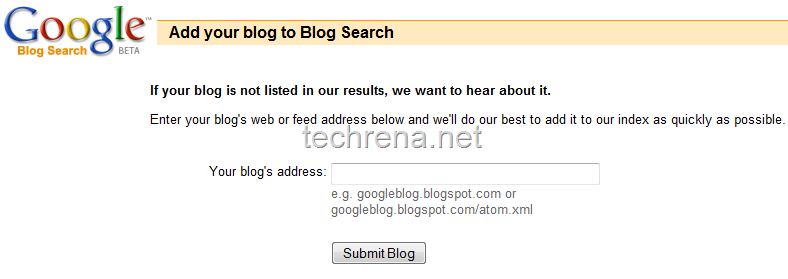
If your blog is relatively new and if it hasn’t been included in Google Blog search yet, then you can notify Google blog search about your blog and get it included in the same by visiting this Google blog search ping service page.You can either enter your blog URL or enter your blog’s feed URL.

Google Blog Search Ping Service

You can also use this Google’s blog ping service to ping your latest posts manually.

Using WordPress Update Services – Automatic:

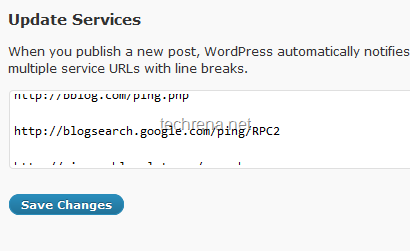
If are usingWordPress platform for your blog, you need not worry bout pinging Google blog search each and every time when you publish a new post to your blog.WordPress has a default “Update Services” where you can add various update services which you want WordPress to ping automatically after each post.You can find Update Services under “Settings> Writing” in your admin dashboard.

You can either choose pingomatic.com pinging which updates multiple services (including Google blog search ping service) and search engines about your blog updates or you can manually add the following Google blog search ping server (which supports XML format) into the WordPress update services:

http://blogsearch.google.com/ping/RPC2

wordpress update services

You may also read more about Google crawling & indexing, also about protecting your WordPress internal files

Moderate and Reply to Comments on WordPress Blog From Your Desktop

Moderating Comments in your Blog is also another workload for bloggers with the increase of spammers and spam comments everywhere. Yes you would have installed plugins to block spam comments. But some of the comments may slip in anytime. Or if the comment is offensive or is violating your policies you need to spam or remove those comments manually.

Another Important thing is that if you want to reply to a comment, then it will take no time and the commenter who needs a reply will be quite impressed if you reply as soon as it is commented.

The overhead of finding the comments one by one and moderating them is a big headache. Now in order to help you solve this problem, WordPress presents the Desktop Comment Notifies for Windows. Just install and configure your blog settings, the comments will be notified in your desktop as soon as it is posted.

Try this exciting Desktop Comment Notifier by WordPress and help yourself to regulate, all the comments live.

To start Download WordPress Comment Notifier from the link below:

Download WP Comment Notifier

Size: 3.30 MB

File: wp-comments-notifier-setup.0.11.exe

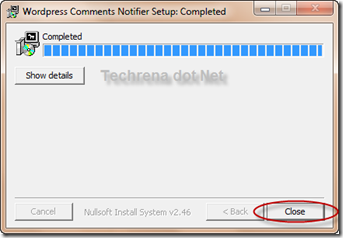
After downloading, Install it on your PC:

Wordpress_Comments_notifier

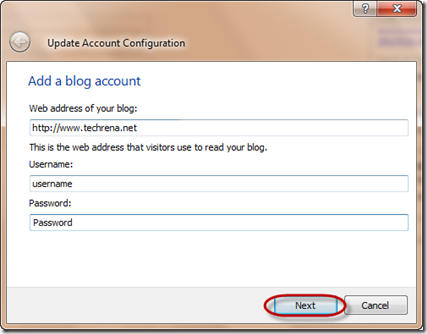
Open wp-notifier and Update your Blog settings. Enter your blog URL, Username and Password. Do not forget to put http://

Update_Blog_Account

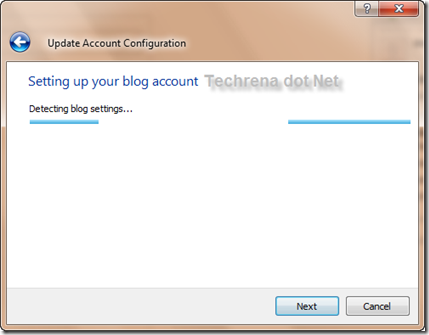
Detect_blog_Settings

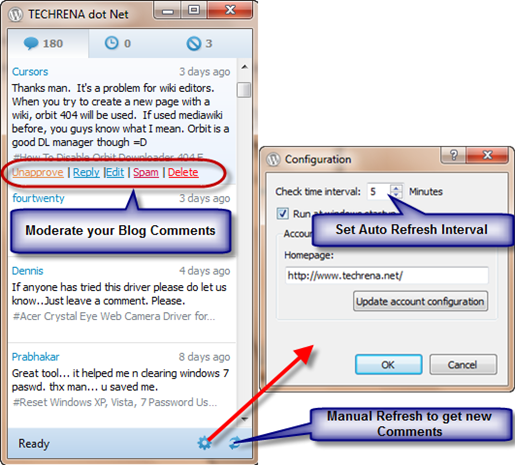
After successful Configuration you can see the Comments on your Blog. you can approve or unapprove, delete, spam, reply, edit a comment. You can set the frequency which it updates the Comments list from your blog. The Frequency is 5mins by default.

Moderate_Wordpress_Comments_from_Desktop

Now you can easily monitor all the comments you are getting live.

Buzrr Offers Google Buzz Counter

Buzrr logo

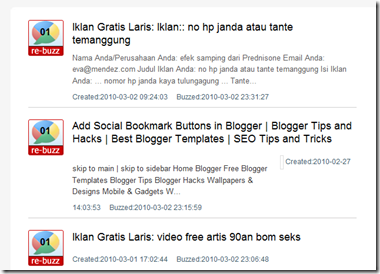
Buzrr re-buzz

With Google Buzz setting itself as another social content sharing tool, there are more and more easier sharing options are being introduced by developers.

We have previously talked about Google Buzz desktop applications for easier buzzing.Now a website called buzrr.com has come forward to offer the Google Buzz count button service similar to that of tweetmeme.com’s ‘retweet’ service.

Buzrr Google Buzz count button

Implementation:

If you are using Blogger.com blogs, visit buzrr.com to get the code to be inserted in your blog’s HTML source

If you have a WordPress blog, you can download the newly released plugin from here:

Download:

Buzrr_wordpress_plugin

Well, the share count buttons list is growing endlessly (Retweet, F share chount, now Buzrr) 🙁

Show Post Tags In Your WordPress Blog Posts Easily

post tags in WordPress

WordPress users might be knowing about Post tags/ template tags or simply the tags that this blogging platform supports.

Many a times themes come up with default feature to show either individual post tags or “tag cloud” in the single post pages.

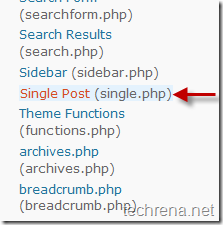
But some themes do not come with showing post tags on single post pages by default.In such cases, follow add these codes to your “single.php” file with in The Loop.

single posts php file

Case-1 : Default Use (Separated by Commas)

<p><?php the_tags(); ?></p>

Case-2 : Tags Separated by  Arrows

<?php the_tags('Social tagging: ',' > '); ?>

You can replace ‘>’ in the above code with a bullet ‘ • ’ to show tags separated by bullet

Case-3 : Tags as lists

<?php the_tags('<ul><li>','</li><li>','</li></ul>'); ?>

post tags example

If you are not using Noindex for tag archives, you must disable showing full post on tag archives to just showing excerpts only.`

WordPress 2.9.2

wordpress logo

WordPress has updated it’s famous blogging platform from earlier version 2.9.1 to 2.9.2.This addresses the problem where untrusted logged in users can secretly look into the trashed posts belonging to other authors.

The reason we should all upgrade our WordPress to 2.9.2 according to WordPress developers:

If you have untrusted users signed up on your blog and sensitive posts in the trash, you should upgrade to 2.9.2.

This is a minor update but considering the fact that it is addressing a security issue, we may not want to take chance, and if you have configured Google friend connect for your WordPress blog, keep in mind that all the users who have subscribed to your blog as members, would be treated as users signed up to your blog by WordPress, and what it means that there’s a possibility that these users when logged in can peek at your trashed posts.

Use Tools>Upgrade menu from your dashboard to upgrade to WordPress 2.9.1 or

Download WordPress Zip file

How To Show ‘Post Excerpts’ Only On Archive Pages In WordPress

If you use a WordPress you would better know that managing archives is very essential in terms of SEO prospective.

It’s a SEO rule that if you don’t use ‘nofollow’ for archive pages, you should use ‘excerpts’ only in your theme archives rather than showing full posts, as it creates the problem of duplicate content for the search engines.

Even though many WordPress themes in recent are coming with just excerpt only pages for archives by default, there are still come classic themes like (WordPress Classic theme for instance) that will show full posts under archive pages.In this post I’ll cover how to disable full posts for archive pages.

[Fortunately for showing excerpts on homepage, we have Homepage Excerpts plugin, but for archive pages, we need to follow the below procedure]

Steps:

This method is very simple and involves a very minor code editing.

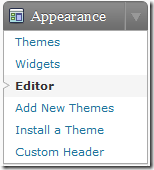
1.First, go to your “Theme editor” page from your WordPress Dashboard.

Theme editor under WordPress dashboard

2.Under the theme files, find and open a template file called archives.php (in some themes, you need to look for tag.php and category.php template files included separately for each type of archives)

In the template file look for something similar to the following line

<?php the_content

Archives php file the_content

3.Replace the above line with, the following line:

<?php the_excerpt(); ?>

After editing:

archives php the excerpt5

Now open your archive pages (tag/category), and you will only see the post excerpts instead of full posts.

Now your archive pages will show first 55 words of the blog post as excerpt.But you can still personalize it.Either you can use ‘Post Excerpt’ field under your WordPress WYSIWYG editor or you use “more” tag present under “HTML” mode in your post editor.

More Tag:

Using ‘more’ tag splits your post into parts, and adds ‘Read More” link

More tag in WordPress Post editorOr use ‘Excerpt’ field under the post editor in WordPress

Excerpt field in WordPress Post editor

Note: If you are using some professional theme, you may not find archives.php or other files in your theme template files.

Is Your WordPress Internal Files Structure Coming In Google Search? Read On…

If you are a webmaster or managing a blog, some day or the other you need to sit and dedicate time to optimize your website, and you start it with it editing core internal files and if you are unlucky,  you may end up messing up things without being really aware of what you are doing.

This happened to us yesterday, we were editing some internal files of this blog’s WordPress installation files with an insight to optimize the loading time of our blog.We sat for hours and did edit some files.We could at least do something and slept peacefully with some satisfaction.

Then the next day BANG !! we were astonished to find some of the WordPress internal files that otherwise shouldn’t be publicly visible were all over the Google.That’s the moment we spotted the mess (look at the screenshot below) that happened while editing our site files yesterday and started working to fix them.You understood what the problem was, right? Don’t panic, there are lots of people like us, who are unknowingly keeping their site internal files open (see examples).

Wordpress internal files in Google search

How To Fix This?

Step 1: We tried to understand why this is happening?

Reason: The permission properties of inner files of the site are site to ‘public’ that means anyone can see the internal file structure of your blog/site.

Step 2: Having found out the mistake, the solution is simple (at least as it seems):

Permission properties of these files/directories should be made ‘private’ and indexing of these files should be disabled

Step 3: There are two ways to do disable the indexing of files so that other people can’t see what’s inside your internal directories:

# 1 You can place a index.html file in all the folders which are coming ‘index of..’ structures.

# 2 Edit your .htaccess file to disable private indexing of the folders.

Step 4: While the 1st method is relatively simple one to follow, but it takes time as you need to put index.html files in all the directories that are visible in indexing.

Step 5: The optimal method according to us is editing your .htaccess file to disable indexing of folders.

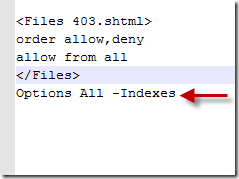
Options All –Indexes

Just add the above code in your .htaccess file (edit through notepad) which is your site’s root folder save it and write it back to your root folder.

Options ALL Indexes in htaccess

Step 6: The problem is solved, now open your Wordpres internal files wihtout logging into the site and you’ll notice the 403 error being returned to you.

This solved the problem in our case.I’ve decided to post this because someone who finds themselves in the same situations as we were yesterday would find it useful to some extent at least.

Download WordPress 2.9.1 Release

WordPress has released upgrade to its latest version 2.9, with WordPress 2.9.1 which has been made available for download just few hours ago at the time this post being written.

This new upgrade includes fixes for the minor issues with the last released version of this blogging software.


wordpress 2.9.1 screen shot

Excerpt from the WordPress official blog post about updates in the version 2.9.1

This release addresses a handful of minor issues as well as a rather annoying problem where scheduled posts and pingbacks are not processed correctly due to incompatibilities with some hosts.

Download WordPress 2.9.1 (Zip file size: 2.2 MB)

(OR)

To Upgrade automatically, login to your WordPress based blog’s dashboard and go to Tools->Upgrade menu and choose ‘Upgrade Automatically’.

WordPress Tip: View All Your Blog Posts With Titles & Post URLs

I wanted to have all of my blog posts with post URLs and titles at one place so that I can quickly quote or make reference to them whenever I post a new post at appropriate places.(In fact I wanted to have a XLS list of the same so that I can always check them directly from my computer .I’m not sure if there’s such a possibility in WordPress.)

However, there’s a little code (thanks to jdembowski), which will allow you view all of your Blog posts with Titles and URLs:

<?php

require_once('../wp-blog-header.php');
query_posts('&showposts=-1&order=ASC');

while (have_posts()) : the_post(); ?>

"<?php the_title(); ?>","<?php the_permalink(); ?>"
<br />

<?php endwhile; ?>

Open text editor, paste this code into that and save it as posts-urls.php,Now upload this file into “wp-content” folder i.e it should be like wp-content/posts-urls.php.

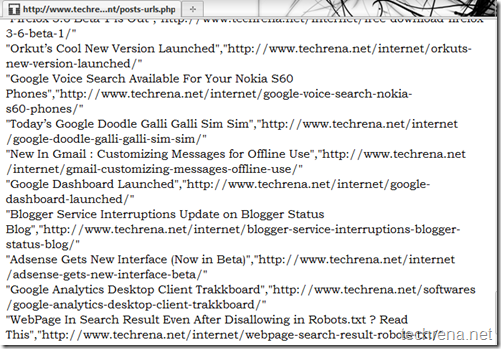
Now open this in your browser like www.yourdomain.com/wp-content/posts-urls.php and you can view all of your Blog posts in Ascending order of time (latest one at last) as a comma seperated list.However if you want it to be in descending order, just use ‘DSC’ instead of ‘ASC’ in the above code.

The output would be something like this:

viewing all blog posts with titles in WordPress

Please let me know if there is any another really good method to extract all Posts and titles form any WordPress blog.

Note: I know that  sitemap.xml file lists all post URLs (in fact all URLs associated with blog) but it doesn’t serve the purpose as it doesn’t show up post/page titles.

Also read Configure Google Friend Connect For WordPress Blogs.