Spice S-1200 With 12 MP Camera @ Rs.14,500 !

spice logo

Spice Mobiles have launched the cheapest 12 Megapixel camera phone Spice S-1200 in India.The phone which is currently available in Indian market, sports a 12MP camera with 3x optical zoom, Xenon flash, auto –focus, multiple face detection, Smile Shutter, Anti-shake and when it comes to other features, it has got 2.4" inch TFT display with a memory expandable up to 32GB, it has Bluetooth 2.1, EDGE, TV-Out, JAVA games and much more.Scroll down to checkout the full specifications.

Pictures:

Spice S-1200 with 12MP camera price in india

Spice S-1200 Specifications:

Dimensions 114 X 52 X 16 mm
Weight 130 g
Display – 2.4” TFT
– 262K colors
– 320 x 240 pixels
Memory – Internal: 70 MB
– External: Up to 32GB microSD
Camera – 12 MP
– Xenon Flash
– 3 x optical zoom
– Multiple face detection
– Video rec: Up to 24.5 fps
Network GSM 900/1800/1900 (2G)
Connectivity – Bluetooth v2.1 With A2DP
– TV Out
– microUSB
Battery 1000 mAh
Talk time Up to 3 Hrs
Standby time Up to 150 Hrs
Colors Black

Price And Availability:

Spice S-1200 is now being sold in Indian market at a price(MRP) of  Rs.14,500 INR.

Review/ Verdict:

The only good thing about the phone is its 12MP camera, other than that there’s really nothing much to look for in this model.If you are a big camera phone lovers, you may probably look at this phone, but as we just heard a new 12MP camera phone Nokia X8 from Nokia expected to hit the markets soon, this may get sidelined in future, there are already phones like Samsung W880 and Sony Ericsson Satio coming with a 12MP camera are available in markets.Coming back to S-1200, the phone has no Wi-Fi, no 3G either, which should have been included for a phone priced at 14K.

WSUS Offline Update: Update Your Windows And Office Offline

Windows Update

It’s very much essential to keep your Windows OS up-to-date when it comes to securing your OS from security threats which may cause damage to your private data.Microsoft knows the importance of the same, hence release Windows update patches more often.You need to be connected to the internet to download these updates from Microsoft.

But what about those innumerable number of people who still can’t manage to get an internet connection for them? Microsoft used to offer AutoPatcher,unfortunately this service was discontinued from 2007.Luckily there are some third party software available on the internet which provide the similar offline update facility, the one which I’m going to talk about is WSUS Offline Update.

WSUS Offline Update:

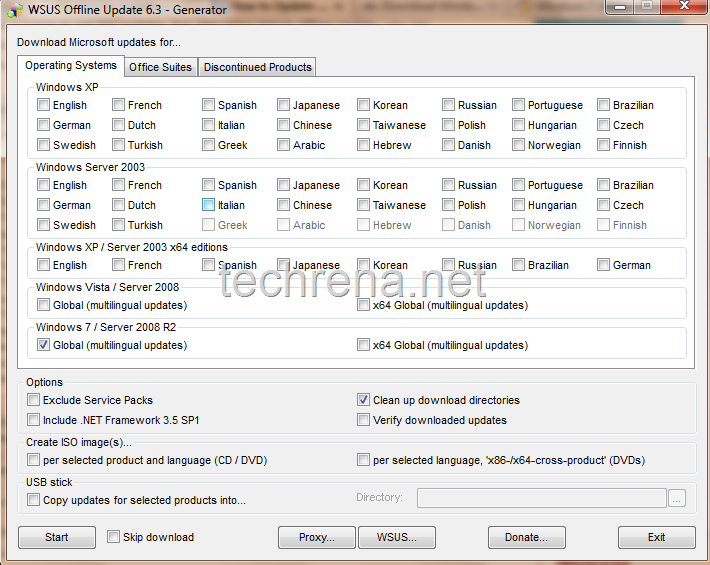
WSUS Offline Update generator

WSUS Offline Update lets you download the patches and updates for Windows and MS Office without requiring an active internet connection on the target computer.All that you need to do is go to your friend’s computer which is having an internet connection, install this WSUS Offline Update, download the Windows updates on an USB drive (or some other removable media) and transfer them to your machine and install them using WSUS Offline Update.

Features:

1. WSUS Offline Update supports: Windows XP, Windows Vista & Windows 7.

2. Supports MS Office 2003 & 2007 versions.

3.You can create an ISO of the updates.

4. Supports copying updates directly to USB

Download:

You can visit the Homepage of the WSUS developers or follow this direct link to download the WSUS Offline Update version 6.51

Schedule Shutdown Based On Advanced Options With Shutdown Timer

Shutdown Timer For Windows:

Many a times, you may need to keep your computer on, until it completes its task like downloading a movie or ripping an entire DVD for instance, these tasks take a considerable amount of time (and considerable amount of CPU usage in some cases), so much so that you just can’t wait until the task gets completed.This where Shutdown scheduler programs will help you.

Even though there are quite a number of shutdown scheduler programs available on the internet for download, the one which I’m talking about is more than just a scheduler.Shutdown Timer, as the name speaks out, is basically a shutdown scheduler for windows.

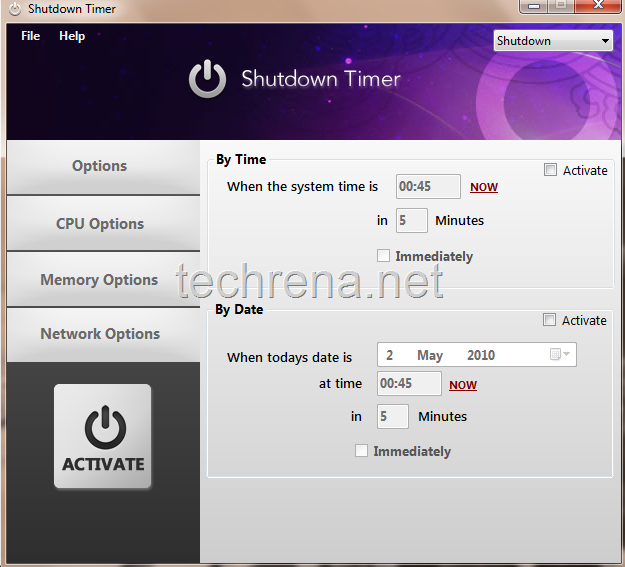
Shutdown_timer_by_time

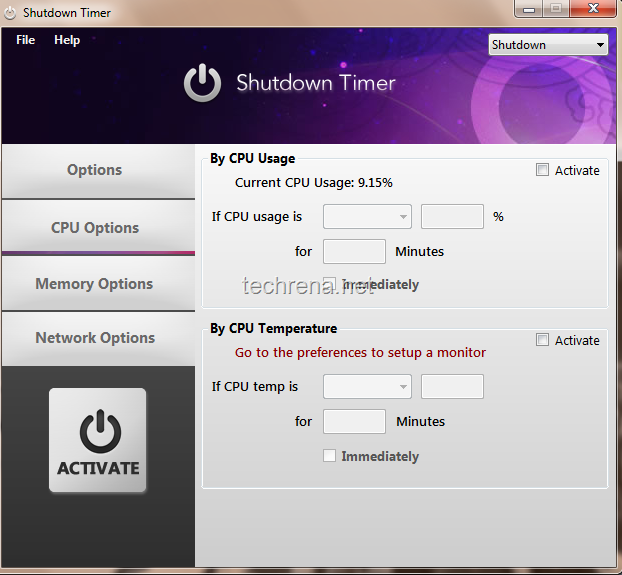
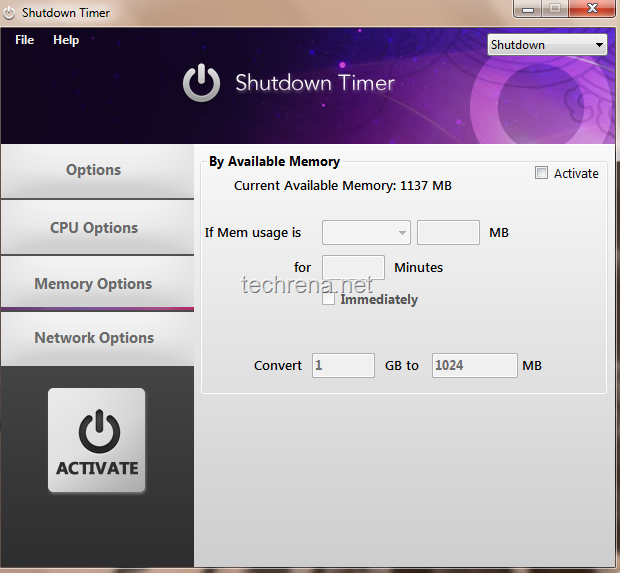
But unlike other schedulers which will only offer you to schedule your shutdown to a predefined time, Shutdown timer offers to schedule your computer’s shutdown based on a wide variety of scenarios.Bundled with a neat and clean UI, Shutdown timer allows you scheduler your computer’s shutdown based CPU memory usage limit or CPU temperature threshold or on network traffic basis besides scheduling your shutdown on a pre-defined date and time.The program continuously monitors your CPU usage and once it reaches the thresholds defined (temperature or memory usage), it will trigger the shutdown event.Scroll down to the bottom for the download links.

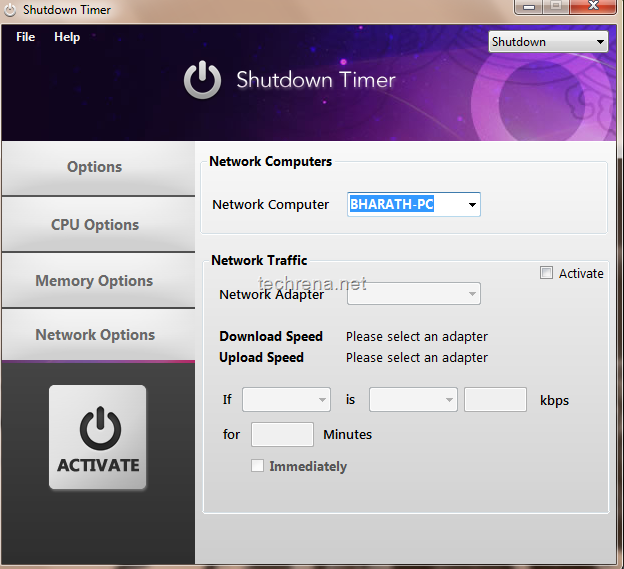
Shutdown timer by CPU usage and temperature

Shutdown timer by memory

Shutdown timer by network traffic

Download Links:

Shutdown Timer (Windows 32-bit)

Shutdown timer (Windows 64-bit)

Related: Read how to create desktop shutdown shortcut

Password Protect A RAR File Using WinRAR

Winrar logo

WinRAR is my favorite archiving software till date.It’s so simple and easy to use.That’s why almost all PC users will have installed this by default as their archiving program.But how many of you are aware that you can actually password protect any RAR file using WinRAR ? If you don’t know how to do ut, follow these steps:

Steps:

1. Right click on the file for which you wan to archive with a password.

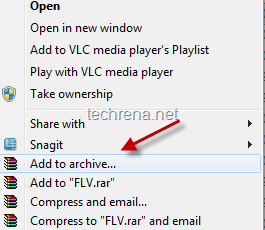
2. Select “Add to Archive”

add_to_archive_winrar

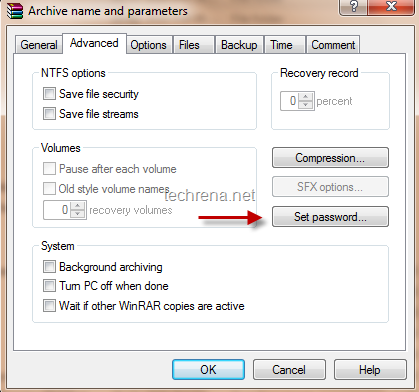
3. In the Archive name and parameters window, go to Advanced tab, click “Set Password”

Archive name and parameters password

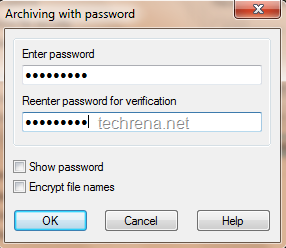
4. Choose the password for the archive and click OK.

setting archive password in Winrar

You can select “Encrypt file names” option if you want to encrypt the files names also, if this is selected, users will not be able to even see the contents of the archive file.

Tikona Wi-Bro Dialer [Downloads]

Tikona logo

We have already posted a review about various tariff plans in Tikona wireless broadband.Tikona broadband tariff plans range from Rs.299 to Rs.4999.Tikona is still much like a start up, without much penetration into the broadband users, so we need to wait and see how much users base it can gather.But there are quite a number of folks out there , already using Tikona.

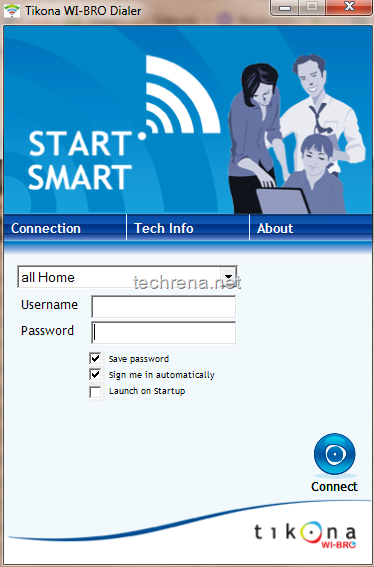
Tikona Wi-bro dailer

If you have already subscribed to Tikona Wi Bro broadband, you might be knowing that you need a dialer to connect to the Tikona wireless network which would have been already provided to you by the Tikona technicians.However, if you have formatted your computer where the dialer is installed without saving the backup file on any other media, you may want to download the Tikona Wi-Bro dialer software to install.So I’m sharing the Tikona wibro dialer file, which you can download from the link given below:

Download Tikona Wibro Dialer 1.4.9.7 (Size: 6.16 MB)

Password: techrena

Nokia 5230 Firmware Update v20.0.005

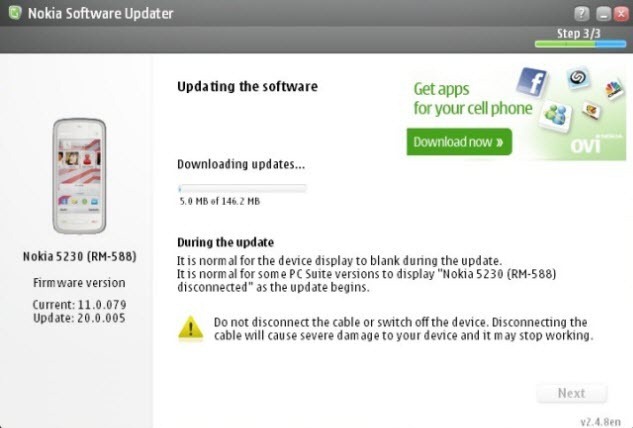
Nokia 5230 has got a new firmware update to version 20.0.005.The new updated version (size: 146.2 MB) can be downloaded using Nokia Software Updater (NSU) or via Over The Air (OTA).The new version is basically coming with a range of fixes.The earlier firmware version of Nokia 5230 was v12.

Nokia 5230 Firmware Update Version 20.0.005

New additions in the v20.0.005 include a new Ovi Sync application icon which will be added to the desktop, all new improved music player, Kinetic scrolling added to the main menu UI, speed increase for the overall system, new GPS code allowing faster fix on your location.

Do a backup of all your data before updating your Nokia 5230 (even though it has User Data Prevention –UDP).As we hear from forums, the update is not yet available in all the regions.Keep checking your NSU for the update to appear for your region.

Transliterate Any Web Page With Google Script Converter

Google India has announced an online Script Converter tool to transliterate text into 17 languages.This comes after Google’s initiative to provide Google Transliteration IME in 14 languages.

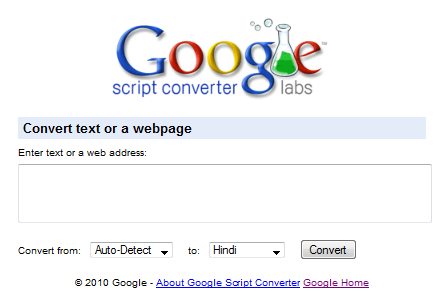
Google Script Converter tool, a Google labs feature will convert any given web page or piece of text given as input from one language script to another meaning that it will just transliterate it but will not translate.

This tool will be useful if you know how to speak a language but can’t read it.Say for instance you can speak and understand Hindi, but you can’t read it.So you would rather like to read the script in a language which you can read to understand it.You know what it means when you say नमस्कार but you can’t read it in Hindi.So what will you do? Go to Script Converter, type the text in Hindi to transliterate it to an easily readable English script, the output would be namaskar.

google script converter

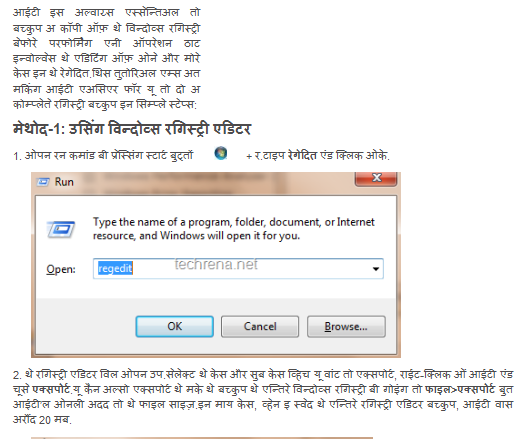
Screenshot: A Techrena post transliterated to Hindi and Telugu.

google script converter web page screenshot

google_script_converter_telugu

The question is who needs this tool? Yeah, all of tech freaks like us who on constantly use gadgets like mobiles, iPod, iPad, internet every thing in English and who have almost forgotten the native Indic script.

List of supported languages (17):

Bengali,
English,
Greek,
Gujarati,
Hindi,
Kannada,
Malayalam,
Marathi,
Nepali,
Persian,
Punjabi,
Russian,
Sanskrit,
Serbian,
Tamil,
Telugu,
Urdu.

Backup Your Windows Registry In Simple Steps [How To]

Windows logo

It is always essential to backup a copy of the windows registry before performing any operation that involves the editing of one or more keys in the regedit.This tutorial aims at making it easier for you to do a complete registry backup in simple steps:

Method-1: Using Windows Registry Editor

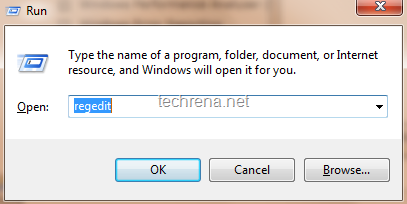
1. Open run command by pressing Start button windows start button+ R.Type regedit and click OK.

regedit run command

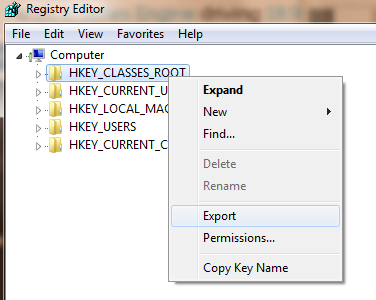
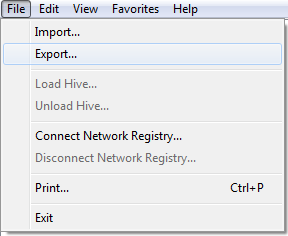
2. The Registry Editor will open up.Select the keys or sub keys which you want to export, right-click on it and choose Export.You can also export the make the backup the entire Windows registry by going to File>Export but it’ll only add to the file size.In my case, when I saved the entire registry editor backup, it was around 20 MB.

Export regedit keysexport option in regsitry editor

3. Save the registry backup to your local drive.

save regedit backup file

Method 2: Using ERUNT

ERUNT stands for The Emergency Recovery Utility for NT can be used in Windows NT/200-/2003/XP, Windows Vista & Windows 7 to backup the entire registry editor.

Download ERUNT for here and follow the following steps:

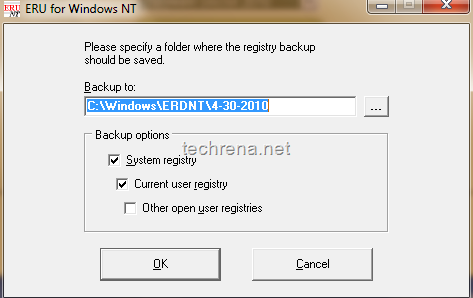
1. Run the ERUNT

ERUNT save backup

2. Set the location where you want to save the entire registry backup file and click OK.

ERUNT in action

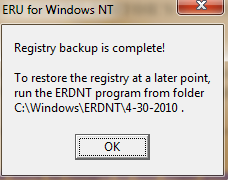
Click OK on the dialog box which you’ll see when the registry backup operation is completed.

registry backup complete in ERUNT

With this, The registry hives (Config, SAM, Security, Software, System) gets backed up on the path that you have selected.

All the 2 methods mentioned above will work on Windows XP, Windows Vista and Windows 7.

[How To] Save And Manage Google Chrome Sessions

google chrome logo

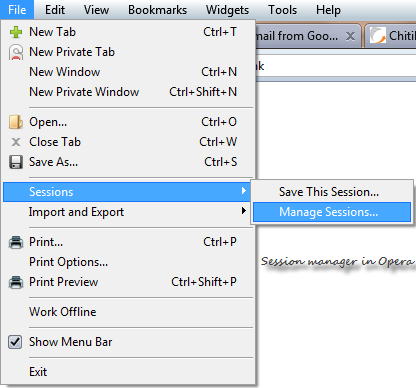
Almost all the browsers off late are coming up with an option to save and manage the browsing sessions.What it means is that you can save the entire session for later reading when you are in a hurry.For instance in Opera, you’ll find this option under File> Sessions>

session manager in opera

But where is such option in Google Chrome?

Ans: It isn’t there at least as of now.This is one of the most requested feature in Google Chrome.I wish the developers considers this in their future releases.

Tip #1: Even though, Google Chrome hasn’t got a default Sessions manager, it does however offer to save your currently opened tabs.For this, go to Wrench > Options > Basic tab> On Start up

Select “Reopen the pages that were open last”

This will save the current session and opens it up as it was when you last closed your Chrome.

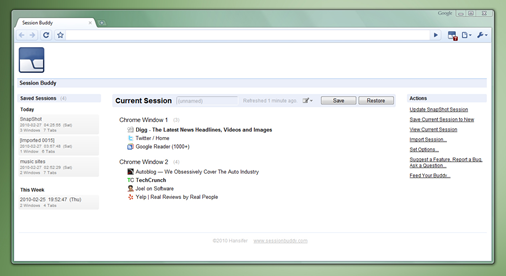
Tip #2: There are some good extensions available, through which you can manage your sessions in Google Chrome.One such extension is Session Buddy.

With Session Buddy, you can view all of your tabs in each window of a current or saved session.

Session buddy

The extension also makes it possible to access saved crash recovery sessions automatically after a Chrome or OS crash.

You can also edit each saved session by deleting individual tabs or windows.

Entire session can be exported into a text or CSV format file.

Install Session Buddy

More Google Chrome resources:

Hide Most Visited Sites from New Tab in Google Chrome in Easy Steps

Enable GreaseMonkey User Scripts in Google Chrome

How to Download Video From YouTube in Google Chrome

Reopen or Recover Recently Closed Tabs in Google Chrome

[How To] Configure AutoPlay In Windows 7

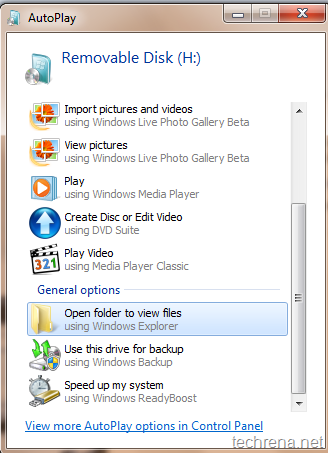
AutoPlay in Windows 7

We are here with yet another tutorial.In this tutorial, I’m going to discuss about how to disable AutoPlay in Windows 7 and Windows Vista.[AutoPlay for CDs/DVDs and AutoRun for USB flash drives or for any removable flash drives.]

AutoPlay (and AutoRun) is disabled by default in Windows 7 and Vista.That’s why Windows gives you an option to choose the possible actions that you  can take without directly playing the DVD in media player.Start reading the following tutorial to learn how to enable or disable AutoPlay .

Tutorial: How to enable/ disable AutoPlay

Covers: Windows 7/ Vista

User level: Intermediate

Complexity: Easy

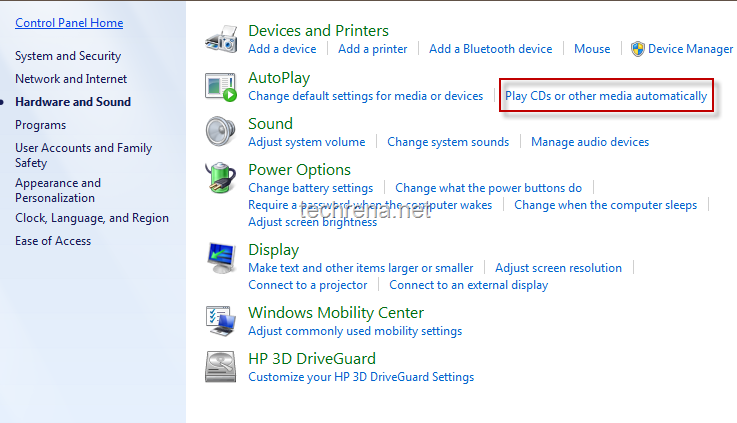
1. Go to Control Panel, and choose “Hardware and Sound” options.

Under AutoPlay, click  Play CDs or other media automatically.

Autoplay in Hardware and Sound

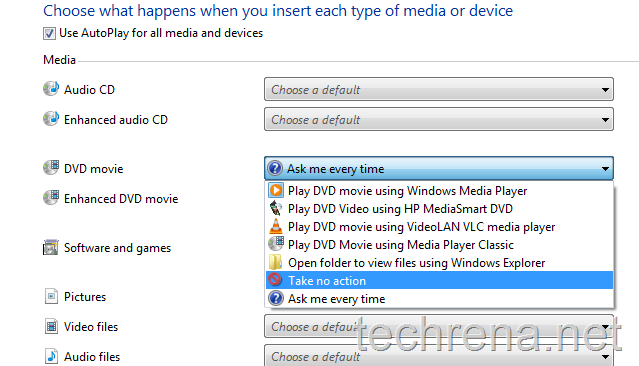
2. Now AutoPlay options window will open.Under uncheck under “Choose what happens when you insert each type of media or device” to completely disable AutoPlay globally for all types of devices.

choose_autoplay_options

3. If you want to disable AutoPlay for particular devices like  DVD movie instance, select the “Take no action” under the DVD Movie options.

disable_autoplay_for_single_type

Likewise you can also configure auto play for USB devices and other plug and play devices.

Using Group Policy Editor [For Business/ Ultimate Editions] :

This methods works only for Business and Ultimate versions of Windows 7 and Windows Vista.

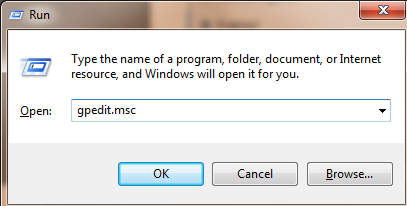
Go to run command by pressing Start button + R.Type gpedit.msc in the text field and click OK.

gpedit run command

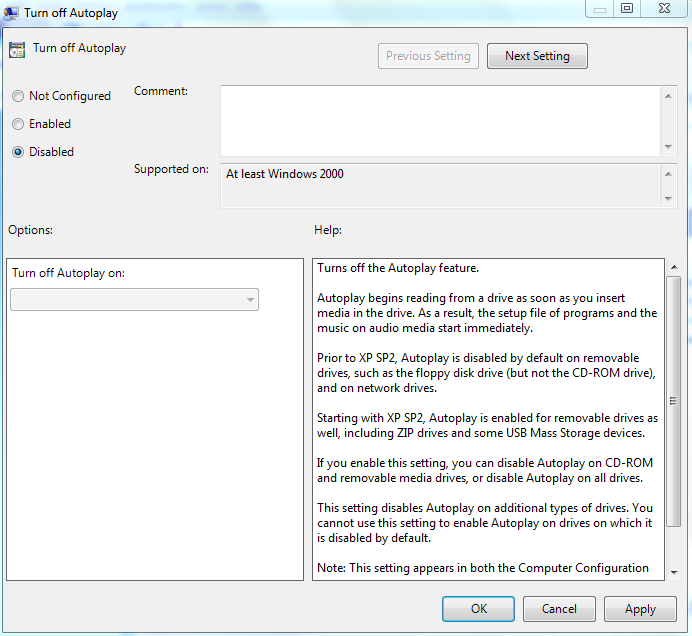
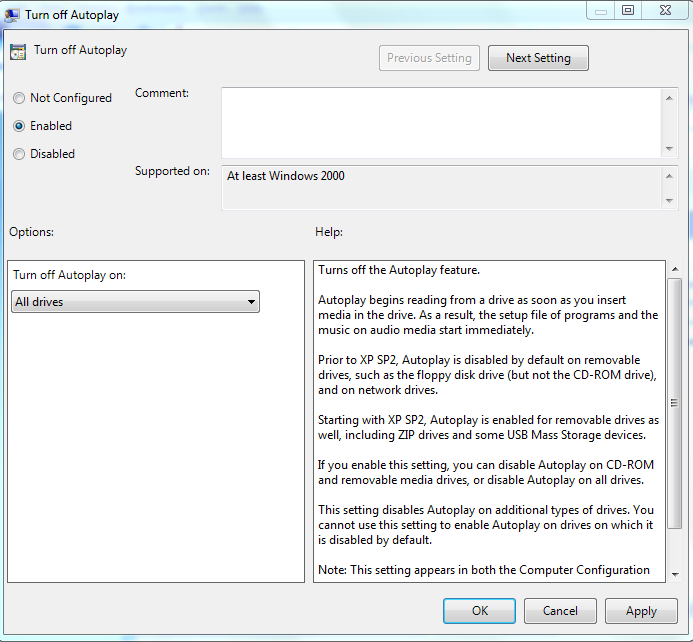
From the Group Policy Editor window, navigate to Computer Configuration\ Administrative Templates\ Windows Components\ Autoplay Policies\ Turn off Autoplay, you will see the “Turn off Autoplay” window as in the screenshot.

To enable the AutoPlay, just change the value of “Turn off Autoplay” to Disabled.

autoplay gpedit enable settings

If you want to completely disable the AutoPlay for all types of devices for default, change select the value Enabled under Turn off Autoplay.

disable autoplay gpedit settings