[Tip] Enable HTTPS In Twitter

Twitter logo

Enabling and using HTTPS mode for websites that require logins is pretty much important particularly if you are accessing the internet via unsecured public Wi-Fi connections.  Understanding how important it is for users to use HTTPS, we have earlier covered several articles explaining how to enable HTTPS mode for Facebook and Gmail. Now it is Twitter’s turn. Twitter has just added an option to enable HTTPS mode for everyone who uses the site. Until now, to use HTTPS on Twitter, users had to visit https://twitter.com/ manually. Thankfully it’s automated now with a simple option. Let’s get into details about how to turn on the secure HTTPS mode for your Twitter account.

Steps:

1. Login to your Twitter account and click on the “Settings” which can be found by clicking on the dropdown arrow next to your account name (if you are using the new Twitter). You may also use the direct Twitter account settings page link to get onto the page.
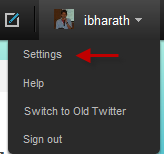
Twitter settings link

2. Scroll down to the bottom of the page and locate the HTTPS settings:

Twitter-https

Check against “Always use HTTPS” and click Save button
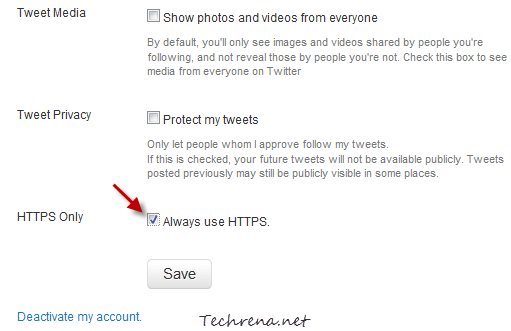
Twitter https settings

That is it. You have now enabled the HTTPS mode for your account. Twitter from now on, will send and receive data from its servers using secure HTTPS. So now you can just use Twitter on any public Wi-Fi hotspots without worrying much about eavesdroppers. If you are using Twitter app on iPhone and iPad, this has already been enabled for you so you do not need to adjust this setting.

Don’t forget to follows us at @techrena (even better if you follow me @ibharath !)

[Tip] Enable Gmail Smart Labels

Gmail smart labels

Gmail has just added new “Smart Labels” feature to its labs section that helps you to ‘classify’ and ‘organize’ your email messages. Gmail users already have features like ‘filters’, ‘labels’ and ‘Priority Inbox’ (launched last year).

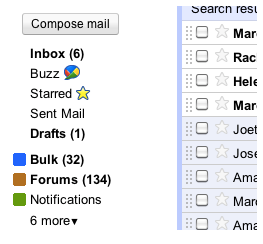
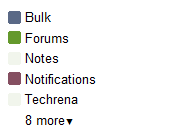
Smart Labels works this way: Smart Labels automatically organizes your mail into Bulk, Notification and Forum messages (labeled as ‘Bulk’, ‘Notifications’, ‘Forums’ respectively). All the newsletters and other promotional messages would under the ‘Bulk’ label. All your social networking notifications, credit card statements etc. would go with the ‘Notifications’ label and finally all the email messages coming from online groups or forums that you have joined would go with the ‘Forums’ label.

Enable Smart Labels In Gmail:

Smart Labels is available as Gmail Labs feature. To enable this for your Gmail account, go to Mail Settings > Labs, locate “SmartLabels” and choose “Enable” radio button against it. Click “Save Changes” button to save your settings.

You should now see the new labels in your inbox.

Gmail smart labels inside inbox

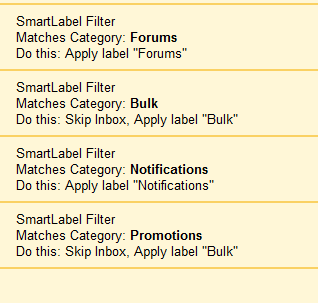
If you have been using Gmail filters, you must find really easy to edit these new Smart Labels as well. To edit any of the Smart Labels (Bulk, Forums or Notifications), just visit “Filters” tab under your Gmail settings and you can edit these labels as you do with usual filters.

Gmail Smart Labels in filters

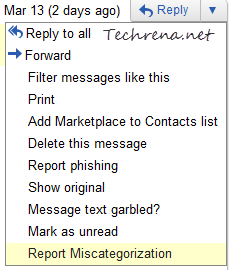
In case you feel any email message is wrongly labeled, you can report it by hitting the dropdown menu next to the message and choosing “Report Miscategorization”.

Miscategorization Smart labels

Search Subtitles Faster With TinySubs

TinySubs realtime search

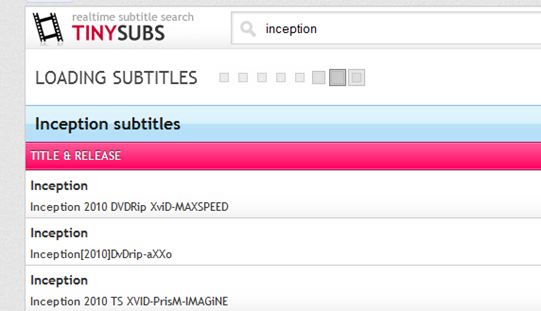
If you are searching for a subtitles to watch a a foreign language film and still not able to find it, try TinySubs.com next time, it should do the work for you. TinySubs.com is a dedicated search engine for subtitles and  fetches the results in realtime. But TinySubs doesn’t host any files on its serves, it only searches for the subtitles from the host sites.

TinySubs screenshot

The usage is simple as you do with most other search engine, just enter the name of the movie to be searched, choose the language and hit enter. You should now be presented with the results listing all the subtitles it found with details including the actual site where the subtitle files are hosted, the language of the subs and whether they are “1-CD versions” or “2-CD versions”.

To try the real-time subtitles search, visit TinySubs.com

For quicker access, you can also try the TinySubs add-on for Firefox.

Found via LifeHacker

The IE6 Countdown

IE6 dead

It’s the father of all the modern day browsers. It’s the one that most of us had used one time or the other. It’s the one that has stood as a synonym to “Internet” in the minds of the internet users. Not a very hard one to guess, Yes, it is the Internet Explorer 6 (or IE6 as they call it).

Even though how good it was in the olden days, we must all agree that the days of IE6 are over. We had earlier covered in a post about a design firm based in Denver conducting funeral for the IE6 by launching a website dedicated for the same. Now Microsoft, the company which developed the IE6 has taken the initiative kill its own product. This could well be the last nail the IE’6’s coffin.

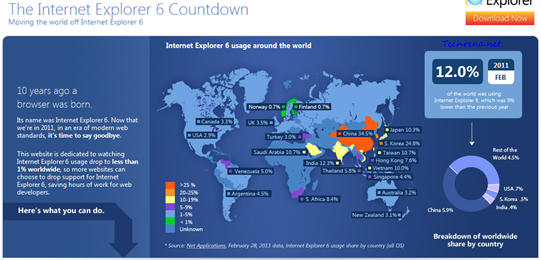
Microsoft has launched a website IE6countdown.com with the aim of “watching Internet Explorer 6 usage drop to less than 1% worldwide”. The Redmond company has no issues is saying that “It’s time to say goodbye” for what has been a 10-year long journey for IE6. The company also advises users to not to let their friends and acquaintances use Internet Explorer 6.

IE6 countdown

Microsoft has also published a worldwide usage map of Internet Explorer 6 and it is stupefying to know that IE6 still has a total share of 12% around the globe. Even though most of the countries could drop their IE usage to a reasonable level of below 5%, the issue is with the Asian countries. As you can see, China tops the IE6 users with a staggering 34.5% usage followed by South Korea with 24.8%. Finland and Norway are the only countries with less than 1% of IE6 usage.

This is a good initiative from Microsoft and we at Techrena.net, do support the initiative to the fullest. We urge our readers not to use IE6 ever and not to let others use it. Please take your time to explain if you find someone at internet cafes or homes using the age old browser on their PCs. Visit the IE6 countdown site to learn more.

Using Google Recipe Search Feature

Google search recipes left-hand panel

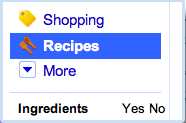
Are you having hard time trying to figure out the best recipe that could be cooked with the available items in your kitchen and within limited amount of time to serve your guests who came for a visit to your home? Wish you had a magic wand in your hands? Well, here is it! May not be a wand but just the right tool which could help you in preparing your recipes, the tool is ‘Google Recipe View’, a new search feature currently available for the users in the United States and Japan. Google’s Recipe view is a new search filter that has been added to the existing filters on the left-hand panel.

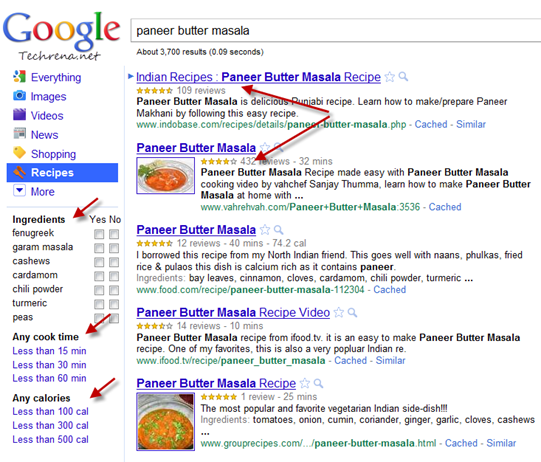
To use this feature, go to Google.com, (Google.com/ncr for users located outside the US and Japan) and type a recipe for which you want to get the information hit the search button and then click on the “Recipes” link in the left-hand panel. You will immediately get the results for the concerned recipe along with ratings so that you make you decide on which one to go for.

Google recipe search results

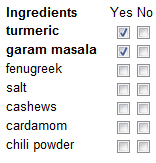
Closely look at the options in the left-hand panel in the results. You can narrow down the recipe search results by choosing the ingredients that you want to include or exclude:

Google Recipe search ingredients

And if you are in rush for time, you can also get the recipe results that help you to cook the recipe in quick time:

Cook time filter in Google recipe search

You might also keep an eye on the amount of the calories that your recipe would serve to your guests. Fortunately there are filters available to narrow down your recipe search results based on the calorie count as well :

Calories filter google recipe search results

Give it a try, I’m sure you will find this pretty useful. Non-US and Non-Japan users can also get try the direct Google Recipe View landing page.

[via] Official Google blog

Watch The Apple iPad 2 Event Online

iPad 2 event

Apple is all set to launch the sequel to its highly popular iPad, the iPad 2 (we believe it’d be the name) today. We are now just an hour ahead of the scheduled iPad 2 launch event, which will start sharply at 10 AM PDT at the Yerba Buena Center for Arts Theater in San Francisco.

Not just Apple fans, I’m sure the whole of the gadget lovers community will be wanting to witness the event live. Also the fact that the iPad has been a huge success and rules almost 93% of the tablet market is just adding to curiosity. Taking into account the huge craze, almost all of the popular blogs will be live blogging the event live from San Francisco. We also expect that Apple will telecast the keynote event live online (Update: Looks like they are not live streaming the event today). We are also hearing news that Apple Store is currently down in preparation for the launch. If you want to follow the event live like us, hit the following links:

Live Blogging:

Engadget

Gizmodo

Gdgt

Macworld

Mobile Crunch

Event Video Coverage (Not Live):

Apple

Covert Word Documents To PDF Using Google Docs

These days, most of the users including organizations prefer to save or export their office documents created using various Office suites like Microsoft Office or OpenOffice etc. as PDF (Portable Document Format) files. This is because when you save it in other typical document formats, some of the elements in the document may not render properly when you open it with Office suit other than the one using which it is made, so it may not look the same on all the computers running on different platforms or using different types of office suits. There are plenty of tools available both online and offline to export the documents into PDF format. In fact, we had earlier written about how to covert Word and Excel documents into PDF using Microsoft Office 2010.

Now let’s me introduce you a not-so-known feature in Google Docs that lets you save any document as PDF.

1. Upload your Word document to Google Docs.

2. Open the document and you click on the “File” in the menu bar.

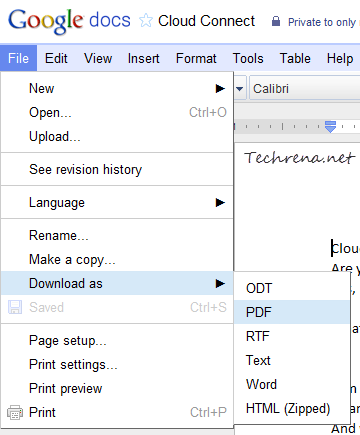
3. Under File > Download as ; choose PDF to save the document as PDF and download to your computer.

Google docs download as PDF option

See Your Facebook Friends Locations On Google Maps

With the growing popularity of Facebook daily, there has been noticeable surge in Facebook related mobile and web applications. Developers are coming up with innovative ideas to build their apps. Once such app that I found lately is, WhereMyFriendsBe, a web based application that shows the locations of your Facebook friends around the world on Google maps. We had earlier covered about Bing Facebook for similar purpose. However, the subtle difference between Bing Facebook app and WhereMyFriendsBe is in grouping the friends map. While Bing app shows your friends profile pictures on their location in the map, the later will list the names of your friends located in a particular area.

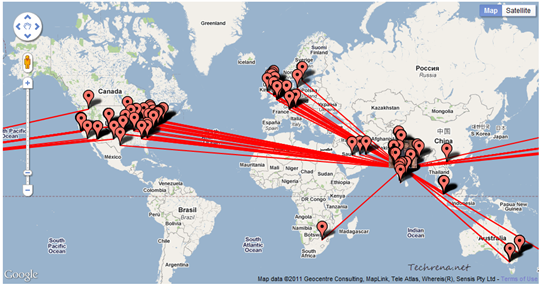
WhereMyFriends Be map

As you can see the app will visualise your Facebook friends on Google maps, based on their location in Facebook profile. If you hover over any of the pins, names of all of your Facebook friends located in that city/location will be displayed. That said, I would still prefer using Bing Facebook map because once you use the WhereMyFriends app, your friends map becomes public. It’s rather surprising that not too many apps exist in this category.

via Labnol

Sync Microsoft Office To Google Docs

Office Google Docs Sync

Google Docs has got into much fame because of its cloud based approach it has adopted. Advantage with cloud based services (when it comes to working on documents in particular) is that you can increase your productivity by means of collaboration, meaning that all of your project mates can work on the document simultaneously syncing each others’ piece of work on the same document collectively to complete the document. Google Docs is very much about increasing the work efficiency by offering collaboration. What if this kind of collaboration comes to the world’s most popular office suit, the Microsoft Office? It can’t get any better, right?

Yes, Google is now offering a plugin called Google Clod Connect for Microsoft Office which lets you collaborate with other editors of your Office document, directly from the Microsoft Office. The plugin allows you to quickly share, backup and sync Microsoft Word, PowerPoint and Excel documents with other co-workers. If the co-workers also install this plugin, they can also directly work from their MS Office document and it will be synced automatically with the other workers.

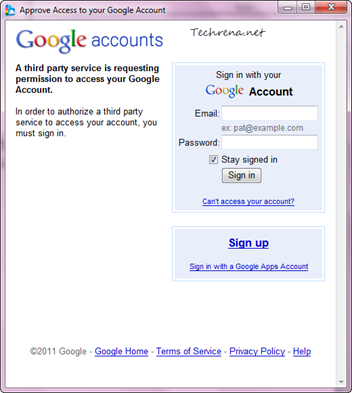
>> Once you download and install the plugin, a new toolbar will be added to your Microsoft Office document. Click on the “Login” button to sign in with your Google account.

Google cloud connect toolbar

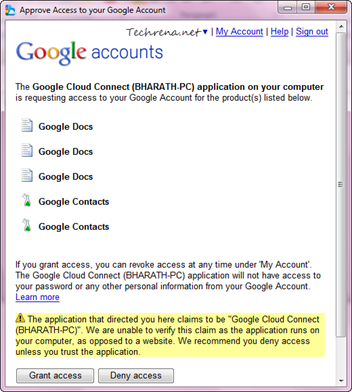
Approve access to Google account

Approve access Google account settings

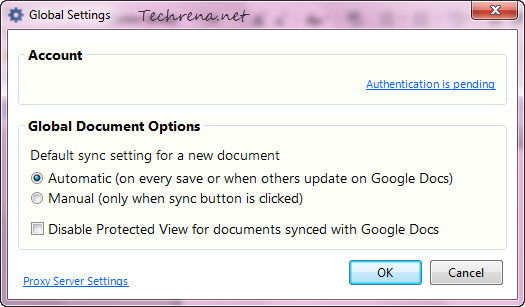
>> You can also choose the default sync settings for a new document:

Global settings for google cloud connect

>> And once you have granted the permissions, you will see a green “Success” icon

Login success cloud connect icon

inside your Office document. You can now work on your document simultaneously with other workers directly from the Microsoft Office.

Google cloud connect toolbar options

Watch the below video to see how the plugin works in Microsoft Office.

[via]

Picasa Web Albums Multiple File Uploader

Picasa web albums logo

Google’s Picasa web albums is popular among the online community as a tool to quickly upload photos and videos to store and share them with others. But the problem with the online upload tool was that you were not allowed to upload multiple photos at once and you could only upload up to five photos at once. If you have some hundreds of photos to upload, this could be really tiresome process and wastes a lot of time. The only workaround this problem for all these days has been to install and use the Picasa desktop software which allows you to upload bulk pictures at once to Picasa Web Albums. But then, we have always wanted the web uploader to handle the multi-upload so as to possibly avoid the installation of another software just to get this missing tiny feature.

You no longer need to worry as Google has just lifted the five-at-a-time limitation to the image uploader in Picasa Web Albums, meaning that you can choose multiple photos and upload all of them at once (but be aware that a maximum of 1000 photos are allowed per album) to your album on the Picasa Web Albums.

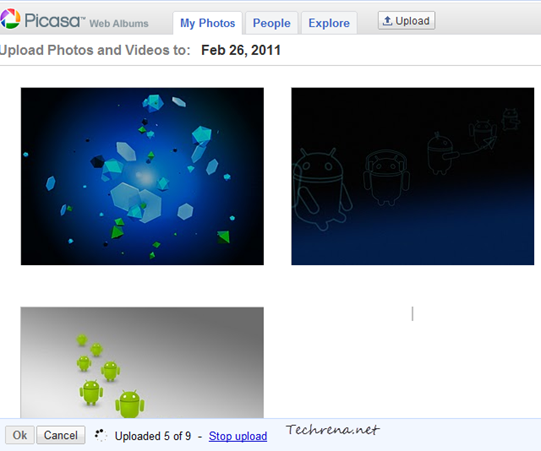
To get started, open the Picasa Web Albums and login with your Google account. and click the “Upload” button if your are using Firefox, Google Chrome or Safari. You will now be asked to enter the album details and then in the next page you will be asked to choose the photos to upload. Once all get uploaded, you will see their thumbnails. You can then add captions, zoom in or delete from the upload screen.

Upload photos to picasa

Picasa web albums uploading photos

If you are using Internet Explorer, you can use the Upload Control plug-in in IE besides using the basic uploader.