[How To] Disable or Enable Registry Editor In Windows 7

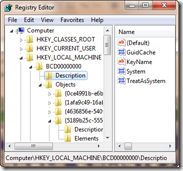
regedit

With viruses trying to attack your system and change the registry, why don’t we try disabling the registry editor now itself before the viruses do it?

Yes, this question is a clear one and why don’t you disable the registry editor by yourself before someone changes your registry and mess with your computer.
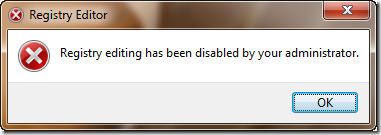
regedit_disabled Well we have a lot of methods to disable or enable the registry editor. Some of the easiest ones are given here.

1. Disable or enable Registry Editor using Registry Enabler & Disabler 3

Registry Enabler & Disabler 3 is a freeware which can be used to enable or disable Windows Registry editor. It is a safe program.

Download: Registry Enabler & Disabler 3

Size: 276 KB

Registry_Enabler_Disabler_3

By using this program, you can directly enable or disable the Windows registry editor.

2. Disable or enable Registry Editor using Local Group Policy Editor

Press Start + R and type gpedit.msc and press Enter.

In the Local Group Policy Editor go to the location:

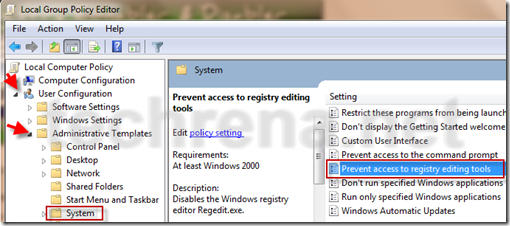
User Configuration—> Administrative Templates—> System

Under System, find Prevent access to registry tool. Double click on it and set Enabled to disable access to registry editor.

disable_registry_editor

Set it to Disabled to enable access to Registry Editor.

Note: Local Group Policy Editor which is not available in Home versions of Windows

3. Enable Registry Editor Using VBS script.

This method is given in techrena.blogspot.com. To read more visit:

How to enable Registry Editor (REGEDIT)

You can subscribe to our RSS feed via email for more tutorials under Solutions.

Find The Microsoft.NET Framework Version Installed In Your Windows PC

Microsoft .Net logo

Well, if you are using a computer running Windows operating system, you might be aware of the Microsoft .NET Framework that needs to be installed in your computer in order to let the most newer applications created for Windows run smoothly on your PC without much compatibility issues.

While it’s easier to install the .NET Framework SDK anytime by downloading the file from the Microsoft’s website, you may definitely want to know the version of the .NET Framework installed on your Windows based computer.

So here I’m trying to guide you through the various ways in which you can find the .NET version installed on your computer.

Method 1 : Using Registry Editor:

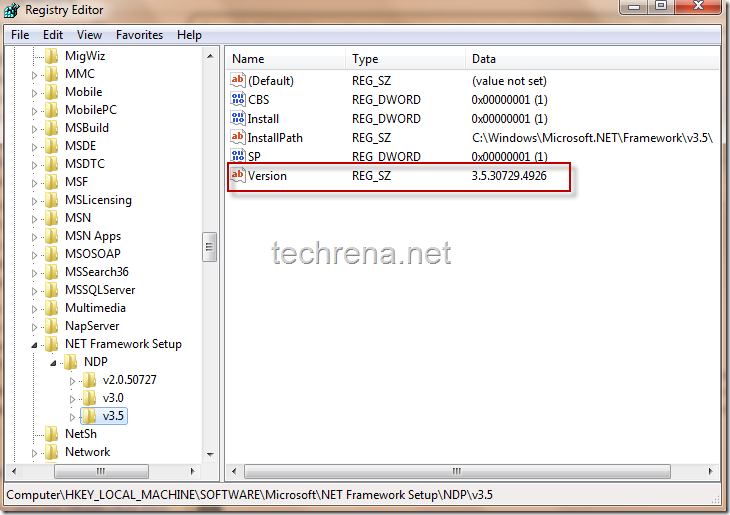
If you are familiar with Windows registry editor (by using regedit command), this should be the easier way to find the version of .NET installed.You just have to navigate to the following registry path and check the value present for the key entry “Version” (which is 3.5.30729… in my case) as shown below.

Path: HKEY_LOCAL_MACHINE\ SOFTWARE\ MICROSOFT\ NET Framework Setup\ NDP\ v3.5

Net Framework Version Registry Key

Method 2: Using IE User Agent String

Please note that this method works only with Internet explorer.

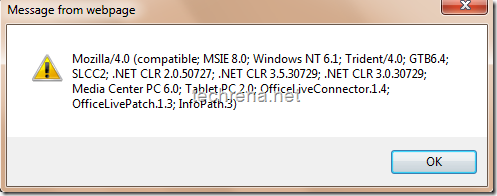
Here we are querying the user agent string of Internet Explorer.Copy the following JavaScript  in to your Internet Explorer address bar and press enter, you will now see an alert something similar to the one shown below.

javascript:alert(navigator.userAgent)

User Agent String Javascript

As shown above, querying the IE User Agent String has resulted in a pop-up alert that shows all the .NET versions installed on my Windows 7 machine (.NET 2.0.50727, .NET 3.0.30729 & the latest one being .NET CLR 3.5.30729).

Even though other browsers like Mozilla Firefox, Google Chrome & Opera also respond to the user Agent String query, they will not however show the actual versions of .NET Framework installed.

Method 3: Using Add or Remove Windows Programs/ Features

If you are using Windows XP and earlier operating systems, just go to control panel and click “Add or Remove Programs” find the version of .NET Framework in the programs installed.

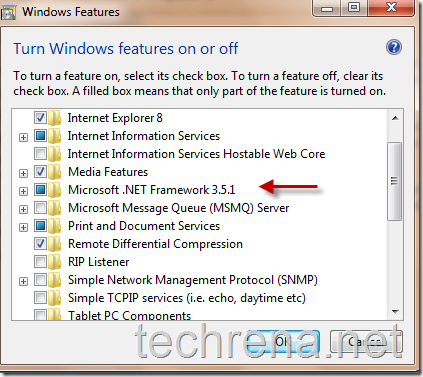
If you are using Windows 7 or Windows Vista, go to Control Panel > Programs> Turn Windows features on or off, find “Microsoft .NET Framework” in the list and note down the version number.

Windows features .Net Framework

Method 4: Using Aaron Stebner .NET Framework Detector Code

If you are a programming geek and want to detect the version of .NET Framework installed on your PC with a simple C++ code, you may want to check Aaron Stebner’s .NET Framework checker code(cpp) which you can run using your Visual Studio/Visual C++ 2005 or 2007 versions.

Method 5 : Using Windows Explorer

To see which versions of the .NET Framework are installed on your PC, locate the %systemroot%\Microsoft.NET\Framework folder by typing the same in the Windows explorer address bar you sill something like this :

  • v3.5
  • v3.0
  • v2.0.50727
  • v1.1.4322
  • v1.0.3705

.NET Framework folder windows These represent the versions of the .NET Framework installed in your computer.
Enable Hide Inactive Icons Tray Using Registry in Windows

Many of the Windows XP, Windows Vista or Windows 7 users usually find that the Auto Hide Inactive Icons tray from the taskbar has stopped working or it is missing inspite of  enabling it from the control panel or the taskbar properties. This problem is very common. May be after reboot it may work again, but for some systems the tray may never come up. This tray will hide the inactive and unnecessary icons from the taskbar. So many people like this feature. Making it work again is what we are talking about here.

See the images below where one is not having hide inactive Icon tray and another one is having it:

missing hide Icon tray hide Icon tray On

Enabling the Inactive icon tray consists of changing only a single registry. Its an easy process. There are two methods given below. Both the methods needs registry editing to be enabled. If your Registry editing has been disabled by the administrator then visit: How to enable Registry Editor (REGEDIT) to enable it.

Method 1: Using Elevated Command Prompt

Step1: Copy the whole command from the table below:

REG ADD HKCU\Software\Microsoft\Windows\CurrentVersion\Explorer /t REG_DWORD /v EnableAutoTray /d 1 /f

Step 2: Open a Command Prompt (Press Start + R, type cmd and Enter). Paste the command you had copied into the Command Prompt. In order to paste in Command Prompt right click and select paste.

View Enable Auto Tray using Command Prompt Image

Step 3: Press Enter to execute the command. It should execute successfully.

Step 4: Log Off your computer and Log On again. Now your Hidden Icon tray will be working.

Method 2: Using Registry Editor

Step 1: Open a Registry Editor(Press Start + R, type regedit and Enter)

Step 2: Go to the registry key path given below:

HKEY_CURRENT_USER\Software\Microsoft\Windows\Current\Version\Explorer

View Hide icon key ImageStep 3: In the Right Side of the registry editor see for the value EnableAutoTray. [If you are not able to find it, create a new value with the same name. To create a, value right click anywhere on the right pane and select New DWORD. Change the Name to EnableAutoTray(Press F2 for name change)]. Double click on EnableAutoTray and change the value to 1.

View new hide icon tray Value ImageView Enable AutoTray New Value Image View Enable Auto Tray Registry value Image Step 4: Now close the editor and log off your computer. Log On and you will find your tray is working.

Congratulations you have enabled your Auto Hide Inactive Icons.

Note:

1. Log Off means complete logging off the computer not Locking the computer like pressing Start+L.

2. Restarting the computer will also work after the performing the procedure.

3. If you change the Value as 0 the it will disable the Tray.

4. This method works for windows XP, Vista and 7.

Change MAC Address or Physical Address Using Registry Editor (regedit) in Windows

Many people have a wrong conception that changing MAC Address of a computer is not possible or it requires a complex software. But it is not true. Changing MAC or Physical address of your computer is very simple. MAC (Media Access Control) address, Ethernet Hardware Address (EHA), hardware address, adapter address or physical address is a quasi-unique identifier assigned to most network adapters or network interface cards (NICs) by the manufacturer for identification. If assigned by the manufacturer, a MAC address usually encodes the manufacturer’s registered identification number. Although intended to be a permanent and globally unique identification, it is possible to change the MAC address on most of today’s hardware, an action often referred to as MAC spoofing.

Now getting to the point we can change MAC by using your Windows Registry Editor. The method has been successfully tested in different Wired Ethernet Adapters, Wireless Adapters etc.

Follow the steps below and your MAC will be changed in seconds:

Step 1: Open Registry Editor (Press Start + R, Type regedit and Enter). If you get a message like “Your Registry Editor Has Been Disabled By Your Administrator” then you need to enable it. To Enable Registry Editor Visit: How to enable registry Editor

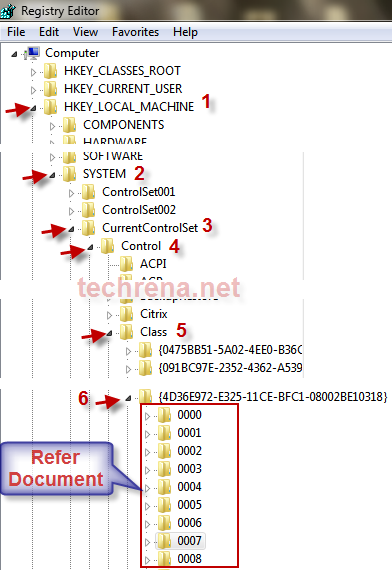
Step 2: After opening Registry Editor successfully, see the left pane of your registry editor. You can find a series of registry keys. You have to follow the path as:

HKEY_LOCAL_MACHINE\System\CurrentControlSet\Control\Class\{4D36E972-E325-xxxx}

For the last key search for the red highlighted part in your Editor. You can refer the image below:

View Change MAC using Regedit Image

Step 3: After opening the last Key you will see a set of keys like 0000, 0001, 0002 etc. You have to open each key and search for values which corresponds to your network adapter. For example, I have an Intel(R) PRO/100 VE Network Connection. So in the right side of the editor i found a value which is containing this name. This is how we identify the key for the network adapter. For me i got the key in 0007.

View Find your Network Connection Image

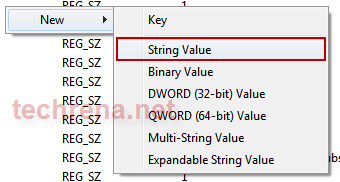
Step 4: Now search for the value NetworkAddress inside the key you have found. If you cant find it right click and create a new String Value of the name NetworkAddress.

View New String Value Image

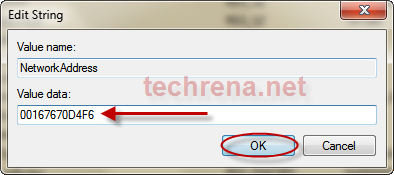
Step 5: Now change the value as your MAC Address. After Changing the value you can close Registry Editor.

View Change Value ImageView MAC Value Changed Image

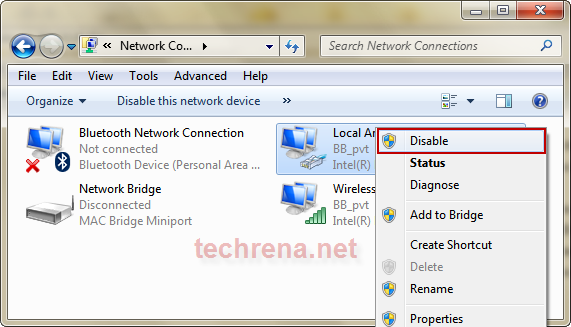
Step 6: Now Go to Network Connections and Disable your Adapter. Right Click and select Disable

View Disable LAN Image

After it is disabled Double click on the Network Adapter and it will Enable it.

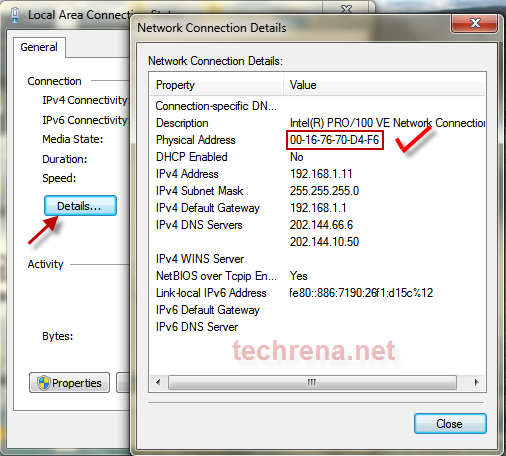
Step 7: Now go to status of the Adapter and Check The MAC address.

View Check MAC Address Image

You will find your desired MAC Address. Now you have changed your Physical Address successfully.

Important:

1. This method Will not work for Windows Network Bridges.

2. If you keep an invalid MAC address value then your Adapter will not function properly.