Install Google Toolbar 5.0.2009.0324b for Firefox

Google Toolbar version 5.0.2009.0324b for Firefox  2+ version users is available now for download (updated on April 13,2009).As many of us know Google Toolbar had introduced the famous Google Chrome feature viz., Most Visited Sites access in the toolbar, the same feature is obviously available in this version too.

Google Toolbar For a complete list of features of Google Toolbar, visit Google toolbar page

You can also add your custom buttons to Toolbar by choosing from Google Toolbar Button Gallery

Google Toolbar Screenshot

Firefox 2+ Users, install Google Toolbar 5.0.2009.0324 [Beta Version] from this Firefox add-on page

Hide Most Visited Sites from New Tab in Google Chrome in Easy Steps

Google Chrome is a web browser developed by Google and based on the WebKit layout engine and application framework. It was first released as a beta version for Microsoft Windows on September 2, 2008, and the public stable release was on December 11, 2008. The name is derived from the graphical user interface frame, or “chrome”, of web browsers. In March 2009, Chrome became the world’s fourth most widely-used browser, with 1.23% usage. In spite of the increasing popularity, chrome lacks user customization and control in some of its features.

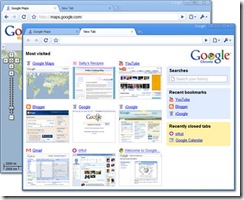
The most visited site of Google Chrome which is displayed while opening a new tab is not under our control, meaning that it will display the top most visited sites in the browser even if we do not want to display some of them as most visited. Most of the users need some privacy settings, like to display the sites which only the users want to display. But as we do not have this control in Google Chrome we are going for this custom technique by using Grease Monkey User Scripts. Till date Google Chrome lacks the feature of customizing the most visited page in new tab, even in the latest version 2.0.174.0 also.

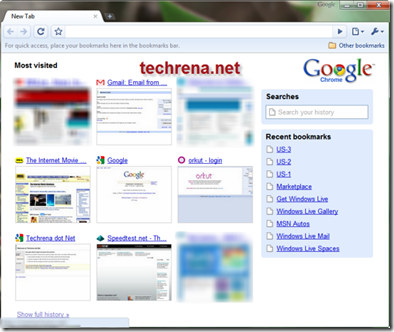
Google Chrome Most Visited site New Tab

It is a simple process. Just follow the steps given below:

Step 1: Enable GreaseMonkey User Scripts in Google Chrome by following the Guide Enable GreaseMonkey User Scripts in Google Chrome

Step 2: Download the Java Script file given below: (Note: Right Click on the link and select Save link as)

Name: NoSpeedDial.user.js

Size: 500 Bytes

Download: http://www.techrena.net/downloads/Grease%20Monkey/NoSpeedDial.user.js

Step 3: After enabling Greasemonkey go to the location below in your computer and save the NoSpeedDial.user.js file in the User Scripts folder:

Windows XP Users:

Documents and Settings\%userprofile%\Local Settings\Application Data\Google\Chrome\User Data\Default\User Scripts

Example: C:\Documents and Settings\DENNIS\Local Settings\Application Data\Google\Chrome\User Data\Default\User Scripts

Windows Vista and Windows 7 Users:

Users\DENNIS\AppData\Local\Google\Chrome\User Data\Default\User Scripts

Example: C:\Users\~User Name~\AppData\Local\Google\Chrome\User Data\Default\User Scripts

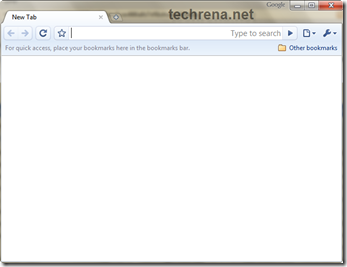
That’s it. Now when you open Google Chrome then you will not find any Most Visited Sites. It will simply show a Blank Page. Even If you click New Tab or Press Ctrl + T then it will show blank page only. No Most Visited sites

important:

1. It is compulsory for you to enable GreaseMonkey User Scripts, otherwise the method will not work.

2. This method will work for Google Chrome Version 2.0 or higher. If you are running a older version then Download the new one and Update it here Download Google Chrome Web Browser

Enable GreaseMonkey User Scripts in Google Chrome

GreaseMonkey in Google Chrome

Greasemonkey is a Mozilla Firefox add-on that allows users to install scripts that make on-the-fly changes to most HTML-based web pages. As Greasemonkey scripts are persistent, the changes made to the web pages are executed every time the page is opened, making them effectively permanent for the user running the script. Earlier versions of Google Chrome did not support Greasemonkey. But from the new version of Google Chrome 2.0, we can make it support Greasemonkey. Greasemonkey can be used for adding new functions to web pages like downloading videos form YouTube or removing the most visited sites from new tab in Google Chrome.

To Enable User Scripts follow the steps given below:

Step 1: Go to the location below in your computer:

Windows XP Users:

Documents and Settings\%userprofile%\Local Settings\Application Data\Google\Chrome\User Data\Default

Example: C:\Documents and Settings\DENNIS\Local Settings\Application Data\Google\Chrome\User Data\Default

Windows Vista and Windows 7 Users:

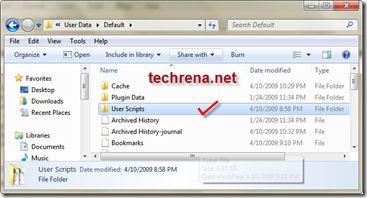
Users\%userprofile%\AppData\Local\Google\Chrome\User Data\Default

Example: C:\Users\DENNIS\AppData\Local\Google\Chrome\User Data\Default

Step 2: In the Default folder Create a new folder and name it as User Scripts. User Scripts FolderStep 3: Now find the shortcuts of Google Chrome in the Start Menu, Taskbar or your Desktop. Right click on it and select properties.
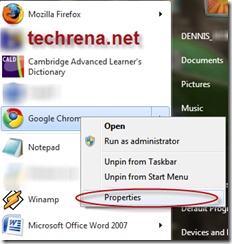
Google Chrome Properties

Step 4:  In the Properties Window go to Shortcut tab and add

--enable-user-scripts

by giving a space after chrome.exe” in the Target text box. Select OK. It is shown below.
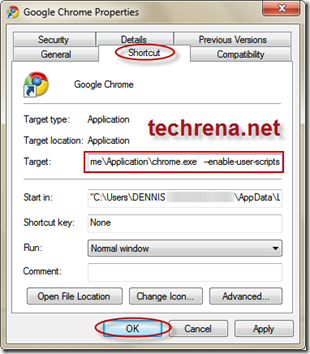
Enable Greasemonkey user scriptsNow you can simply save your Grease Monkey scripts in the User Scripts folder that you have created.

For a small test download the script given below in the User Scripts directory

To download Right click and Select Save Link As:

https://techrena.net/downloads/Grease%20Monkey/test.user.js

You should see a Hello World! dialogue when you open Google Chrome from the Start menu or Desktop shortcut. Don’t forget to delete the script after the test has been successfully completed.

Important:

1. GreaseMonkey Scripts will work on Google Chrome 2.0 or higher. To download the new version visit  Download Google Chrome Latest Version

2. You should perform Step 3 for all the Google Chrome shortcuts you have, either in Desktop, Taskbar, or Start Menu.

3. User scrips will be enabled only if you open Google Chrome from a shortcut where you have preformed “Step 3”.

4. For removing a particular Greasemonkey addon, just delete the corresponding user.js file from the User Script folder.

UPDATE on Feb 4, 2010: Google Chrome 4 now officially supports GreaseMonkey User Scripts

Inserting Images in Gmail made easy

Adding Inline Images in Your Gmail

Gmail labs today has announced a feature which allows Gmail users (Only those who enable this feature in Lab Features under Gmail) to insert images while composing mail in Gmail.It was a major development at Gmail but nobody has any idea why Google hasn’t enabled this feature by default to all Gmail users.Anyway take a look at how actually you can add images in your mails.

First Click on the tiny Gmail Labs button in Green towards left-hand side of your browser.[If you have already been using Labs features, else you have to go to Settings>>Labs]

Click on Gmail labs button in Green

Then a list of Gmail labs features available will be shown to you.Look for the following feature called “Inserting Images”

enable inserting images lab feature in Gmail

Now enable that feature.

Start composing a mail now, in your rich text editor, now you may find a small image button which allows you add images (see in picture).

Click on Insert image button in your rich text editor

Now you can either upload image from your desktop

Adding image from computer web URL

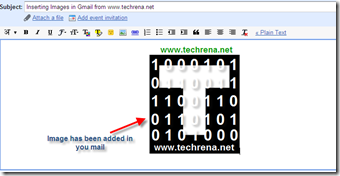
That’s it now your image will appear in your mail (see the sample image in picture)

image added in Gmail looks like this one

Note:The recipients may not the images in your mail as by default Gmail will not display images from mails so as to to prevent from spam.So the recipient must either click on “Display Images Below” or “Always Display images from…” to see the images that you have inserted in the mail.

This is the latest improvement at Gmail after last week’s addition of Five Indic Languages in Mail composer.

Download Google Chrome 2.0.172.2 Beta Open Source Web Browser

Google Chrome is a Open source web browser from Search Engine giant Google.The latest version of the browser, Google Chrome version 2.0.172.2 Beta is now available for download (from April 4,2009).Google Chrome boasts of features and enhancements that make the web faster, safer, and easier.

Google Chrome 2.0.172.2 Beta download


You may also want to remove Google Chrome showing Most Visited sites when you open new tab.

Driving Directions Now Available in Google Maps India

Planning a long journey to a place where you never had been in India? or just visited a big city like Mumbai and want to reach your relative’s house with minimum time of travel or with minimum fare that you can give to the cab. Now you no longer worry about this, as Google Maps India has just launched this new feature “Get Driving Directions” for Indian road routes.India Google maps Driving Directions

Apparently, Google Maps is not the first one to introduce Driving directions for maps in India ,it follows Yahoo India maps and Live Maps India to add this feature.

Google Maps directions for Google Maps India is much similar to Yahoo India Maps and Live Maps India.You just need to enter the starting point and the destination.

Comparing Google Maps, Yahoo India Maps and Live Search Maps India

Google Map Directions for Hyderabad to Bangalore

I wanted to just compare these three services (Google Maps, Yahoo India Maps and Live Maps India). In my case I tried to get driving directions for journey between Hyderabad to Bangalore (the two major IT cities of India, of course).

The results:All the three services showed a similar distance (Google-566 Km, Yahoo-572 Km, Live Maps-572 Km).All three were also similar in terms of number of turning points or intermediate stations –Google –38, Yahoo- 35, Live Maps-34 ).

But they varied considerably in terms of time of travel.Google showed about 9 hours 19 minutes , Yahoo -12 hrs 24 mins and Live Maps India-10 hr 51 min.

Gmail Goes Desi – Adds Five Indian Languages To The Mail Editor

Composing Gmail in Hindi, Telugu, Tamil, Malayalam or Kannada made easy.

There was a time when Indian users had no option to send a mail in their own language, and later few software’s like Baraha had made it easier the task,and after sometime Google had come up with fantastic Google Indic Transliteration tool, an online translator which automatically translates the words that you type in English to the five Indian languages, and later extended to other Google services like Blogger, Orkut, iGoogle .Now Google finally thinks that it’s time to add this feature to the users of Gmail in India.

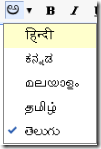
The Gmail editor (composer) much like other editors such as Blogger editor will also have an option to choose the language from the drop down listgmail 5 different indian languages choice (currently five Indian languages Hindi, Kannada, Malayalam, Telugu and Tamil are available) to compose mail in that particular language.
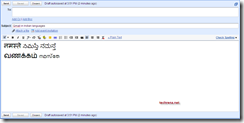
gmail compose in 5 inidc languages -www.techrena.net

This is a really cool feature for Indian Gmail users and I’m sure they gonna love it.

Also check out:How to export Gmail contacts