[Tip] Download Your Entire Facebook Data

facebook logo

What’s the point of any service where you don’t have control over the data you add through it? This is the first and foremost point that every user considers before using any service and the service provider must be up to it to provide users with full control over their data. Being the most widely used social networking website on the internet, Facebook is no exception. Facebook has recently added a provision through which the users can download their entire personal information that you have posted on Facebook including messages, Wall posts, photos, status updates and profile information etc. You can download all this data with a single click.

Follow these steps to download all your information on Facebook:

1. Login to Facebook and click “Account Settings” under Account.
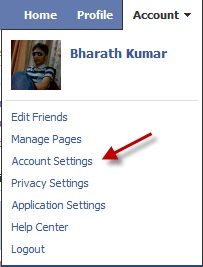
Facebook account settings

2. Locate “Download Your Information” in the Settings tab and click “learn more” link present right next to it.
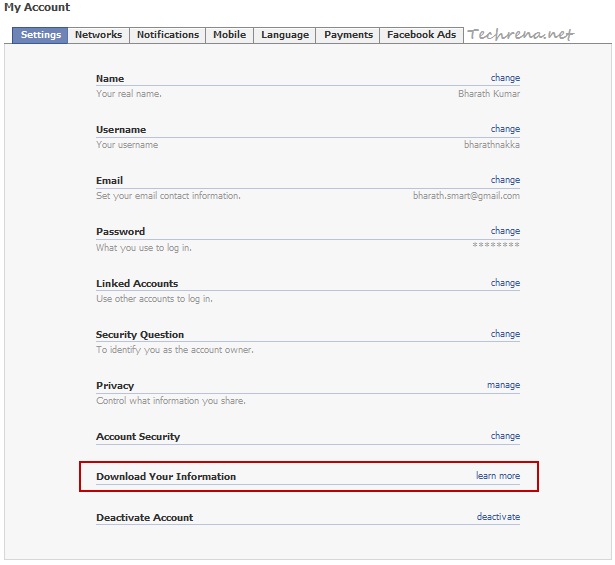
Download Your Information in fb account settings

3. In the next page, you will receive a brief message about what the tool exactly going to do along with a brief warning message. Click on the green “Download” button to proceed to the next step.
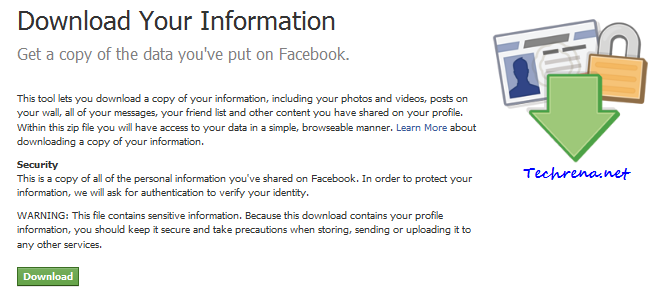
Download Your Information warning in facebook

4. A pop-up window (“Request My Download”) appears now. The window tells you to wait till Facebook gathers all your photos, wall posts, messages and other information. Click on the Download button again to proceed.
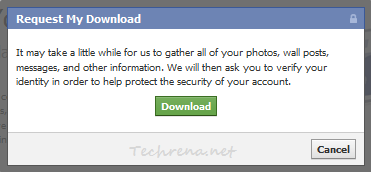
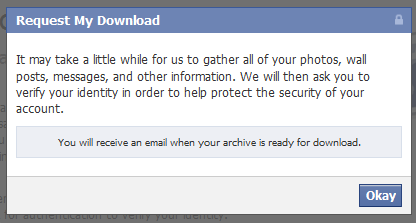
Request my download window in facebook

Request my download window in facebook

5. It may take a little while for Facebook to gather all your information and you will eventually receive a mail containing a download link for the zip file containing your Facebook account information.

You need to verify your identity by entering your account password before you can download the zipped file.
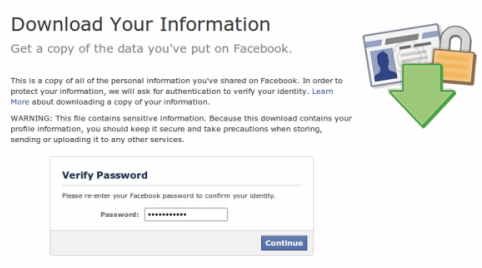
Download your information fb verification

In the next page you should see a download button along with showing information about the size of the file you are about to download. Download the .zip file and unzip to see the contents of it. You should see sub-folders like photos, html along with index.html and readme files.

6. You are done with downloading your information from Facebook!

Watch the below to video to follow the above steps:

[Tip] Enable High Quality Video Chat In Gmail

Gmail logo new

If you use Gmail video chat for making video calls to your friends, you might be pleased to know that the Google has announced a enhancements to the video quality in Gmail video chats.

Gmail video chat quality used to be very poor particularly when you switch the video to full screen mode. The new enhancements are available as a labs feature and will not be enabled by default. For this video enhancement to work, the other party with whom you are chatting must also have enabled this feature.

gmail video chat before after

Follow these steps to enable high resolution for video chat in Gmail.

Steps:

1. Open Gmail and Login with your Gmail account

2. Click on the little green labs icon towards the right top corner of the screen, next to your username. Alternatively you can open this Gmail Labs Settings link.

gmail labs settings

3. Scroll down the window until you find “Video chat enhancements” tab and choose “Enable” against it.

Gmail Video chat enhancements

4. Click “Save Changes” button to save the settings.

You can always revert back to the default video quality settings at any time by simply choosing “Disable” option for “Video chat enhancements” under the labs settings as shown in the step 3.

[Tip] Open Google Page Automatcially With Every New Tab In Firefox

firefox logo

I got this idea when one of my friends asked me how to automatically Google.com when a new tab is opened. I dug into it as is it indeed pretty useful not just for me, but majority of other Firefox users who wants to see Google.com page automatically whenever they open new tabs.

So here we want to open a default website (be it homepage or google.com for instance) each time we hit the new tab. Firefox by default shows a blank page whenever a new tab is opened. Unfortunately Firefox doesn’t have an in-built provision for achieving this, so we have to go through workarounds. Here is the easiest way in which you can set such a feature in Firefox.

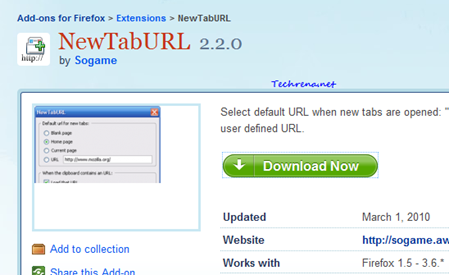
1. Install NewTabURL extensions from the Firefox add-ons gallery.Restart your Firefox.

NewTabUrl install

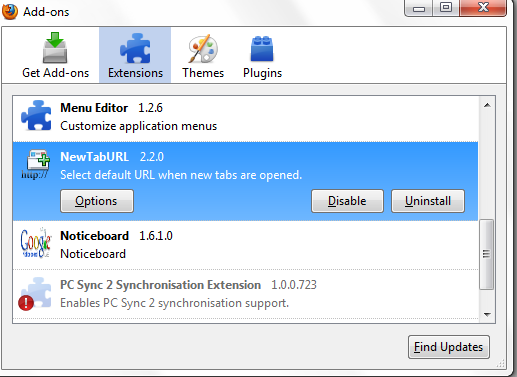
2. Go to Tools> Add-ons and find “NewTabURL” in the list under “Extensions” tab. Click “Options” to configure options for the add-on.

NewTabURL extensions page

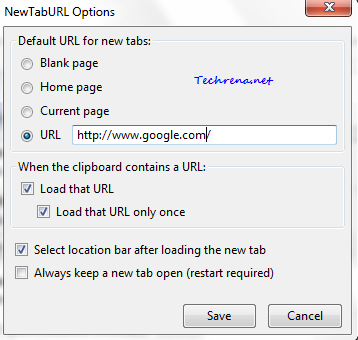
3. In the Options window, enter the URL (ex: http://www.google.com/) in against URL option or you can even set Home page as the default URL to open with new tabs. Click Save to save the changes.

NewTabURL options

Now when try opening a new tab in Firefox and it should load the URL that you had chosen while configuring the options. Isn’t it that simple ?

Other Firefox add-ons offering similar feature: New Tab Homepage, Tab Mix Plus

Google’s Spam Report Extension For Chrome

Google chrome extensions logo

Now you can improve the search results in Google more easily by reporting spam websites to Google by installing the newly released “Google Webspam Report” extension in your Google Chrome browser. While Google folks are very proud that they have released such an useful extension for the users, the majority on the users front are of the opinion that Google should release such an add-on for the Firefox browser too (including me Smile).

The extension is considered as a pretty useful for the most webmasters and Google users, who really hate the spam websites on the internet. Of course, you can report any website for spam from this page include within the Google webmaster tools. You need to be logged into your Google account to report the sites for spam (both via the extension and via the GWT).

Google report spam in search results

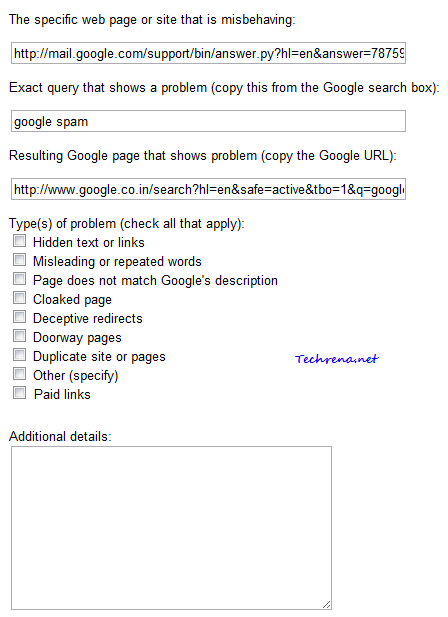
Upon installing this extension, will add a “Report spam” link beneath the all the pages in the search results.  Clicking on which will directly take you to Spam report form.

Google spam report form

Install Google Webspam Report in Chrome.

[How To] Getting Started With New Version Of Facebook Groups

facebook logo

Facebook has recently announced the revamped Facebook Groups feature, giving you more control over the group interactions that you would like to make. Suppose you are just back to home after a holiday and you want to share the wonderful photos that you had taken during your trip to your other members of the family via Facebook. Unfortunately whatever photos or other media you share was visible to your entire friends in Facebook. With the launch of new version of Facebook Groups, you can create groups for your family, club or work etc. Once you have created the groups, you can select content that you share to be visible to only a particular group of people. This is not exactly a new concept, something of this sorts already exists in Google’s Orkut. But with Facebook groups, users can make a group chat, email subscriptions for updates from the group, collaboration features etc.

Let’s see how to get started with Facebook groups:

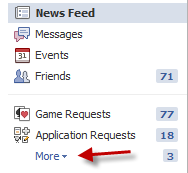
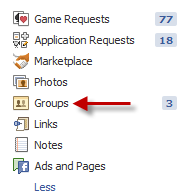
1. To create a group, you can visit facebook.com/groups. Alternatively, you can find groups link on the left sidebar along with “Game Requests”, “Application Requests” etc.

Facebook Groups link hiddenFacebook groups link in sidebar

2. Click on Create a group link to start creating a new group.

Create a Group link in Facebook

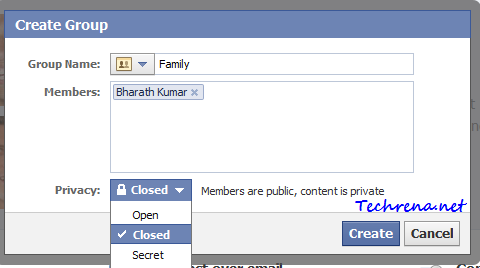
3. Give the new group a name (suggestions: Family, Work, Club etc.). You can add members from your friends list. Just type the name of the person that you want to add to the group, Facebook will automatically suggest people from your Facebook friends list who possess that name. You can add as many people as you can in the Members field.

Create Facebook Group

And beneath the Members section, you will have “privacy” settings for your group. There would be three options to choose from: Open, Closed and Secret.

Open: If you set your group privacy setting to Open, it means that anyone on Facebook can view the Group and its content and can join the same. The group will also appear in search results.

Closed: If a group is set to “Closed” under privacy settings, it means that anyone in Facebook can view the name and members of that group but can’t view its content. Only members of the group will have access to its content. These groups can be found in Search results though (content will not appear in results).

Secret: Secret groups can’t be found in searches. And it’s absolutely invisible to non-members of the group. Non-members can’t even see the name of the group, its members list and of course the content as well.

By default, Privacy will be set to “Closed”. You can always change it to any of the above three options discussed.

Click on “Create” button to finish creating the group.

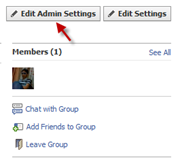
4. Now that you have created a group, go to the groups tab, click on the group that you have just created and click “Edit Admin Settings”.

edit admin settings in facebook group

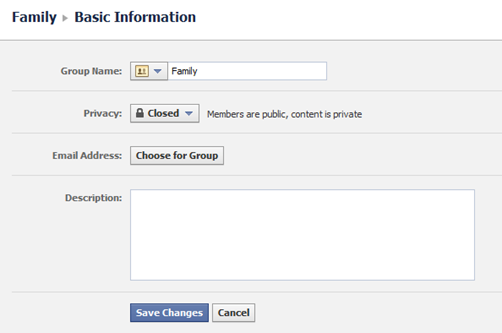
Basic Information:

You can now edit the basic information like Description and Email address for your group here:

Basic information facebook group

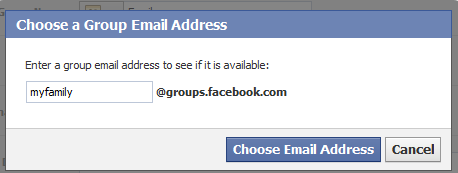
If you want a special email address for your group, click on “Choose for Group” next to the “Email Address” tab, these email addresses end with @groups.facebook.com. You can choose an email address depending on the availability.

Choose group email address Facebook

Profile Picture:

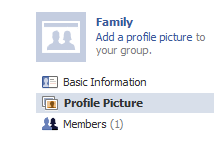
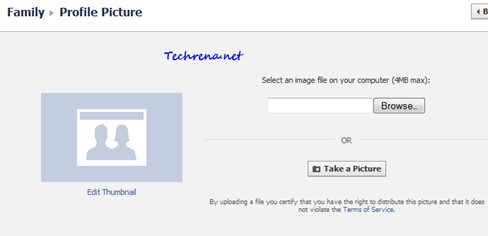
To add a profile picture to your group, click on the “Profile Picture” link on the left sidebar:

Facebook profile pic link

Profile Picture in facebook group

You can either upload a picture from your computer or take a new snapshot using your webcam.

Sharing Content:

You can share a text post, link, photo, video, event or a document with the members of your group. Go to the your group page and these options will be listed below the group name.Facebook content share with group

Group Chat:

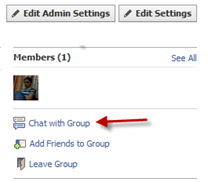
group chat in facebook

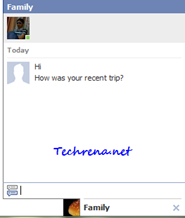
Clicking on “Chat with Group” option will let you chat with the members of the group.

Facebook group chat demo

Leave The Group:

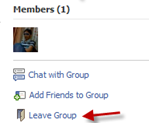
Finally if you want to unjoin from the group, just click “Leave Group” link that can be found under the group page.

Leave group link in Facebook

[Tip] Using Goo.gl URL Shortener Without Google Toolbar

Google URL Shortener logo

Google’s goo.gl URL Shortener is now available for public via the website Goo.gl. Google released the Goo.gl URL shortener service (along with Youtu.be URL shortener) in December 2009. According to a blog post on Google Social Web blog and another post by Matt Cutts, Goo.gl URL shortening service was initially launched for the requirement of Google’s staff in their products. But it has quickly got into popularity and even some pretty good browser extensions have come in (here’s one for Chrome). Until now the service was available via Google Toolbar alone. Not anymore!  You don’t need any external add-ons or extensions or workarounds to use this service now. This is now available for public use via the website.

Google URL Shortener

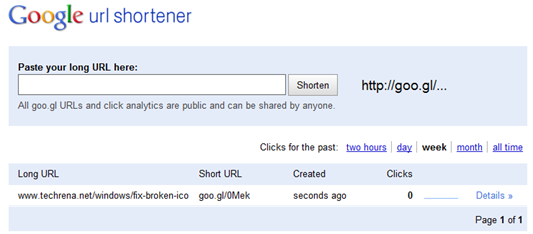
To shorten any URL, go to goo.gl, enter your and click Shorten. The good thing about this is, much like Bit.ly, Goo.gl will also show you the analytics of the links that you have shortened, provided you have signed into your Googe account. Without signing in, you can still shorten the links but you can’t keep track of the clicks coming from that particular short URL.

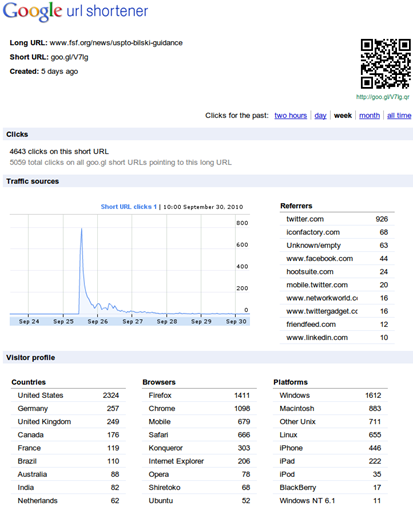
As you can see in the screenshot, the dashboard will show you the list of links that you have shortened using this too. It will also show the number of clicks received along with a “Details’ link, clicking on which will take you to the detailed analytics of your links.

goo.gl analytics stats

The analytics shows you the clicks received against a time line, the top traffic referrers, the countries from where the visits came, the browsers used, the Operating systems (or the platforms) used etc.

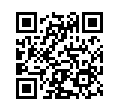
You can also generate a unique QR code exclusively with Google’s URL shortener. Which looks something like this:

QR code

The only thing that might disappoint is the inability to choose custom URLs that is very much possible with the market leader in this sector, Bit.ly.

Go and give it a try at Goo.gl.

[Tip] Locking Google SafeSearch For Better Parental Control

A simple Google search can give you access to a wide range of information which sometimes may even included the content that is not appropriate for your age. For the same reason, Google has “SafeSearch” feature to filter out content that may not be enjoyed by the users of all age groups.

But the SafeSearch settings aren’t kind of that hack-proof stuff. It’s even easier for your kid to change turn the SafeSearch off without much effort. One way you can ensure your kid browsers search through SafeSearch only is to lock the SafeSearch option for a particular browser.

Let me guide you to lock the Google SafeSearch settings for any specific browser. Follow the steps:

1. Go go any Google search results page.

2. Click on the “Search settings” link present at the top right corner of the page.

Search Settings link in Google

3. You will now be taken to the Google Preferences page, where you can find different sections like Interface Language, Search Language, SafeSearch Filtering, Number Of Results etc.

Focus on the “SafeSearch Filtering” section.

4. You will find a “Lock SafeSearch” link at the bottom of the three options.

Lock SafeSearch

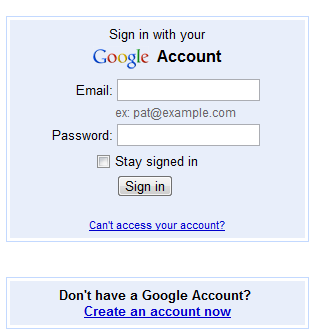
5. When you click on the “Lock SafeSearch” link, you will be asked to log into your Google account. Provide your credentials and proceed to the next step.

Google sign in page

6. When you proceed, you will be shown a warning about locking SafeSeach. Just click “Lock SafeSearch” to proceed further.

SafeSearch Filtering

Progress for locking safesearch

The SafeSearch will be locked across all Google domains, meaning all the country specific Google sites included.

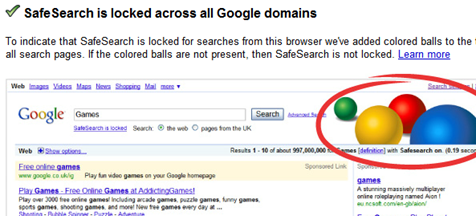
7. A message will appear saying “SafeSearch is locked across all Google domains” will be displayed along with a text that tells you that colored balls have been added to all the search pages, denoting that SafeSearch is locked.

SafeSearch locked success

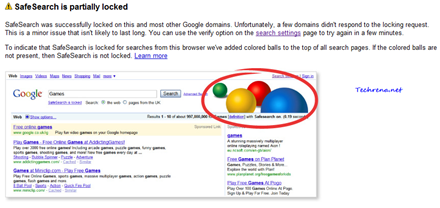
Sometimes you may get messages like “SafeSearch is partially locked”. This happens so when some of the Google’s domains don’t respond to the request sent to them from your browser. This is a minor issue and will be fixed automatically when you try the same after sometime.

SafeSearch locked partial

That is it. You have now locked the SafeSearch settings for one browser. This would still work even if you log out of your Google account.

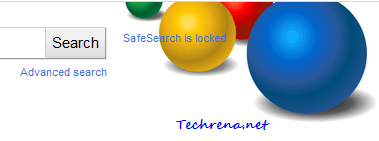
From now on, a group of colored balls will appear on search results page, to let you know that Safe search is being locked.

colored balls Google

However, this isn’t hack-proof either. As these are stored via cookies, deleting all the browser cookies will change the settings again. Also you need to setup this kind of SafeSearch lock for all the browsers that you use. Read : additional parental controls to restrict your children from using applications and other settings on your Windows 7 machine.
[Tip] Disable Threaded View In Gmail

Gmail logo

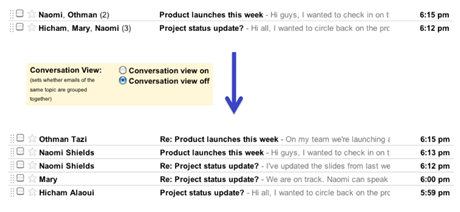
Gmail’s conversation view is without any doubt, one of the key factors that has helped Gmail emerge as the most used web based email program on the internet. While the normal users like us enjoy related email messages being grouped into threaded conversation messages thus making your inbox not to be cluttered with mails, but there have always been some people who don’t like this feature, as they like the traditional or classic way of email, the one with unthreaded messages. For those minority uses, who still want to see their mails in the traditional format, without the threaded conversation view, Google has just added the feature that lets you enable or disable this feature for their accounts.

threaded and non-threaded in gmail

Follow the steps to disable the conversation view in your Gmail:

1. Log into your Gmail account.

2. Click on the “Settings” link on the top right corner. Alternatively, you can click on this link once you are logged in, this will directly take you to the Gmail settings page.

Settings link in Gmail

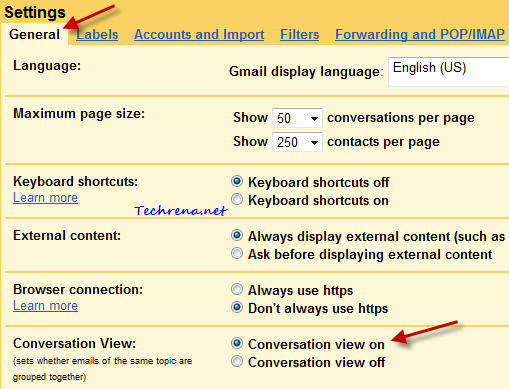
3. Under the “General” tab, find

Gmail settings for conversation view

4. By default, the conversation will be set on. To disable the threaded conversation, select “Conversation view off” button and click “Save changes” button.

Conversation view off

From now on, you won’t see the email messages being threaded to form conversation view. So any reply or related message that you get to a particular mail will be shown with the corresponding symbols as the case with any other classic email clients (for instance you will get RE:.. for any reply you get to the mail that has been sent by you).

WordPress.com To Be The New Blogging Platform For Windows Live Users

Windows_Live_WordPress

So here is some big news, Windows Live Spaces is dead ! All the Windows Live Spaces users (bloggers) will now be shifted to the WordPress.com, which is going to be the default blogging platform for all Windows Live users.

This was announced by Dharmesh Mehta, Director of the Windows Live Product Management at the TechCrunch Disrupt.

All the existing users need to upgrade their current Windows Live Spaces blogs (there are 30 million of them !) to WordPress.com. This collaboration means that you can use Messenger Connect, to share your blog content with friends over Windows Messenger, each new post will be sent via notification to your friends in Windows Messenger.

WordPress and Windows Live Messenger

The migration may be a bit tricky as it changes your current URL and redirects it to the new WordPress.com URL (there won’t be significant traffic loss though). You can start the migrating process right now at the moment by visiting your Live Space blog. For more information about, read the official post from Windows Live Blog.

[Alert] Orkut Affected By ‘Bom Sabado’ Worm, Stay Away For Now

orkut logo

If you are an avid Orkut user, you might be aware of this new worm which has just been discovered. This XSS (cross-site scripting) attack was allegedly initiated in Brazil, where the social networking site has the most of users than any other country in the world.

The worm hijacks the user account and sends spam scraps to all those in the user’s friend list. The scraps just contain the words “Bom Sabado” with some links attacked to it, clicking on which the receiver’s profile will also get hacked. The worm adds some unrelated communities to the infected accounts and currently thousands of such attacks have been reported.

Bom Sabado virusBom Sabado worm communities

The word “Bom Sabado” stands for “Good Saturday” in Portuguese, the official language of Brazil.

Tip: If you notice that your account has been affected by this worm/virus, logout from your account, clear your browser cache and cookies and then sign back in, then change your password and secret question for the Orkut/Google account. If you account stands good and no traces of hijacking are found, just stay away from Orkut until the engineers fix the issue.