[How To] Track Your Train in Google Maps In India with Rail Radar

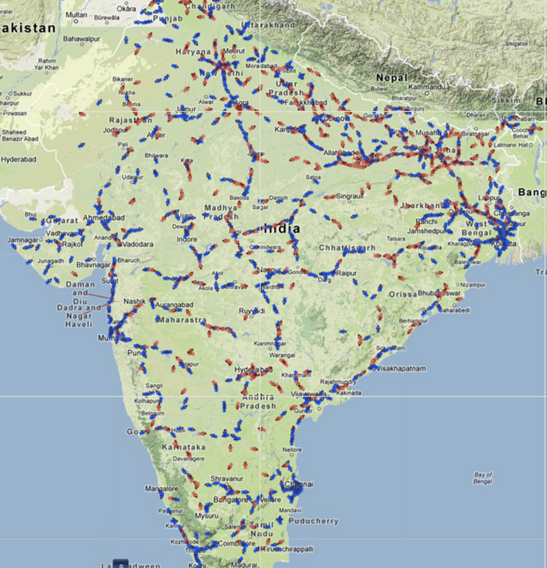
Indian Railways is one of the largest rail networks in the world it operating more than 10,000 trains everyday. Today Rail RadarTM has been launched in order to make Rail travelling a little easier. The  new web app uses Google Maps to track trains on a real-time basis. Currently the service is only available on 6,500 trains.

Rail Radar for Indian Railways

To find out where your train is, simply visit railradar.trainenquiry.com and search for your train name or number and Rail Radar will spot it for you with the exact location details. You can also find trains by entering the name of the station.

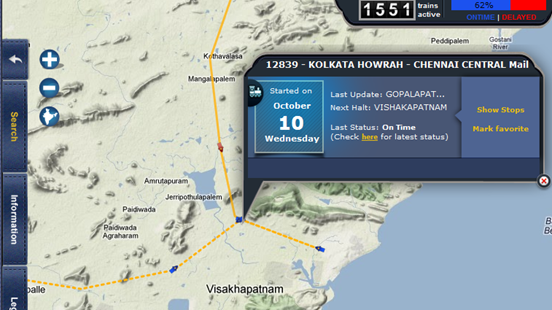
For example I searched for the Howrah Chennai Mail Train No 12839, you can see the result below.

Howrah Chennai Mail Rail radar

As you can see my train is currently at Vishakhapatnam and it is On Time.

Blue highlights indicate trains that are on time while red means it’s behind schedule. If you click on a train, it’ll show its entire route from start to finish.

We are thankful to the railway ministry and Indian railways for working together to bring up such nice technology up-to-date project. We hope Indian Railways should also launch a mobile application soon so that we can beat the train on the go.

Changing Google Chrome’s Default Search From Regional Google To Google.com

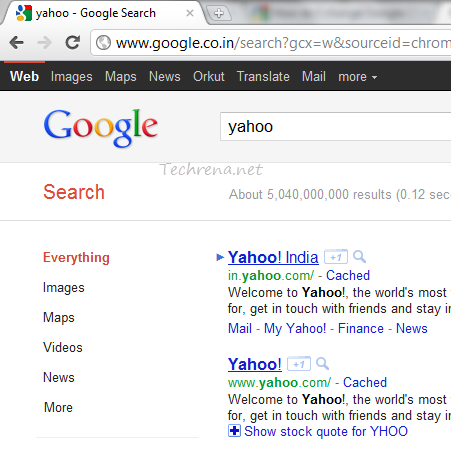
If you use Google Chrome much and love searching right from the address bar, you might be knowing that any search you perform from the address bar will take you to a regional Google search like Google.co.in or Google.co.uk etc.

Google Chrome Addess bar Search regional

In case you want the search results from the more generic version of the Google (i.e google.com) and are looking to change the settings so as to reflect the same in the Google Chrome’s address bar default search, here are the steps you need to follow:


Steps:

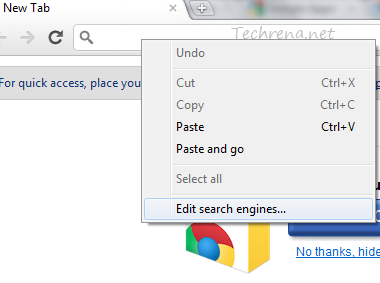
1. Right click on the address bar and choose “Edit Search Engines”.

Google Chrome Edit Search Engines

Alternatively you can access the search engines settings by typing the following URL in the address bar:

chrome://settings/searchEngines

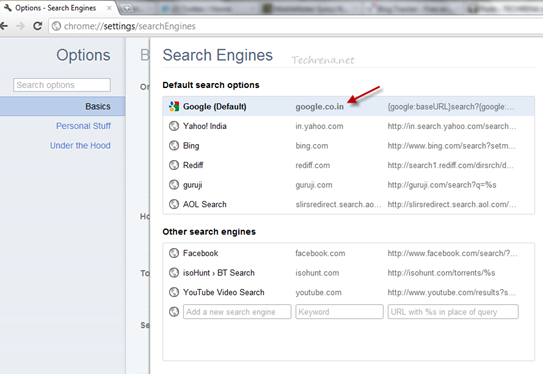
2. You will notice that the regional version of the Google search engine has been set as your default search engine under the ‘Default Search Options’ as shown in the following screenshot.

Google Chrome Search Engines list

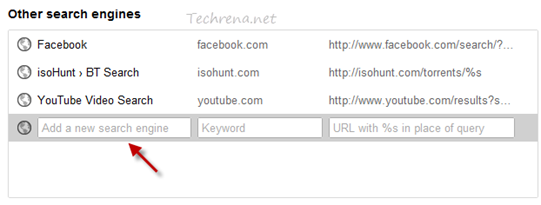
3. We need to add a new custom search engine (in our case the international version of the Google) and then make it the default search engine.

Google Chrome add a search engine

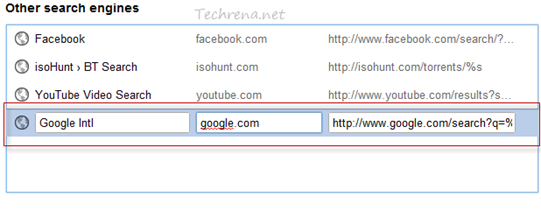
To do that type the name of your new search engine in the empty box and then type the keyword (There are no rules in filling these two boxes). That now leaves you with the URL box which holds the key. As we need a international version of the Google to serve us, key in this value (and hit Enter):

http://www.google.com/search?q=%s


Google Chrome Search Engines add new Google

4. Now that we have added a new search engine, we are now left with making it the default search engine. Hover your mouse over the newly added search engine and you will now see an “Make default” option right next to the search engine entry. Click the ‘Make default‘ button as shown in the screenshot:

Google Chrome Search engines newly added


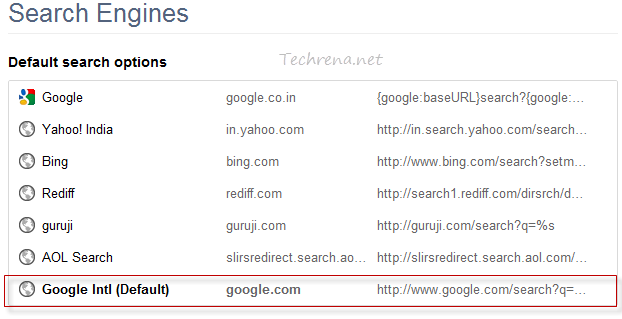
5. You will now notice that your newly created search engine has been made the default search engine and is found under the ‘Default Search Options’ listing.

Google Chrome Search Engines new default search options

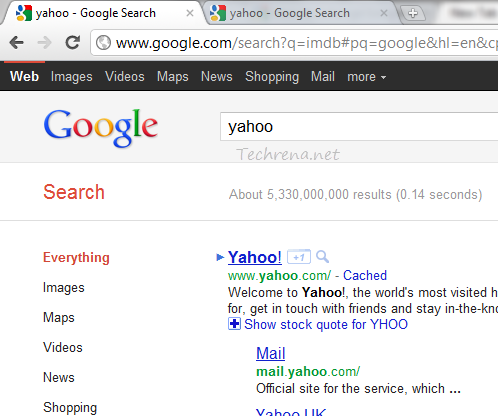
6. You have successfully changed the default search engine of your Google Chrome and you might want to test it.

Google-Chrome-Addess-bar-Search-international

Perfect! Isn’t it?

[Tip] Turn Off Auto-Saving Email Addresses To Contacts Feature In Gmail

Gmail logo

Google’s Gmail has got whole bunch of features that makes it as one of the top free email service providers on the internet. But who says that it hasn’t got any annoyances? It surely does. Gmail automatically saves email address of the person and adds it to your contact lists when you communicate with that sender even though you might not communicate with him future. Most users would find it annoying as your contacts list just keeps growing bigger with additions of such unknown contacts. If you look at it from the other side, it indeed is a nice feature for so many who are just lazy to manually add those email addresses to their contact list. I don’t know why it took so long, but apparently Google has decided to let users have the option of turning this ‘auto-save contacts feature on or off.

Steps:

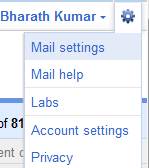
1. Login to your Gmail and click “Mail settings link found at the extreme top right corner of the window.

Gmail mail settings link

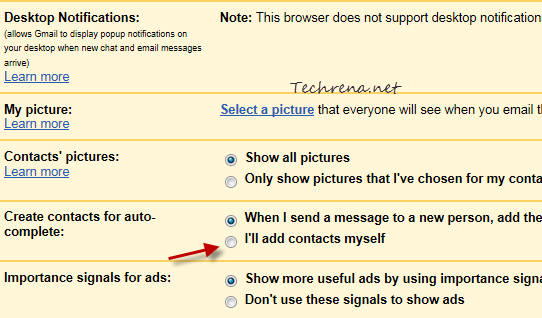
2. Go to ‘General’ tab under the settings. Scroll down until you find the settings “Create contacts for auto-complete”.

3. Choose the “I’ll add contacts myself” radio button and click the “Save Changes” button.

gmail contacts auto complete settings

That is it. But then, keep in mind that you will have to add contacts manually once you have turned this feature off.

[Tip] Use Google Talk Guru To Get Quick Answers In Chat

Google talk guru

If you think you can chat pretty much faster than say doing a web search, Google has some good news for you. Now you can get all your information more quickly while you chat with your friends without switching the windows. Google has recently launched an experimental feature called ‘Google Talk Guru’, a chatbot  that answers most of the information queries that are associated with Google SMS (currently available in the US only). The bot allows you to get information relating to weather, sports scores, simple calculations, definitions, translations, currency and metric conversions etc.

Getting Started:

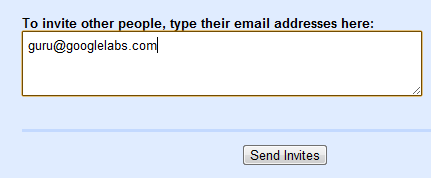
google talk guru chat invitation

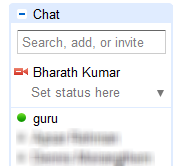
To get started, just send a chat invitation to guru@googlelabs.com and the Google Talk Guru should immediately appear in your chat list, no matter what chat client you are using.

Google talk guru on chat list

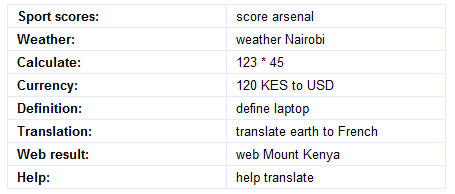
Now that you have got the chatBot on your list, all you have to do is to send your query in the form of instant message. In case you are wondering what sort of queries that you can type, take a look at the following examples to get a brief idea about using the service.

Google talk guru examples

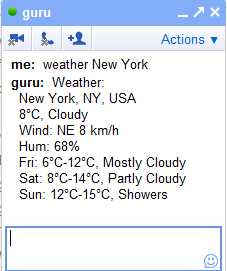
If you are familiar with the Google SMS commands, this shouldn’t a big problem as Google Talk Guru supports the majority of the kind of queries that work with Google SMS. For instance, if you want to get weather information of your city, just type ‘weather (your city name)’ and send an IM. You should immediately get the weather information related to your city:

google talk guru weather

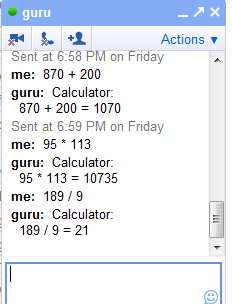
You can also ping the Google Talk guru bot with the calculations and get the result instantly.

google talk guru calculator example

Go ahead and try pinging the Google Talk Guru with various queries to get information that you need.

Using Google Recipe Search Feature

Google search recipes left-hand panel

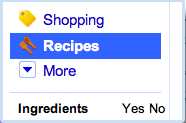
Are you having hard time trying to figure out the best recipe that could be cooked with the available items in your kitchen and within limited amount of time to serve your guests who came for a visit to your home? Wish you had a magic wand in your hands? Well, here is it! May not be a wand but just the right tool which could help you in preparing your recipes, the tool is ‘Google Recipe View’, a new search feature currently available for the users in the United States and Japan. Google’s Recipe view is a new search filter that has been added to the existing filters on the left-hand panel.

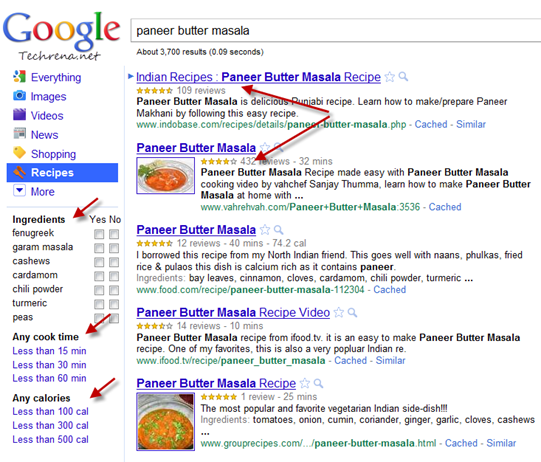
To use this feature, go to Google.com, (Google.com/ncr for users located outside the US and Japan) and type a recipe for which you want to get the information hit the search button and then click on the “Recipes” link in the left-hand panel. You will immediately get the results for the concerned recipe along with ratings so that you make you decide on which one to go for.

Google recipe search results

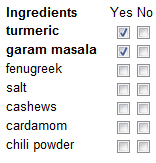
Closely look at the options in the left-hand panel in the results. You can narrow down the recipe search results by choosing the ingredients that you want to include or exclude:

Google Recipe search ingredients

And if you are in rush for time, you can also get the recipe results that help you to cook the recipe in quick time:

Cook time filter in Google recipe search

You might also keep an eye on the amount of the calories that your recipe would serve to your guests. Fortunately there are filters available to narrow down your recipe search results based on the calorie count as well :

Calories filter google recipe search results

Give it a try, I’m sure you will find this pretty useful. Non-US and Non-Japan users can also get try the direct Google Recipe View landing page.

[via] Official Google blog

Picasa Web Albums Multiple File Uploader

Picasa web albums logo

Google’s Picasa web albums is popular among the online community as a tool to quickly upload photos and videos to store and share them with others. But the problem with the online upload tool was that you were not allowed to upload multiple photos at once and you could only upload up to five photos at once. If you have some hundreds of photos to upload, this could be really tiresome process and wastes a lot of time. The only workaround this problem for all these days has been to install and use the Picasa desktop software which allows you to upload bulk pictures at once to Picasa Web Albums. But then, we have always wanted the web uploader to handle the multi-upload so as to possibly avoid the installation of another software just to get this missing tiny feature.

You no longer need to worry as Google has just lifted the five-at-a-time limitation to the image uploader in Picasa Web Albums, meaning that you can choose multiple photos and upload all of them at once (but be aware that a maximum of 1000 photos are allowed per album) to your album on the Picasa Web Albums.

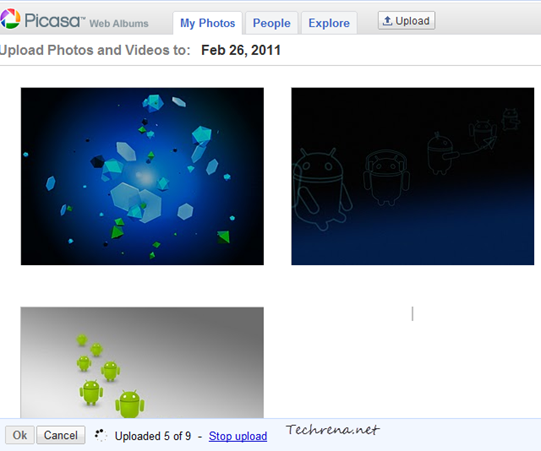
To get started, open the Picasa Web Albums and login with your Google account. and click the “Upload” button if your are using Firefox, Google Chrome or Safari. You will now be asked to enter the album details and then in the next page you will be asked to choose the photos to upload. Once all get uploaded, you will see their thumbnails. You can then add captions, zoom in or delete from the upload screen.

Upload photos to picasa

Picasa web albums uploading photos

If you are using Internet Explorer, you can use the Upload Control plug-in in IE besides using the basic uploader.

Enable Reading Levels In Google Search

Google reading level is a feature that lets you adjust the reading level in Google search results so that you get the most appropriate results based on your reading level so that you get webpages that you can read and understand easily. To get a better understanding, consider the scenario which Google mentioned in the help article (linked at the bottom of the post) about the reading level: A student or second-language learner might need a webpages more of basic reading levels when compared to a research scholar who might want to webpages of advanced reading levels. If you think, reading level matters for you, here’s how you can change

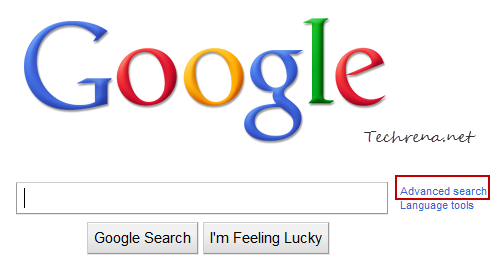
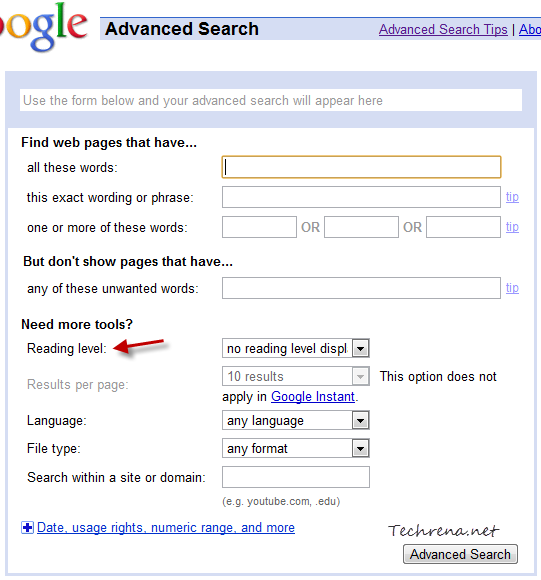
Go to Google homepage and click on the “Advanced Search” link found next to the search bar.

Advanced search link in Google

Locate the “Reading level” settings in the advanced search page:

Advanced search options in Google

Basically there are three reading levels to choose from: Basic, Intermediate and Advanced.

reading level options

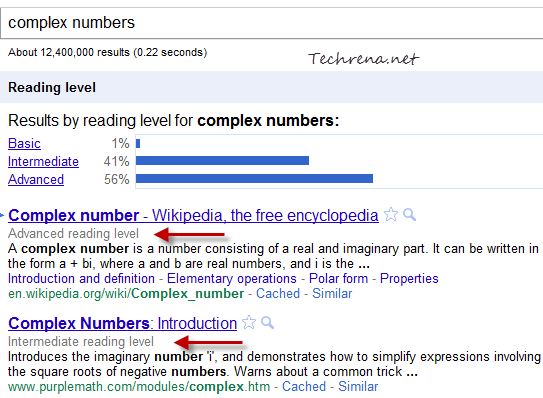
You can either choose one of the three levels or you can also choose “annotate results with reading levels” and the reading level of the webpages will be displayed in the search results as shown:

reading levels in Google search

You can then choose to read the webpages that are at your desired reading level.

These reading levels have been compiled by based on data provided by number of teachers hired by Google for the same purpose.

Source: Google Help article

[Tip] Import Delicious Bookmarks To Google Bookmarks

Delicious to Google Bookmarks

Delicious, the popular social bookmarking service was in news in December 2010 when Yahoo said that it would ‘sunset’ the bookmarking web service which made the users think that Yahoo was trying to shut down the service. Later it turned out to be a rumor when Yahoo! clarified that it wouldn’t be shutting down the service but they would be selling Delicious. And so many Delicious importers uprose ever since the ‘sunset’ rumors surfaced. Now it’s Google’s turn! Google has launched a new Delicious Bookmark importer service to enable the Delicious users to import their bookmarks to the Google’s own bookmarking service. The usage is straightforward:

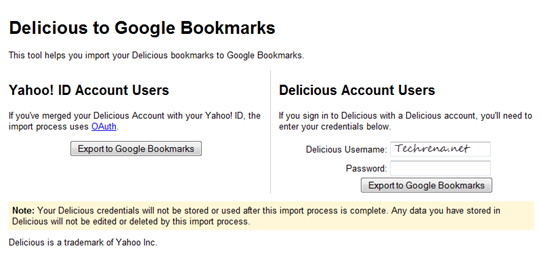
1. Login to your Google account and open this Delicious import page.

Delicious to Google Bookmarks import

2. Just provide your Delicious login credentials or login through your Yahoo! account in case if you have merged your Delicious account (the importer uses the oAuth process in this case).

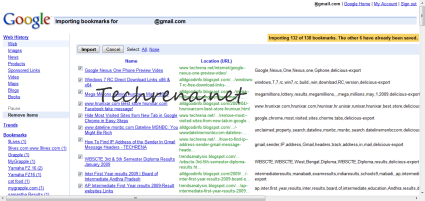
Delicious Bookmarks Imported To Google Bookmarks

Select the ones that you want to import and click the “Import” button and that is it. You should now have all of your Delicious bookmarks (favorites) in your Google Bookmarks.

Activate 2-Step Verification Process For Your Google Account To Make It More Secure

Google 2-step verification

Google had previously announced the new 2-step verification for Google apps users. The same is now being rolled out to all the Google account users. The 2-step verification would make your Google account more secure by verifying you are the real owner of the account that you are trying to access. You can verify your authentication by using a smartphone, or via a SMS text code that you receive similar to how you do it while making online banking transactions or even you could use a landline to verify your identity through a voice call in case you don’t have a mobile phone with you.

How To Enable 2-Step Verification In My Account?

To set up the 2-step verification, login to your Google account and navigate to the Manage Account page, and if the feature has been enabled for you, you should see a “Using 2-step verification” link under Security column in your Personal Settings.

Google account personal settings

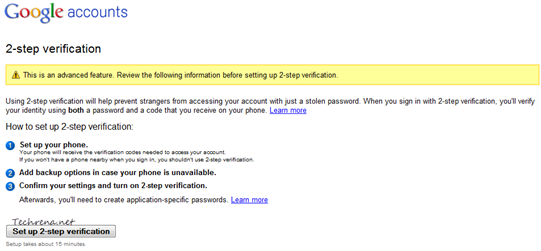
And the whole setup should take about 15 minutes. You will see this page on the next screen:

google 2-step verification setup

Click on the “Set up 2-step verification” to continue and complete the setup process. It involves 3 steps: 1. Setting up your phone 2. Adding backup option when your phone is unavailable 3. Confirm your settings

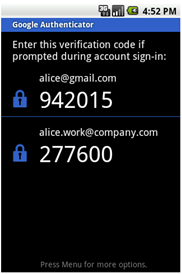
If you have a smartphone, you can install Google Authenticator application from (available for Android, iPhone and BlackBerry devices).

Google authenticator screenshot

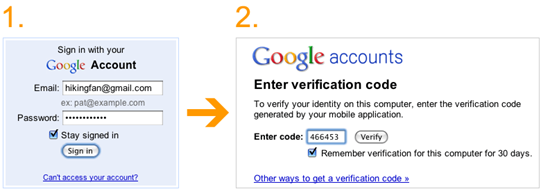
The application generates a verification code that is required in the second step during the sign in. You can also check the “Remember verification for this computer for 3 days” option and you don’t need to re-enter the code again for the next 30 days. In case you don’t have a smartphone, you can receive the verification code through a text message or through a voice call as well. You can also generate application specific passwords to sign in to non-browser based applications that use Google account like mobile Gmail, Picasa or AdWords Editor. But all these are advanced options and might confuse you. For now you have completed the 2-step verification process and you have added more security for your Google account and lets not bother too much about the advanced settings.

[via] Official Google blog

[How To] Schedule Emails in Gmail with Boomerang

I would say Google’s Gmail is the best email service. We do not need any introduction to Gmail here.

Well, if you use Gmail this is going to be an interesting post. Here, I am going to write how to schedule your emails. Means you can send or receive your mails at a particular time set by you in prior. Let me explain how it is going to be useful. Say one of your good friend’s birthday is coming and you do not want to miss wishing him. So how do you make it 100% sure that you wish him at midnight? Just write a beautiful email and schedule it to the time you want it to send using Boomerang for Gmail.

Boomerang-for-gmail

Boomerang is an add-on for Firefox and Chrome which lets you to schedule the emails in Gmail.  Follow the following steps to install it and schedule the mails.

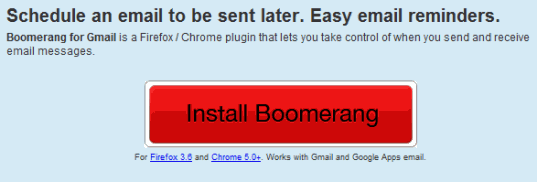
Step 1: Download Boomerang. Click the Install Boomerang button below.

download-boomerang

Step 2: Click on Allow Button to install the Add-on. If you are installing on Chrome, Click the Continue button in the left lower corner of the window. (Click to enlarge the image below).

Install-boomerang

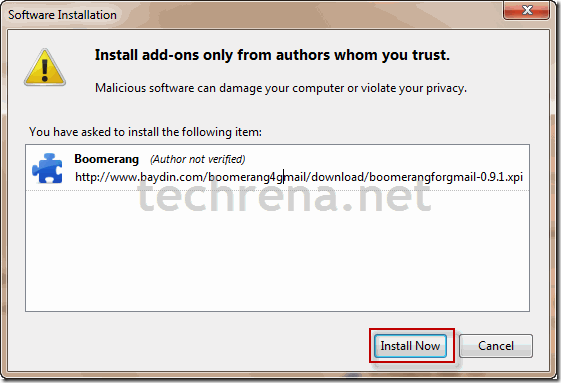
Step 3: Click on the Install Now button to install the add-on.

install-now-plugin

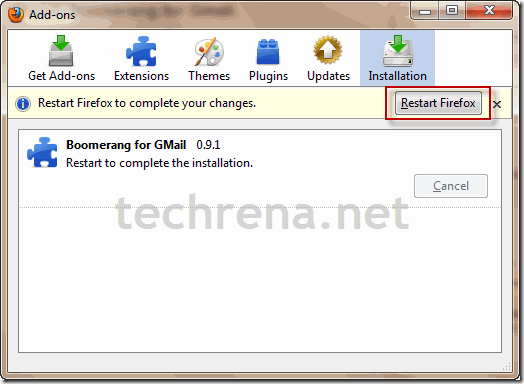
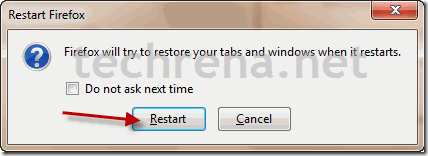
Step 4: After installation, it will ask you to restart the Browser. Restart the Browser to use the add-on.

restart-firefoxrestart-firefox-window

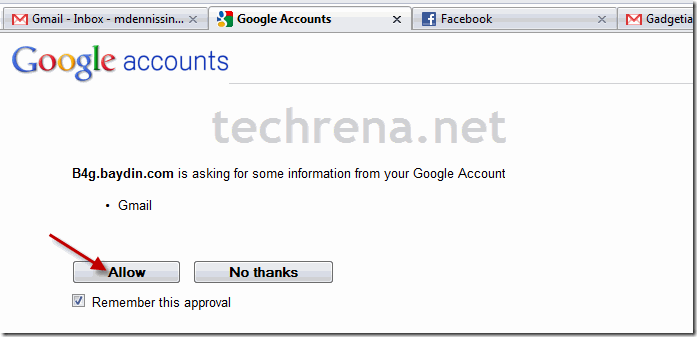
Step 5: Now after restarting the browser Google will ask you if you want to share information to  Boomerang. Click on allow.

allow-information

Step 6: Now you should be able to see Boomerang on the top right corner.

boomerang-installed

As Boomerang is finally installed you can schedule your emails. As follows:

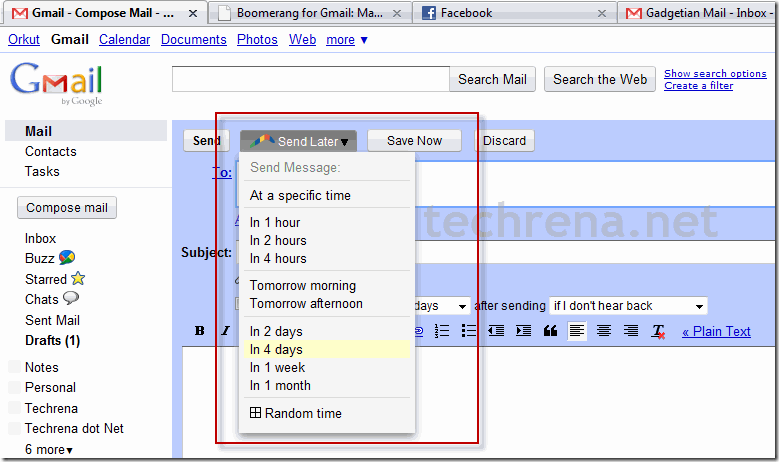
To send a mail at a scheduled time, click on Send Later Button and select any time.

send-email-later

If you select At a specific time, you can enter the exact time and date.

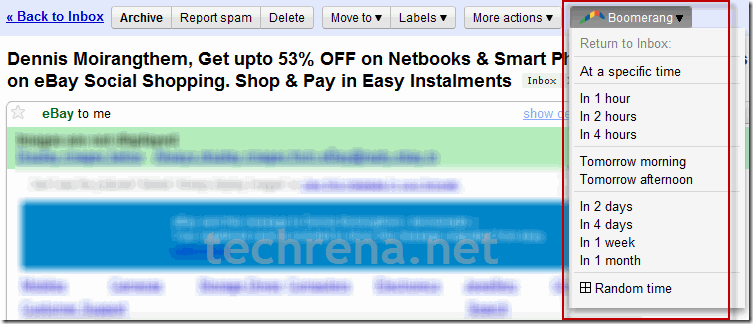
To re-receive an already received mail, click on Boomerang after opening the main and select the time you want it to return to your inbox.

return-to-inbox

I hope that this add-on will be really helpful for all of us.