[Tip] Find Facebook Last Login Time & Location Details

facebook logo

Facebook is undoubtedly the no#1 fastest growing websites in the world and no wonder it has made to the top 3 websites in terms of number of daily visits worldwide. It has evolved as such a nice platform for social networking, connecting with friends, sharing with friends and with those wonderful apps, the ease of using the site is just growing in a phenomenal manner. Popularity always brings envies too. The result: increasing number of phishing attacks on Facebook to get your login details. The only way you can save your account from being exploited is to never share Facebook account details on any where else. Even if you does this regularly, you would still be doubtful if someone else finds your login details without your knowledge and gain access to your profile. The only way you can sense a suspicious activity on your account is to monitor your account to see if there’s an unauthorised access from any where and from any device which might not have used by you.  Here’s the tutorial on how to check your last login time and location on Facebook.

Find last accessed time & location of Facebook account:

1. Login to Facebook and click on “Account” dropdown menu on the top right corner of your screen. Click on “Account Settings”.
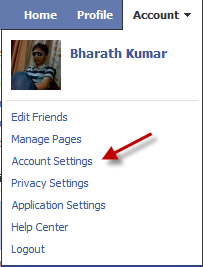
Facebook account settings

2. You will be taken to the Facebook “My account” page, where you will a number of tabs, each account for settings for different sections of Facebook. Click on Settings tab.

Facebook my account

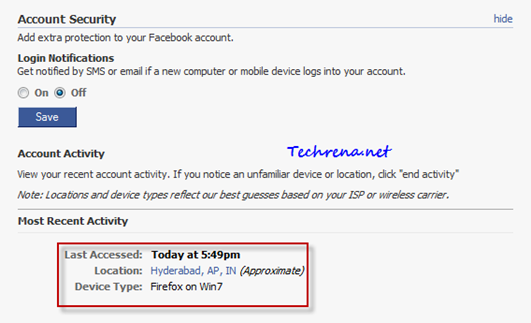
3. Find the “Account Security tab “under settings, you will have the account activity details listed under “Most Recent Activity

Facebook most recent acitvity

You can find the last accessed time, location and the device from where your account has been accessed. You can even enable SMS or email notifications whenever your account is accessed from a new computer or mobile device, just select “On” radio button under “Login Notifications” and click Save button.

You might also want to read how to disable Facebook notification emails.

[Tip] Paste Text Minus Formatting In Google Chrome

This might have happened to all of us- You are writing an email and you want to quote something from a webpage, you try to copy text and paste it in the email editor, you will see the original fonts, colors, spacing and styling attached to it, but you are just concerned about the plain text and you don’t want any sort of styling attached to it.

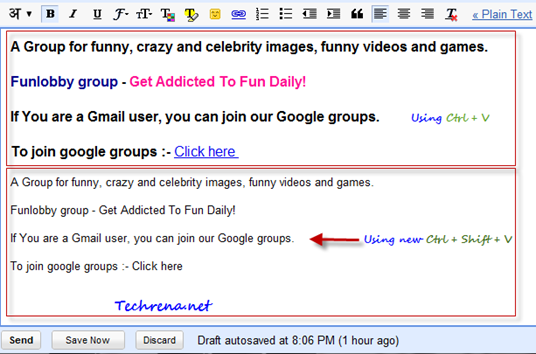
When the traditional Ctrl + V command just pastes the text with all formatting, Google Chrome team has developed an easy shortcut Ctrl + Shift + V command (Command + Shift + Option + V on Mac OS) to just “paste as plain text”.

Ctrl shift v chrome

Take a look at the following screenshot which highlights the advantage of this particular shortcut while writing an email in Google Chrome.

Chrome Shortcut for pasting text without formatting

You can use this keyboard shortcut for any rich editor like Gmail’s compose mode, or even in editing documents in Google docs etc. to remove all the unwanted formatting and styling from the text from webpages.

Via Google Chrome blog

[Tip] Google Talk And Google Buzz Text Formatting Tips

gtalk

Google Talk is quickly overtaking the Yahoo and MSN when it comes to instant messaging (IM). Lots of people are using Google Talk either through their native desktop version or the Gmail version of the talk client. With many features like video chat made available to the users, Google Talk is one IM client that has gained lot of popularity among the users. But not so many option to format text unlike Yahoo Messenger and other IMs is a let down for Gtalk users. But Google talk do have some lesser known  formatting styles that are in my honest opinion sound a bit difficult to implement as these have to be used manually by typing rather than to be able to select by a mouse click like in other popular IMs. Here we are listing down all the possible styling tips that you can use while you do a chat with your friends in Google talk.

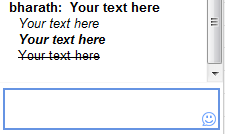
Google talk text formatting

Tip 1: Use Bold Text

To make your text bold during your chat, enclose the text inside “*” (asterisks)

*Your text here*= Your text here

Tip 2 : Use Italic Text

To italicize the any text just enclose it in “_” (underscores)

_Your text here_ = Your text here

Tip 3: Use Bold + Italic Text:

Use

_*Your text here*_ = Your text here

Tip 4:  Use Strikethrough Text

To strikethrough a text in your chat, enclose the text inside “-“ (dashes)

-Your text here- = Your text here

Bonus Tip: The good thing here is that you can use all the above tips in your Google Buzz too.

Google hasn’t yet made the underline font feature available to the Gtalk users. However, you can suggest the Google Talk team to activate this feature.

If you are an excessive Google Talk user, you will definitely find all the above tips handy.

[New] Drag And Drop Attachments From Gmail To Your Desktop

gmail drag attachment

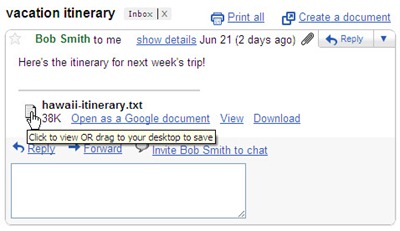
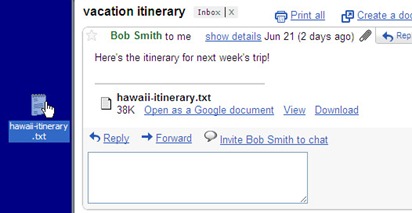
Gmail has just announced a support to drag and down the attachments from mail to your desktop. Until now we could only drag and drop attachments from the desktop to the mail while composing but the reverse was not possible. Now Gmail blog has officially announced the launch of this new feature (in Google Chrome) along with a couple of screenshots on how to do it. I have included the screenshots in this post so that you can get a brief idea about how to use this feature. When you hover the mouse over the attachment, you can see a message “Click to view OR drag to your desktop to save”. It’s pretty much straight forward, just click and hold, drag and drop the attachments from your mail to any folder on your computer. Release the mouse button once you have taken the cursor to your desired folder.

gmail_drag_attachment_2

Gmail had earlier enabled another feature that lets you drag and drop images on to your email messages while composing a mail.

Note: This works only with Google Chrome as of now

Via Gmail Blog

[Tip] Get Free Gmail Email Alerts Via SMS

Gmail via SMS logo

If you want to get all your new Gmail messages to your mobile phone via SMS text messages, there are already enough no of services and tools have been developed to serve the purpose for which you need to share your Gmail password. Even though most of these services are genuine, still you might not always want to share your Gmail personal credentials with those services for security concerns. Here I’m coming up with an alternative where you need not give access to your personal Gmail to any unreliable third-party service. All you need is an Gmail account and a Windows Live Mail (Hotmail account). If you still haven’t got an account at Live Hotmail, get a new account here. Now follow the steps mentioned below:

Steps:

1. Connect a mobile device to your Hotmail account and set up Hotmail Email SMS alerts.

2. Login to your Gmail account, go to settings page.

3. Go to Forwarding and POP/IMAP tab, find the “Forwarding” tab.

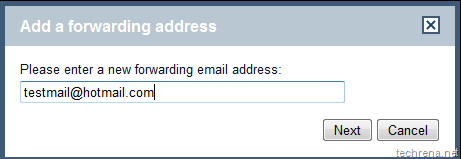
4.  Add a new email address to your forwarding list by selecting “Add new email address..” option for the drop down box. Enter the new forwarding email address. It should be something like username@hotmail.com

Add new email address Gmail forwarding

forwarding_address_gmail

5. Click Next and complete the verification process. Enter the verification code that you receive via SMS.

Verfiy forwarding mail in Gmail

6. Now that you have successfully verified your new forwarding hotmail address, you will now receive each and every mail from your Gmail inbox to the new forwarding hotmail address (we selected “keep Gmail’s copy in the inbox” option). As you had also setup your Hotmail Email alerts to be sent to your mobile via SMS, in effect you get all your new mails in your Gmail inbox directly to your mobile.

7. But some operators in India like Airtel have a limit on the number of free text messages that you can receive through Hotmail (The current limit for Airtel is 300 !). So you might want to filter out some unimportant mails to wasting these free messages count. Luckily we have “filters” in Gmail that makes this task easier for us.

8. First of all disable the forwarding under your Gmail’s “Forwarding and POP/IMAP” settings.

disable forwarding in gmail

Now go to Filter tab and create a new filter:

Filters tab in Gmail

9. Under the filter settings filter out Emails based on senders or words or based on subjects of the mail that you receive. I have chosen not to receive alerts for mails from Facebook alerts, Twitter alerts etc. You can setup your own criteria for filtering the mail.

Creating Filter in Gmail

Click on “Next Step” once you are done.

10. Now select the fifth option i.e “Forward it to:….@hotmail.com”. And click “Create Filter”.

forwarding using Gmail filter

That is it. You are done with configuring your Gmail inbox to receive SMS alerts for important mails in your Gmail.

Note:

Windows Hotmail Email SMS alerts is currently available only in few countries. This tutorial is based on the such service offered in India,and thus this trick may not work for you if you are located in a country where Hotmail SMS service is currently not available.

Add Images To Your Gmail Signatures

Gmail has recently launched a new feature that lets you add rich HTML signatures right inside your Gmail without needing to any hacks. Until now Gmail didn’t have a built-in support for rich text HTML signatures, if you had to add a signature, it used to look like something as shown below;

gmail_old_signature

Now that Gmail has official support for rich text HTML signatures, you can create a more customised signatures like the one shown below:

Gmail html signature

To start using this feature in Gmail, follow the steps:

1. Login to your Gmail and go to settings page.

2. Find the signature section under settings

3. You can see a much familiar rich text editor that you would normally see while composing a mail using Gmail.

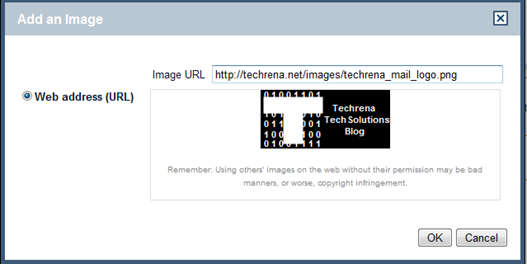
4. You can even add images and link them to your profiles on various social networking sites.Click on the “image” icon to start uploading a image.

add images in Gmail signatures

The only issue here is that you can only upload images that are already present on the web, however you can’t upload images directly from your computer. That being said, one need not bother much about it because images can be easily uploaded to Flickr or Picasa for permanent storage and faster access. You can also resize the image to three different sizes (small, medium or large).

5. You can even change your font size, style, color etc. using the rich text editor. Click on the “save changes” to save your signature.

New Feature: Blogger Stats Comes To Blogger In Draft

Blogger stats

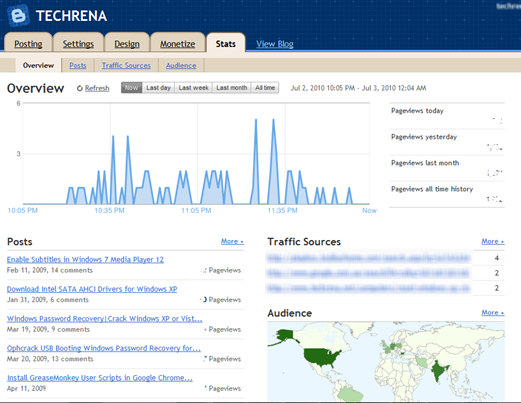
Blogger has just launched a new almost real-time like visits tracking to blogger.com blogs via

Blogger in Draft (which means that it is still in testing phase).

Though we have tools like Google Analytics, people still want to see their visits in real-time. But if you think that you are just a beginner with Blogger and not completely comfortable with all those advanced features in Analytics, then this is probably the one that you just needed.

Blogger Stats offers all basic information about your site visits in a far better easier way. You can see visitors details during intervals of one hour/day/week/month like which posts are getting most visits, the referring pointing to your blog, the geographic location of your visitors etc. [Checkout “Overview”, “Posts”, “Traffic Sources” & “Audience” tabs].

Just login to draft.blogger.com, and checkout the “stats” tab on your blog dashboard to get started.

Blogger stats tab

[Tip] Top 4 Ways To Schedule Your Facebook Status Updates And Twitter Tweets

With the evolution of social media, so many new features are being added to the social networking sites so often to keep up with the ever increasing demand from the users to stay connected with their pals in the sites like Facebook and Twitter in a number of different ways. But we still feel that they are lacking some features. One such feature I think of is the ability to schedule the updates in the networking sites so as to respond faster to future events like birthdays, parties etc.

We understand how handy it could be if we are able to schedule Facebook status updates and the Tweets in twitter. Here are the list of such services (most of them are free) offering this feature.

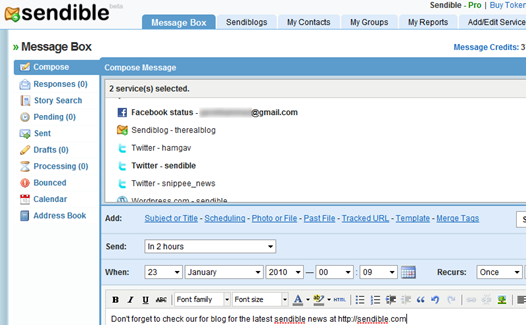
1. Sendible

Sendible schedule

Sendible is the popular tool for scheduling emails, sms and updates for social networking sites like Facebook, Twitter, MySpace etc. If you signup as a free user, you can send up to 100 updates per month using Sendible. You can also send messages to more than one site at the same time using Sendible.

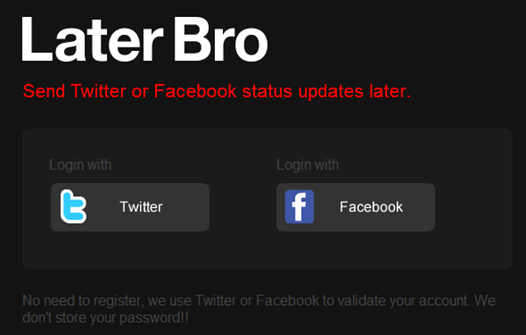
2. LaterBro

LaterBro twitter facebook updaes

LaterBro (funny name, isn’t it?) doesn’t require you to create an account at their site. You just need to login to the site using either your Twitter account or with your Facebook account. You can then schedule Facebook updates or tweets from multiple accounts.

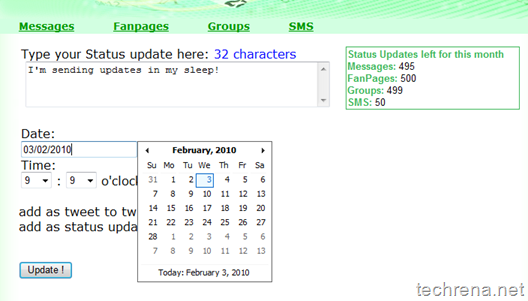
3. Social Tomorrow

Social tomorrow facebook

With Social Tomorrow, you can schedule Facebook status updates, fan page wallposts, twitter tweets and sms text messages. Note that there is a limit of 500 messages per month.

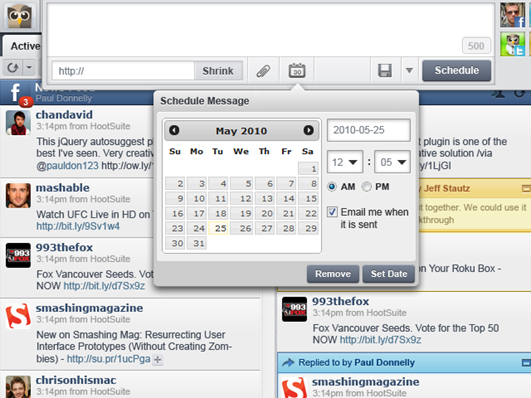
4. Hootsuite

Popular web based twitter client Hootsuite also offers scheduling Facebook and twitter updates. You can see all your scheduled messages under one column. It is an easy to use and already established service, strongly recommended.

HootSuite_schedule

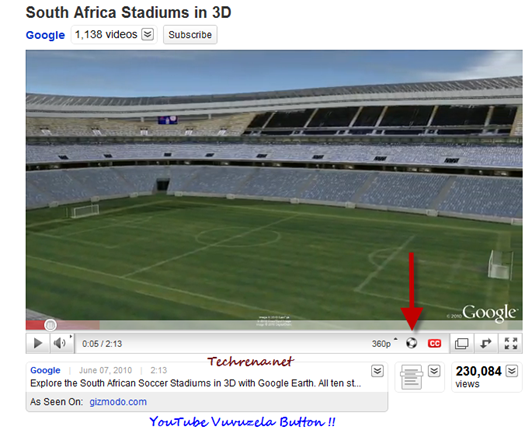
Watch Out: YouTube Adds A “Vuvuzela” Button

YouTube Vuvuzela button

Some things always keep changing, like how YouTube has been doing for some time now. YouTube has recently (some months back actually) redesigned it’s interface and we are getting used to it.

YouTube is good at playing some pranks too ! After April 1 fools day prank (Textp), it seem we have another one here, this time it is 2010 FFIA World cup special, the “Vuvuzelaeffect to the audio.

Have you noticed the small football icon soccer worldcupwhile watching some of the YouTube videos off-late? Just go ahead and click on it,  surprise !! who’s blowing the “Vuvuzela” there ?

The annoying Vuvuzela sound toggles on and off if you click this football icon. Although this button can’t been found on all videos, it’s indeed showing up on some non-soccer videos on the YouTube.

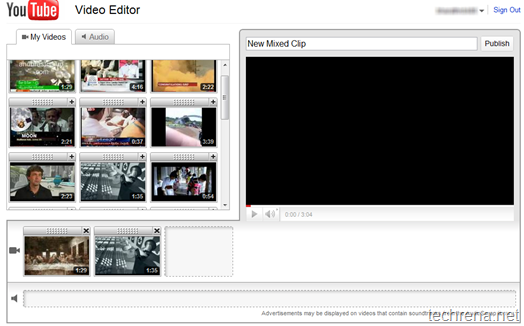
Try The New YouTube Online Video Editor

YouTube online video editor

YouTube has launched a new free online video editor for those videos that you upload to the YouTube.

This is on-par with the most of the offline video editor softwares like Windows Movie Maker or iMovie. This online video editor tool allows you to do various action on the videos like combine multiple videos, trimming the beginning or ending of the video, adding soundtracks from AudioSwap library, you can even created new videos directly in the YouTube without worrying about the file formats or uploading problems.

This feature has been launched under TestTube, where YouTube tests whole lot of new upcoming features (like Real-Time comments search etc.).

Watch the funny video below to know more about it:

Link: Access YouTube online video editor