Adsense Revenue Share Revealed

Google adsense logo

Google has recently disclosed a vital information about the share of the Adsense revenue that Google credits to the publishers for running Google ads on their sites.

According the announcement made in official Adsense blog, Google shares

68% of total revenue for Adsense for content (AFC) ads

51% of total revenue for Adsense for search (AFS) ads

with the publishers.So Google keeps 32% of the total revenue (49% in case of Adsense for search) with it.Google uses this portion of your Adsense revenue for serving ads on your site.
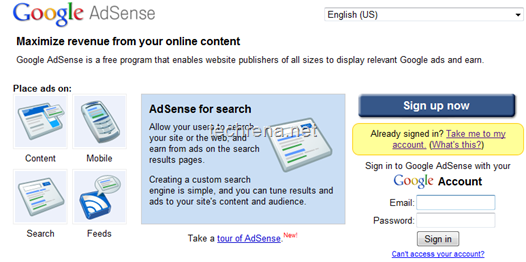
Adsense_login

Why Is This Important ?

This data is very useful for many webmasters to estimate the net worth of their site by calculating the total worth of the site in terms of the total worth of Adsense advertising appeared on their site.

For instance, if your site is generating $200 monthly on average (AFC only), it means that your site could run a total of $294 ($200 / 0.68) worth of Adsense advertising.

You can now make use of this data to fix a price for the ads that you run through direct advertising.In the above case, you know that your blog is worth $294 and accordingly you can fix price as minimum price for any ad that you run through direct sale of the ad slots.So this is how webmasters can use their site’s Adsense net worth as a benchmark for ad slot sales.

Google however has chosen not to disclose the revenue share for other Adsense products like AdSense for mobile applications, AdSense for feeds, and AdSense for games at the moment.

Webmasters across the world are delighted to know exactly how much of the ad revenue share that they are being credited and this is a great initiative from Google to provide better transparency.

Microsoft Windows Update KB981793

Windows logo

Microsoft has released update KB981793 (on Monday, 24th May 2010) for Windows (including Windows 7) systems categorized as “Important update” for all Windows running computers titled as May 2010 cumulative time zone update for Windows operating systems.

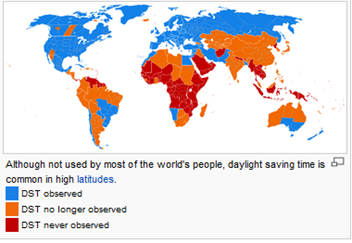
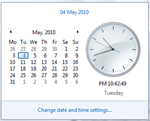
DST worldwideWindows 7 clock

This latest update addresses the fix for changes in various time zone data to accommodate recent changes to daylight saving time (DST) in several countries since the last Windows cumulative time zone update KB931667 and adjusts your computer clock according to the changes.

DST changes since the last Windows cumulative time zone update:

Fiji, Morocco, Pacific SA, Paraguay – DST change

Bangladesh – Cancelled DST

Syria – Created a new UTC +2 Damascus time zone

The Update is available for the following Operating Systems:

Windows XP (SP2 & SP3) –

Windows Server 2003

Windows Vista or Windows Server 2008

Windows 7 or Windows Server 2008 R2

This updates installs the files Tzchnage.dll, Tzchnage.exe, Updspapi.dll in case of Windows XP and Windows Server 2003; Tzres.dll, Tzupd.dll.mui & Tzupd.exe for Windows Vista and Windows 7 based systems.

KB981793 Direct Download Links:

Windows 7

Windows Vista

Windows XP

[How To] Make Gmail More Secure By Using HTTPS Instead Of HTTP

“If you sign in to Gmail via a non-secure Internet connection, like a public wireless or non-encrypted network, your Google account may be more vulnerable to hijacking. Non-secure networks make it easier for someone to impersonate you and gain full access to your Google account, including any sensitive data it may contain like bank statements or online log-in credentials” – Google

In order to avoid such kind of security risks we should enable HTTPS(Hypertext Transfer Protocol Secure) which is a secure protocol that provides authenticated and encrypted communication and the interceptors will not be able to tap the information.

You might have seen HTTPS being used in the banking and payment websites. So by using HTTPS for your Gmail, you will be able to a secure you mailbox.

In order of enable HTTPS protocol follow the steps below:

1. Sign in to Gmail

3. Check If your Gmail is secure?

Check if you have a https://mail.google.com url. If not then follow the steps else not required as it is already enabled.

gmail_url

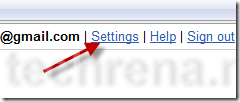
3. Click Settings at the top of any Gmail page.

gmail_settings

4. Set Browser Connection to Always use https

always_use_https

5. Click Save Changes.

save_gmail_settings

6. Log out and Login.

7. Now find a secure login

You can see https://mail.google.com in the url.

gmail_https_url

Now you Gmail is as safe as you internet banking site. But never forget to Logout your account if you are using a public computer.

Notes:

  1. Using HTTPS may slow down a bit the speed of accessing your Gmail, so if you trust the security of your network, you can turn this feature off at any time
  2. “Always use https” will prevent you from accessing Gmail via HTTP
  3. Currently Gmail has enabled HTTPS by default. For the old users you can follow the method.

Google TV Announced, Joined Hands with Sony, Intel and Logitech

Google has come up with the technology to unite Web surfing with channel surfing on televisions. Google has joined hands with Sony, Intel and Logitech International to bring their dream to reality. They have unveiled their much-anticipated Google TV.

Google_TV

For  those who already have a flat-panel TV will be able to plug into the new technology by buying a set-top box made by Logitech or Sony. Both devices will contain the same software and microprocessor as the new TV sets.

Problem during the Announcement of Google TV

The demonstration wasn’t smoothly at a Google conference for about 5,000 software programmers. Many people in the audience were using the conference’s wireless access network that created problems while Google showing how its technology is supposed to toggle seamlessly between the Web and television programming. Ironically Google had to plead with the attendees to disconnect their smart phones from the wireless network.

Google Android 2.2 Froyo Unveiled

Android 2.2 Froyo

Google has announced the latest version of the Android OS version 2.2 named Froyo today. A significant improvement in performance has been explained and list of new features Froyo have been included.

Some of the major changes Android 2.2 Froyo are listed below:

  • The Dalvik JIT Compiler improves the performance to 2x-5x
  • Supports Flash 10.1
  • Onscreen camera keys allows zooming, flash, white balance, geo-tagging, etc.
  • Better memory management for faster app switching and higher performance

Watch the Official video giving the full details of the new Android 2.2 Froyo release:

[How To] Disable Restart Your Computer Notification After Installing Windows Update

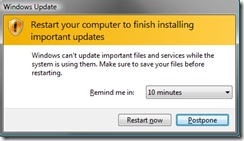
Microsoft Windows automatic updates provides maximum protection against latest security threats and fixes bugs discovered later. Well it is advisable to enable automatic updates or at least install them manually whenever any new update is released. The only annoying thing about Windows Automatic Updates is that it starts displaying a notification to restart your system in regular intervals once it finishes installing the updates.

This notification is even more annoying in Windows XP where we don’t have the option of increasing the time interval.

Windows_XP_Restart Windows-7-restart

Now we can disable this notification. The methods are given below:

1. By using Local Group Policy Editor (gpedit.msc)

Note: Local Group Policy Editor which is not available in Home versions of Windows

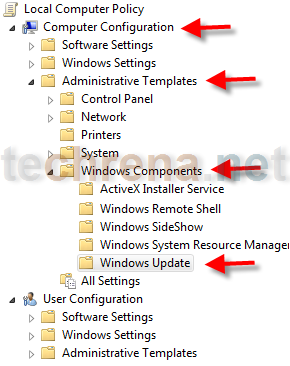
Open Local Group Policy Editor. Press Start + R, Type gpedit.msc and Enter.

Now go to in the left pane :

Computer Configuration—>Administrative Templates—>Windows Components—>Windows Update

Windows_update

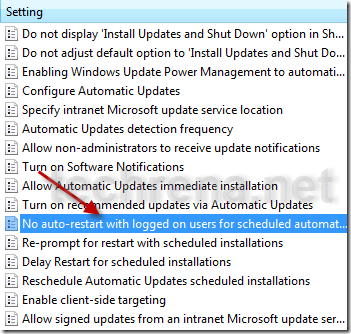
In the Right Pane Double Click on:

No auto-restart with logged on users for scheduled automatic updates installations

no_auto_restart

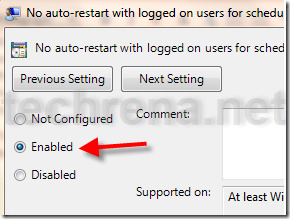
Click on Enabled and press OK.

enable_no_auto_restart

Now the notification has been disabled permanently.

2. By using wuauserv command

Note: This method is applicable for all versions of Windows XP, Vista and Windows 7.

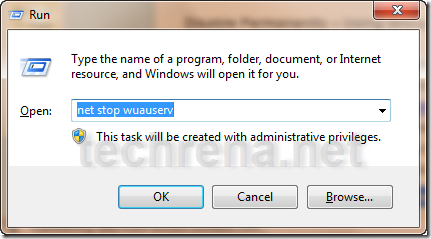
Press Start + R, Type net stop wuauserv and Enter.

net_stop_wuauserv

Stopping_windows_update_service

It will stop the Windows Update service for the current session. It will start again after the system restarts. It is important to note that you have to use this command only after Windows has finished installing the updates and when it starts notifying to restart. Do not stop the service while installing the updates.

If you want to start the service Type net start wuauserv and Enter.

This method stops the notification temporarily, only for the current session.

We hope that now you will not have to press restart later again and again and get hold of the annoying message.

You can subscribe to our RSS feed via email for more tutorials under Windows.

[How To] Copy A File Or Folder Path To Clipboard Without Any Software

Windows7_Logo

Are you using any third party software or any registry hack to copy the path of any file or folder in windows? Do you know that Windows 7 allows you to copy the full path of any file right from the context menu itself? Here’s how you can do this:

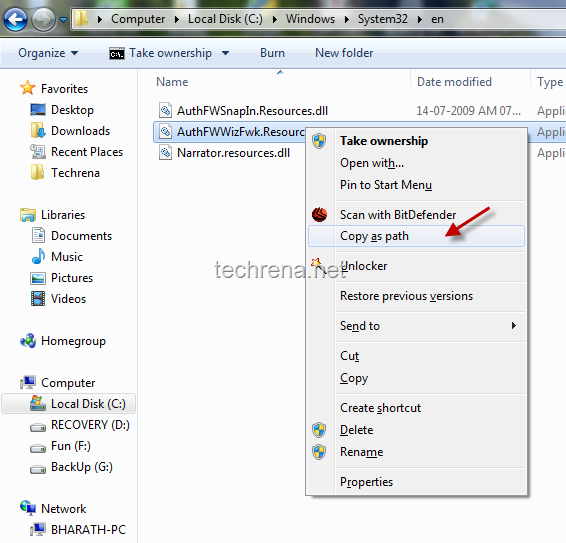
Use Shift + Right-Click on any file or folder and you will find “Copy as path”.

Copy as path in windows

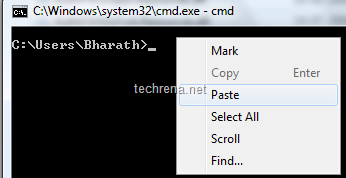
You can now use the copied file path from the clipboard anywhere including in a command prompt DOS window:

paste file path in cmd

file path copied in cmd

This is very helpful if you are using some commands via the Windows command prompt (DOS windows) that needs the full path of the files on which the DOS commands are used.

Hope this tip helps you.You may also subscribe to our RSS feed via email for more tutorials under Windows 7.

Add Or Remove Items From Windows Context Menu

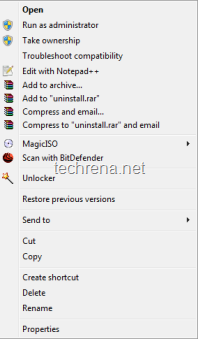
messy windows context menu

Context Menu appears when you right-click on any Windows folder or a file.When you install programs, it is very common that they fight with each-other to occupy the content menu.This context menu list will just keep on increase as you install new programs in your PC.But it is very unlikely that you use all such programs from the context menu, then why have it there? It is very annoying in such cases and you might want to get rid of all such menu items.Read on to get the possible solutions..

Using Registry Editor:

You need to find two items in registry editor which pops up by typing Regedit in your run command area.

In the registry editor, find the following items:

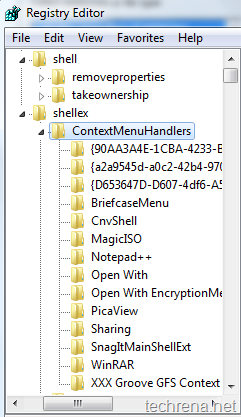
HKEY_CLASSES_ROOT\Directory\shell

HKEY_CLASSES_ROOT\Directory\shellex\ContextMenuHandlers

Shell Context Menu Handlers in regedit

As shown in the above diagrams, you will find most of your context menu items under shellex, which you can edit to hide or disable.

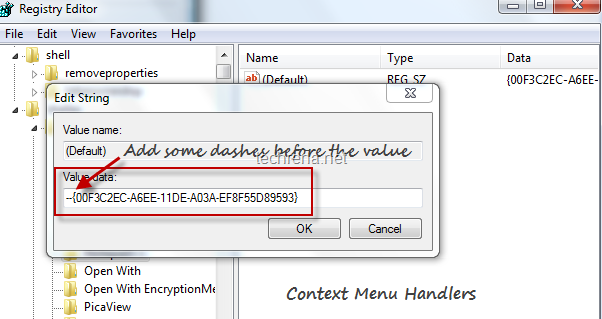
Regedit shell context menu handlers

To hide any context menu item, just right click on the key> choose Modify data?> just add some dashes before the Value data filed, this will hide that particular item for appearing in the context menu handlers.

Well, working with registry values is always going to be dangerous particular if you edit some other key values instead of the correct one.So I always prefer using simple programs available for obtaining the same result in a easier way.

ContextEdit:

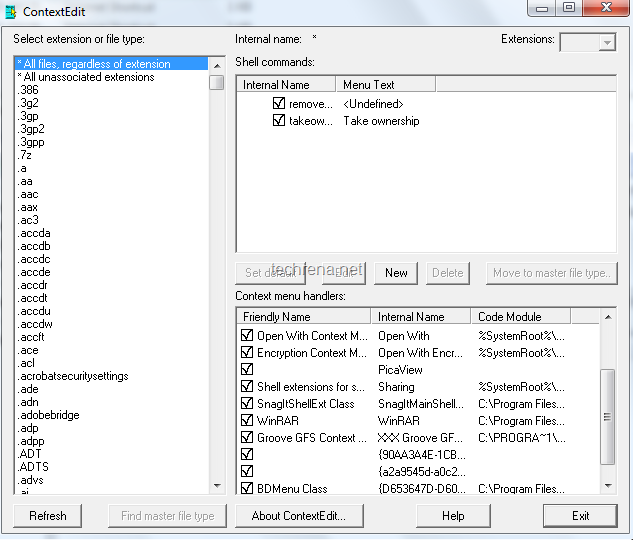
ContextEdit displays list of static context menu handler items that appear when you right-click on any folder or file.You can easily disable them by unchecking against it.

ContextEdit

Download ContextEdit (487 KB)

FileMenu Tools:

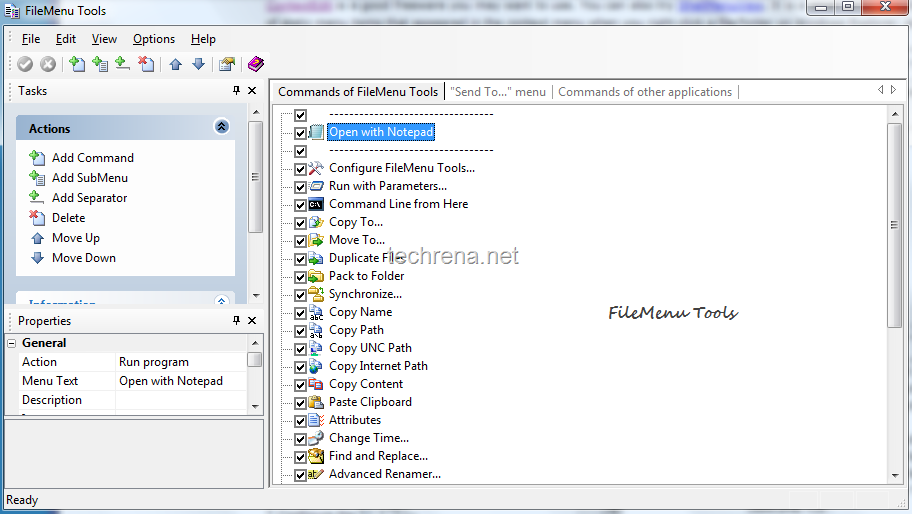
FileMenu Tools, is another great free utility which allows you add, delete or manage the context menu items, you can even choose move a particular context menu item down (or up).

FileMenu tools

Download FileMenu Tools (7.4 MB)

[How To] Disable or Enable Registry Editor In Windows 7

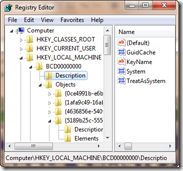
regedit

With viruses trying to attack your system and change the registry, why don’t we try disabling the registry editor now itself before the viruses do it?

Yes, this question is a clear one and why don’t you disable the registry editor by yourself before someone changes your registry and mess with your computer.

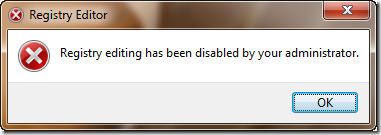
regedit_disabled Well we have a lot of methods to disable or enable the registry editor. Some of the easiest ones are given here.
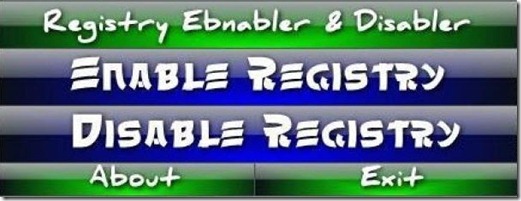
1. Disable or enable Registry Editor using Registry Enabler & Disabler 3

Registry Enabler & Disabler 3 is a freeware which can be used to enable or disable Windows Registry editor. It is a safe program.

Download: Registry Enabler & Disabler 3

Size: 276 KB

Registry_Enabler_Disabler_3

By using this program, you can directly enable or disable the Windows registry editor.

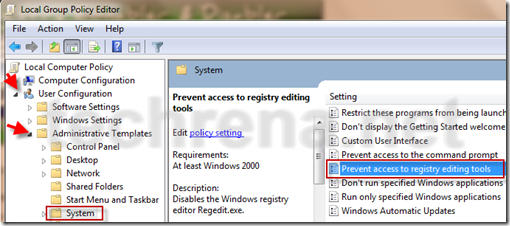
2. Disable or enable Registry Editor using Local Group Policy Editor

Press Start + R and type gpedit.msc and press Enter.

In the Local Group Policy Editor go to the location:

User Configuration—> Administrative Templates—> System

Under System, find Prevent access to registry tool. Double click on it and set Enabled to disable access to registry editor.

disable_registry_editor

Set it to Disabled to enable access to Registry Editor.

Note: Local Group Policy Editor which is not available in Home versions of Windows

3. Enable Registry Editor Using VBS script.

This method is given in techrena.blogspot.com. To read more visit:

How to enable Registry Editor (REGEDIT)

You can subscribe to our RSS feed via email for more tutorials under Solutions.

[How To] Remove Trojan.Vundo.H or Vundo.H Virus

danger

Trojan.Vundo.H also known as Vundo.H is a back door trojan horse program  that will activate corrupt infected local and network computers and download further malware programs onto the system. The Trojan.Vundo.H trojan horse is considered at severe security risk that can alter registry files and radically slow down computer speed.

Though popular anti-virus programs like AVG can detect the virus, it is found that some special anti-spyware program is needed to remove this virus application

Trojan.Vundo.H  infects and alters certain registries which include:

* HKEY_CLASSES_ROOT\CLSID\{39458c53-4dae-471a-a480-e3bc0b1d7dd9}
* HKEY_CLASSES_ROOT\CLSID\{65d46614-611d-4af2-aa13-a34fc317a96e}
* HKEY_LOCAL_MACHINE\SOFTWARE\Microsoft\MS
* HKEY_LOCAL_MACHINE\SOFTWARE\Microsoft\dslcnnct

Some of the known infected files by Trojan.Vundo.H are given below:

* C:\WINDOWS\SYSTEM32\ugohwe.dll
* C:\WINDOWS\SYSTEM32\subapade.dll
* C:\WINDOWS\SYSTEM32\edapabus.ini
* c:\WINDOWS\SYSTEM32\voriyeji.dll
* C:\WINDOWS\SYSTEM32\pefedamu.dll

Removal of Trojan.Vundo.H program:

It is very difficult to remove the virus program manually, though it is possible. To monitor the activity and registries of the program we can use Hijack this. To know more follow step 2 in this post.

After a detailed research we have found that this spyware virus can be removed using the spyware program: Spyware Doctor with AntiVirus 2010 for Windows. You can download the program from the link below:

Download: Spyware Doctor with AntiVirus 2010 for Windows

Size: 34.9 MB

Run a full scan and remove the Virus files.

You can subscribe to our RSS feed via email for more tutorials under security.