[New] Drag And Drop Attachments From Gmail To Your Desktop

gmail drag attachment

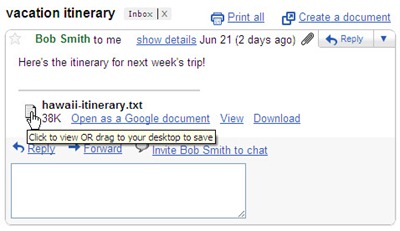
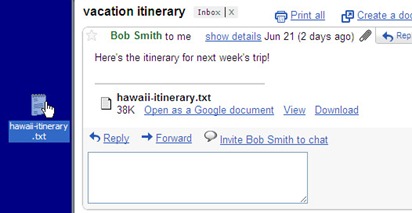
Gmail has just announced a support to drag and down the attachments from mail to your desktop. Until now we could only drag and drop attachments from the desktop to the mail while composing but the reverse was not possible. Now Gmail blog has officially announced the launch of this new feature (in Google Chrome) along with a couple of screenshots on how to do it. I have included the screenshots in this post so that you can get a brief idea about how to use this feature. When you hover the mouse over the attachment, you can see a message “Click to view OR drag to your desktop to save”. It’s pretty much straight forward, just click and hold, drag and drop the attachments from your mail to any folder on your computer. Release the mouse button once you have taken the cursor to your desired folder.
gmail_drag_attachment_2

Gmail had earlier enabled another feature that lets you drag and drop images on to your email messages while composing a mail.

Note: This works only with Google Chrome as of now

Via Gmail Blog

[How to] Install Google Android OS In Your PC

Google is giving us the opportunity to use Google Android OS for free in out x86 PCs. LiveAndroid is a live CD or Live USB with which you can try Android even without installing it to your PC. This Live CD/USB is available for free download.

More than that, the LiveAndroid disc image can be used in virtualization software like VMware and Microsoft Virtual PC.

Google LiveAndroid  is an open source project which will allow you to download the different releases and versions of the Google Android Operating System.

LiveAndroid

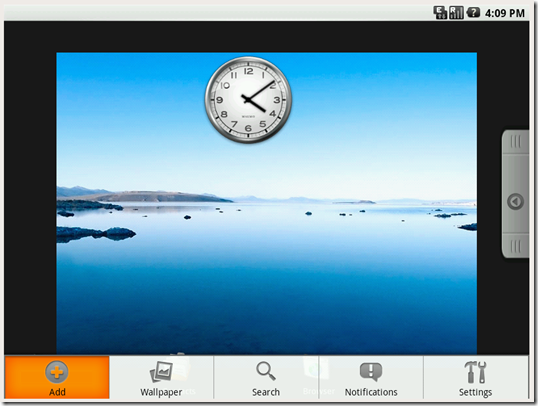
Google Andoid OS in x86

LiveAndroid Screenshot

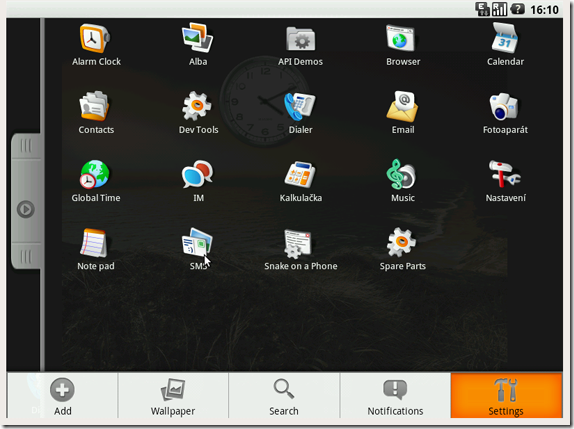
LiveAndroid Screenshot

To download the Live CD or Live USB visit:

Link: http://code.google.com/p/live-android/

Once you have done downloading the image file you can burn it the Image to a CD or use a USB and boot it in your PC. You can use VMware to use this OS. You can follow the steps given in this post Install and Run Windows XP in Windows 7 Using VMware Player

.

Add Images To Your Gmail Signatures

Gmail has recently launched a new feature that lets you add rich HTML signatures right inside your Gmail without needing to any hacks. Until now Gmail didn’t have a built-in support for rich text HTML signatures, if you had to add a signature, it used to look like something as shown below;

gmail_old_signature

Now that Gmail has official support for rich text HTML signatures, you can create a more customised signatures like the one shown below:

Gmail html signature

To start using this feature in Gmail, follow the steps:

1. Login to your Gmail and go to settings page.

2. Find the signature section under settings

3. You can see a much familiar rich text editor that you would normally see while composing a mail using Gmail.

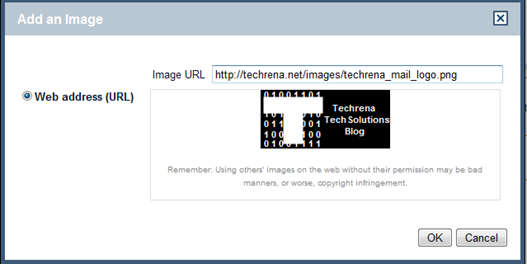
4. You can even add images and link them to your profiles on various social networking sites.Click on the “image” icon to start uploading a image.

add images in Gmail signatures

The only issue here is that you can only upload images that are already present on the web, however you can’t upload images directly from your computer. That being said, one need not bother much about it because images can be easily uploaded to Flickr or Picasa for permanent storage and faster access. You can also resize the image to three different sizes (small, medium or large).

5. You can even change your font size, style, color etc. using the rich text editor. Click on the “save changes” to save your signature.

New Feature: Blogger Stats Comes To Blogger In Draft

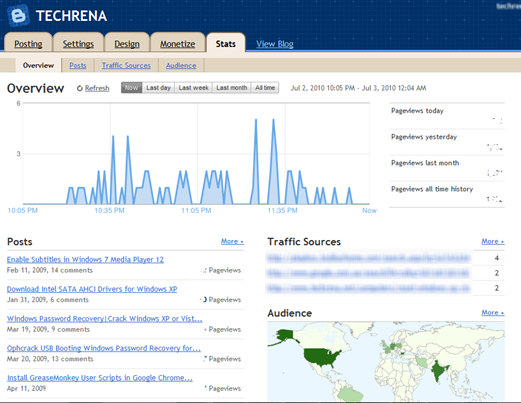
Blogger stats

Blogger has just launched a new almost real-time like visits tracking to blogger.com blogs via

Blogger in Draft (which means that it is still in testing phase).

Though we have tools like Google Analytics, people still want to see their visits in real-time. But if you think that you are just a beginner with Blogger and not completely comfortable with all those advanced features in Analytics, then this is probably the one that you just needed.

Blogger Stats offers all basic information about your site visits in a far better easier way. You can see visitors details during intervals of one hour/day/week/month like which posts are getting most visits, the referring pointing to your blog, the geographic location of your visitors etc. [Checkout “Overview”, “Posts”, “Traffic Sources” & “Audience” tabs].

Just login to draft.blogger.com, and checkout the “stats” tab on your blog dashboard to get started.

Blogger stats tab

New Orkut Upgrade Brings More Facebook Like Features

orkut logo

Orkut team has yesterday announced minor upgrades to the Google’s social networking site, definitely in a attempt to catch up to the Facebook’s domination in the arena.This is evident since the launch of new version of Orkut with changes like enabling friends to comment on the status updates,auto-magic groups, file transfer in chat etc.

The new upgrade to the site will bring three feature changes:

# Scraps are now being replaced by conversations:

“From now on, all scraps you send to your friends will also show up in your profile, making it easy to start new conversations”

You can even comment on the ongoing conversations that any of your friends have already started, now this conversation will start appearing in your profile, much like that way how Facebook shows them up.

# Private scraps:

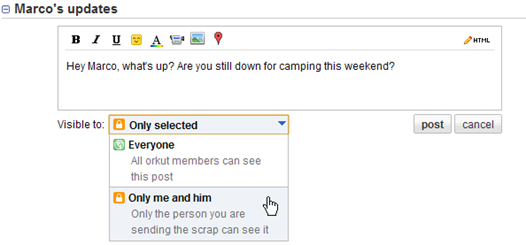
You can now send a private scraps to your friends which will be visible to only selected friends:

orkut private scraps

To keep something secret, just send a private scrap to your friends, and just those people selected will see it

# Privacy Levels:

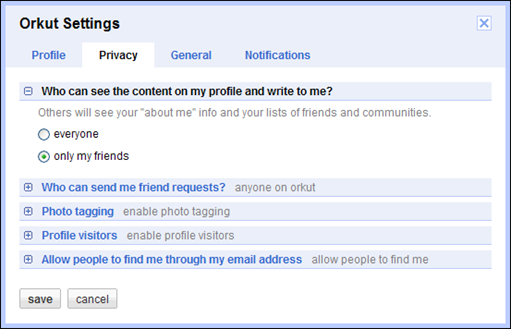
Orkut has added privacy settings for each of the individual items like who can see content on your profile, who can send a scrap to you, etc.

orkut_new_privacy_settings

Every piece of content on orkut (a scrap, photo, video, etc) will be labelled with a privacy level, so you know who else is seeing it or not

What do you feel about these new changes ? let us know.

Change Address Bar Search Provider In Firefox

Firefox logo

Address bar search is the feature that allows you to search for a keyword entered in the address bar (location bar) without entering the search engine homepage. Firefox by default will look for the keyword entered in the address bar in Google search as it is usually set as the default search engine to manage address bar keywords.

However, you might want to change it to suit your personal interest. It may sometimes can also be a case of hijacking: You install some programs that they change your search bar address bar search provider without asking for your permission (ex: so many toolbars like Alexa, Yahoo etc.). For some reasons, if you want to change the Firefox address bar search provider, you can do it by following the steps below:

1. Type about:config in the Firefox address bar. You will be presented with a warning, if you are using Firefox 3.5 + version, just click “I’ll be careful, I promise”!” to continue to the about:config page.

Firefox_about_config_warning

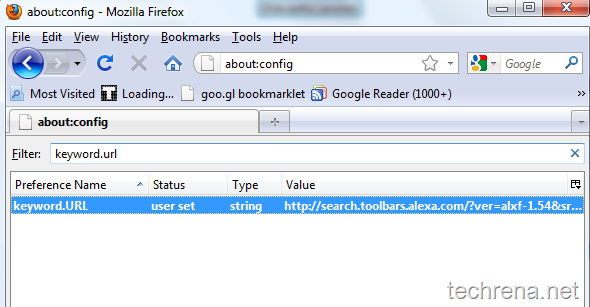
2. In the Filter search box, type “keyword.url” and the result returns only one result as shown in the screenshot below.

keyword.url_firefox

And as you can see here, the address bar search engine provider in my case has been changed to Alexa, when I installed it’s toolbar sometime back. Now I want to change it to a different provider, back to Google may be, or Bing? Well I can even test how it works with Twitter search.

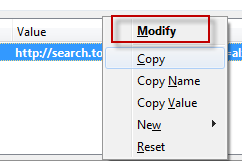
3. Right-Click on the field value and click “Modify”.

change_firefox_keyword.url_string_1

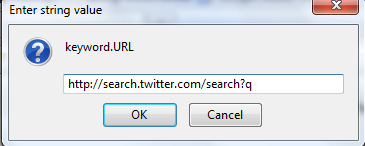
You will now be asked to enter a string value for the keyword.URL, choose the values according to the provider, as listed in the table below.

change_firefox_keyword.url_string

List of  string values of various search engines:

Google http://www.google.com/search?ie=UTF-8&oe=UTF-8&sourceid=navclient&gfns=1&q=
Yahoo http://search.yahoo.com/search?p=
Bing http://www.bing.com/search?q=
Ask http://www.ask.com/web?q=

Click OK to save the settings and checkout the result yourself with typing a keyword in the address bar of the Firefox.

Add A Background Image To Google Homepage

Google new official logo

Google has recently announced a new feature that lets you choose your own background images for the Google homepage similar to the Bing.

This feature is initially available to US version of Google, Google.com. This feature will be rolled out to the users outside US very soon. However no will stop you to visit Google.com/ncr and access this feature. Here’s how we can add the background image for Google homepage.

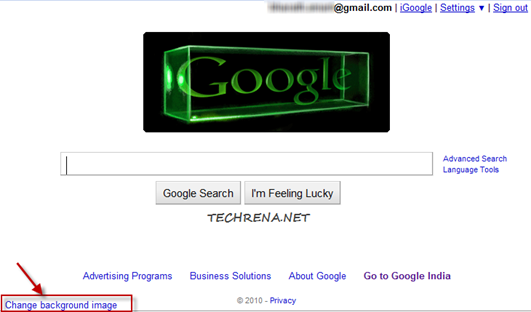
1. Visit Google.com/ncr and click on the “Change background image” link on the bottom left of the page.

Google homepage

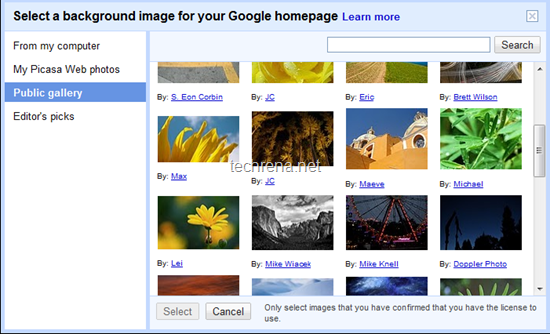
2. Now you can choose the background picture from your computer, your Picasa Web photos, Google public gallery or from editor’s picks.

Google background image selection

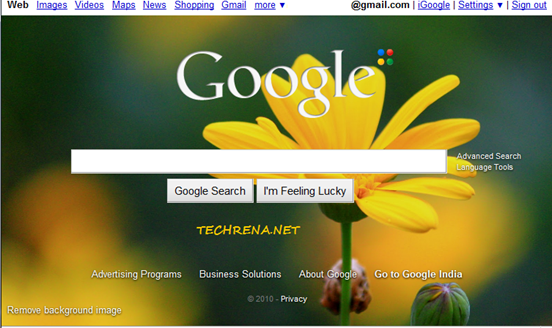
3. Click Select to apply the background image and you are done, and the Google homepage will now look like this one in the below screenshot.

Google homepage with background image

Note:

  1. When you upload a image from your computer, it will be saved as a photo in a new unlisted album in your Picasa Web Albums.
  2. Image Requirements: Landscape, Min. resolution: 800 x 600 pixels
  3. Image formats: .jpeg, .tif, .tiff, .bmp, .gif, .psd, .png, .tga

How To Download Google Chrome Standalone Offline Installer

Google Chrome Offline Installer

Google Chrome, the lightweight browser from Google has become very good alternative for browsers like Internet Explorer and Mozilla Firefox and its market share is continuously increasing booting other less popular browsers.

The problem that many users raise against Google Chrome is regarding the installation of the browser. When you want to download Google Chrome, all that Google gives you is a small file called “Google Chrome Installer” which then connects to internet and downloads the installer package online and automatically installs the stable version of the Google Chrome on your computer.

Google_Chrome_Installer

But do you guys know that Google offers a standalone offline installer which you can download and install on any computer that has no internet connection ?

Tip #1 :

If you want to download the standalone installer for the official Google Chrome stable version,

Download Google Chrome Standalone Offline Installer

Tip #2:

If you want the standalone offline installer for the latest Dev version of Google Chrome, follow these steps:

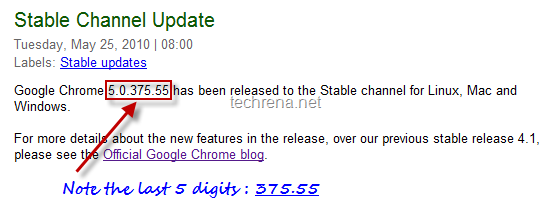
1. Find the latest dev version of the latest release from official Google Chrome Releases blog, find the latest version number mentioned there (in the screenshot, it is 5.0.375.55).

Note down the last 5 digits of the version number (xxx.xx format). In this case, it is 375.55

Chrome latest dev stable release version
2. Paste the above 5 digit number that you copied in the above step in place of “xxx.xx” in the following link:

http://dl.google.com/chrome/install/xxx.xx/chrome_installer.exe

[ In the above case, the link will be http://dl.google.com/chrome/install/375.55/chrome_installer.exe ]

3. Type the link in the address bar and press enter. You can now download the standalone offline installer of the latest Dev channel release version of Google Chrome.

Adsense New Beta Interface Invitation

Google Adsense logo

Google Adsense is set to roll out a new interface to all the Adsense publishers in the coming months. Currently Adsense new beta interface is under testing and is available to few publishers initially. While some publishers have already got the invitation from Adsense to enable new interface for their accounts, there are still a large number of publishers eagerly waiting for the invitation to arrive in their inbox.

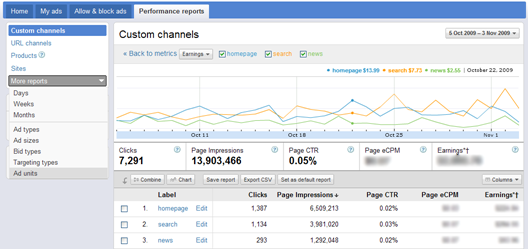
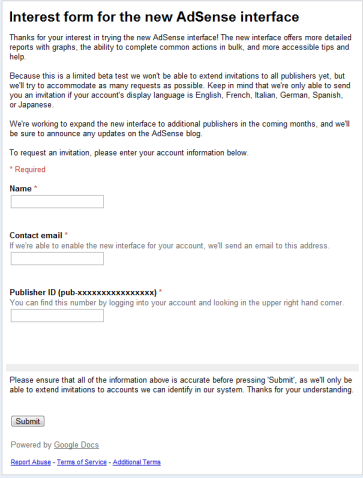
As you can in the below snapshot which is a courtesy of Adsense official blog, the new interface will present your Adsense data in a more enhanced view by showing Adsense reports in using graphs. The new interface makes it easier to change the settings of several ad units simultaneously, with enhanced and improved Ad Review Center.

Google Adsense new beta interface

Can’t wait to see this new beta interface for your account? It’s easier, follow the link below and enter your name, contact email and your Adsense Publisher ID and submit the form. You can now get the new Adsense beta interface enabled for you.

Link: New Adsense interface interest form

Adsense new interface invitation

Adsense Revenue Share Revealed

Google adsense logo

Google has recently disclosed a vital information about the share of the Adsense revenue that Google credits to the publishers for running Google ads on their sites.

According the announcement made in official Adsense blog, Google shares

68% of total revenue for Adsense for content (AFC) ads

51% of total revenue for Adsense for search (AFS) ads

with the publishers.So Google keeps 32% of the total revenue (49% in case of Adsense for search) with it.Google uses this portion of your Adsense revenue for serving ads on your site.

Adsense_login

Why Is This Important ?

This data is very useful for many webmasters to estimate the net worth of their site by calculating the total worth of the site in terms of the total worth of Adsense advertising appeared on their site.

For instance, if your site is generating $200 monthly on average (AFC only), it means that your site could run a total of $294 ($200 / 0.68) worth of Adsense advertising.

You can now make use of this data to fix a price for the ads that you run through direct advertising.In the above case, you know that your blog is worth $294 and accordingly you can fix price as minimum price for any ad that you run through direct sale of the ad slots.So this is how webmasters can use their site’s Adsense net worth as a benchmark for ad slot sales.

Google however has chosen not to disclose the revenue share for other Adsense products like AdSense for mobile applications, AdSense for feeds, and AdSense for games at the moment.

Webmasters across the world are delighted to know exactly how much of the ad revenue share that they are being credited and this is a great initiative from Google to provide better transparency.