[How To] Using Windows 7 Credential Manager

Windows 7 logo

Credential Manager is a Single Sign-On (SSO) solution that Microsoft has been offering since Windows Server 2003. It was there in Windows XP, Vista and now in Windows 7 too, this with some more extended features.

Credential Manager allows a Windows user to store sensitive credentials like log on information (ex: user IDs and passwords) required for the websites you visit or for connecting with the other computers on a network. These credentials are stored in special folder called vaults. With this stored information, Windows 7 can automatically log on securely to the websites and the computers on your network automatically without requiring you to remember the credentials all the time. Credential Manager is based on a secure client-side credential-caching mechanism. Now let’s see how we can use Credential Manager in Windows 7:

You can open Windows Credential manager via Start > Control Panel > Credential Manager or alternatively go to start and type “cred” (or even “credential manager” ) and open Credential Manager from the results.

Credential manager search

Credential Manager search results

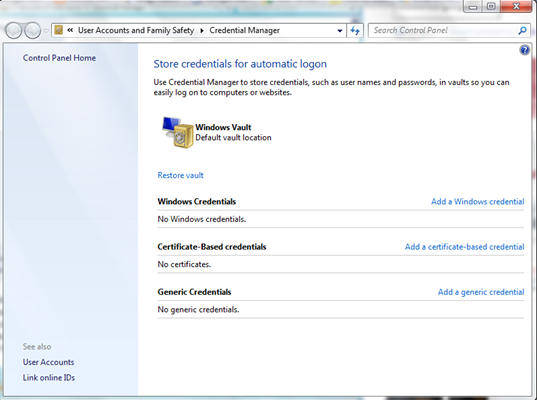
Credential Manager:

Windows Credential Manager
As you can see in the above screenshot, there are basically three types of credentials you store using Credential Manager:

1. Windows Credentials: Lets you store the network addresses, user IDs and passwords that are required while accessing intranet and SharePoint sites.

For example you can add a credentials required to connect to one of a computer in the network or you can even store the password needed to access you printer, storing upon which Windows can automatically log on to it while accessing the printer.

2. Certificate-Based Credentials: Lets you store digitally signed public key certificates like Smart Card Logon certificate or Smart Card user certificate if you are using a certificate that is used with the smart card.

3. Generic Credentials: Lets you store the URLs and the usernames and passwords associated with them.

Adding Credentials To Windows Vault:

If you want to add a new credential, just  select the type of the credential that you want to add and then click “Add a credential” link and enter the details that are needed like username, password and network address etc.
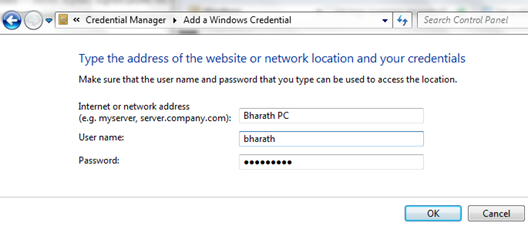
Add new Windows Credential Manager

Backing Up Windows Vault:

If you stored some credentials in your Windows vault using Windows Credential Manager, you can safely backup the Windows Vault to other places (preferably on removable media) so that you can access them even in case of any Hard disk failure.
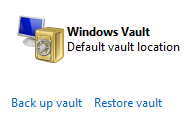
Windows vault backup

Click on the “Back up vault” link under the Windows Credential Manager. Select the location where you want to save the back up file (stored as “Credential Backup Files” with .crd extension)
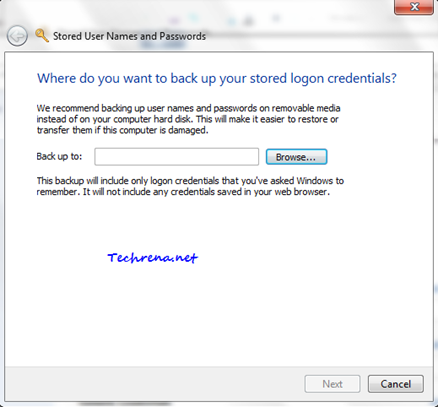
Stored user names and passwords
Press Ctrl + Alt + Delete to continue the backup process on the Secure Desktop. Finish the step and your vault backup would be ready on your computer.
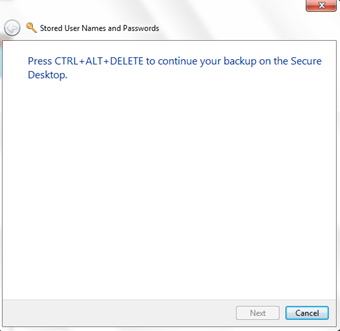
Stored user names and passwords in vault

Then you again restore your Windows vault backup using the “Restore vault’ link below the Windows Vault.
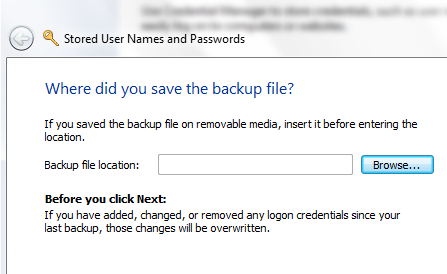
Restore vault

Note:

1. You can not store credentials of websites that you browse through browser for instance Gmail credentials, Twitter credentials or Facebook credentials etc. These credentials can only be accessed by certain Windows applications which need to go through authentication with the resource (or server). Some of the Windows applications that make use of the Windows Credential Manager in Windows 7 include Windows Live Messenger, Microsoft Word, Outlook and Windows Explorer.

2. Please note some of the above features may not work in some editions especially if you are using Windows 7 RTM (Release To Manufacturing) builds.

[How To] Windows Virtual Memory Configuration

Did you notice an alert anytime saying ”Virtual Memory Low” while running a huge application or a game?  Well all what you need about Windows Virtual Memory and its configuration is explained in detailed here.

First question in your mind will be:

What is Windows Virtual Memory?

Physical memory or you know it as RAM is the vital component of your Windows machine. But Windows is not designed to run on RAM chips alone, no matter how much physical memory you have. In addition to using physical RAM to store programs and data, Windows creates a hidden file on your primary hard disk and uses that file to manage pages of data pulled from scattered sections of the hard disk and used in physical memory when necessary. The page file acts as an extension of main memory which is known as virtual memory.

What is the default Size and File location of Virtual Memory?

Windows creates the page file in the root folder on the same drive that holds the Windows system files. The size of the page file is determined by the amount of RAM in your system. By default, the minimum size on a 32-bit (x86) system is 1.5 times the amount of physical RAM if physical RAM is less than 1 GB, and equal to the amount of physical RAM plus 300 MB if 1 GB or more is installed. The default maximum size is three times the amount of RAM, regardless of how much physical RAM is installed.

Configure Windows Virtual Memory Size and Page file Location

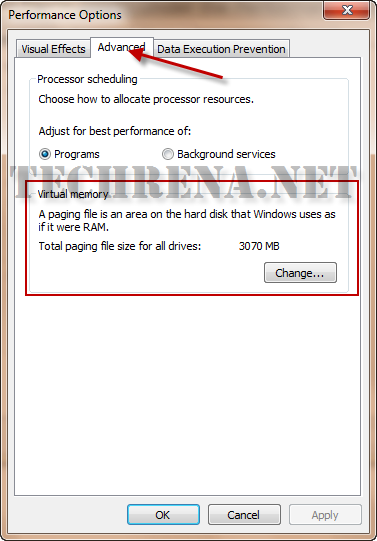
Press Start + R and type systempropertiesadvanced and press Enter. Under the Performance heading, click Settings. In the Performance Window, go to the Advanced tab. Here you will find Virtual Memory Change Option.

change virtual memory

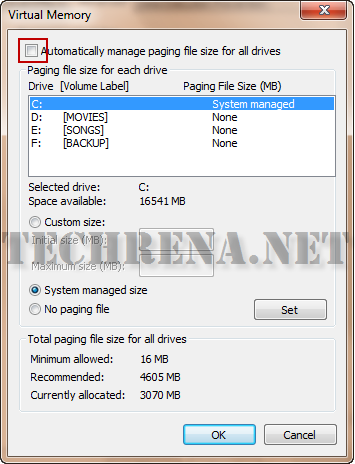
If you click on change, you can find the configuration window where you can change how the virtual memory is managed. Uncheck Automatic manage paging file size to change the virtual memory size.

virtual memory change window

You can have the following options in this window:

  • You can move the page file to a different volume if you have more than one.
  • If you have more than one volume, you can establish more than one page file.
  • For any page file, you can choose between System Managed Size and Custom Size.
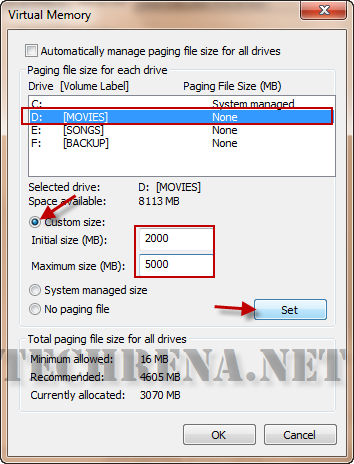
  • If you choose Custom Size, you can specify an initial size and a maximum size.
  • You can remove a paging file from a volume by selecting the volume and choosing No Paging File. (You can even get rid of all paging files this way, although doing so is not recommended, even on systems with a lot of RAM.)

An example configuration is given below:

virtual memory custom management

Should you enlarge your page file(Virtual Memory)?

Most users won’t need to do this. But sometimes you might get a pop up warning telling “Low Virtual Memory”. This happens when you have huge applications and less RAM size. If this is the case you might consider increasing the maximum size of your page file.

[How to] Install Google Android OS In Your PC

Google is giving us the opportunity to use Google Android OS for free in out x86 PCs. LiveAndroid is a live CD or Live USB with which you can try Android even without installing it to your PC. This Live CD/USB is available for free download.

More than that, the LiveAndroid disc image can be used in virtualization software like VMware and Microsoft Virtual PC.

Google LiveAndroid  is an open source project which will allow you to download the different releases and versions of the Google Android Operating System.

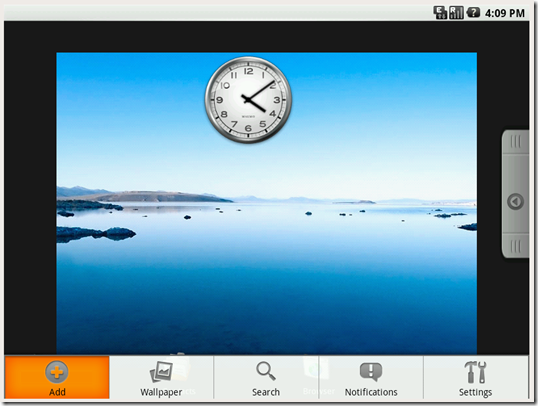
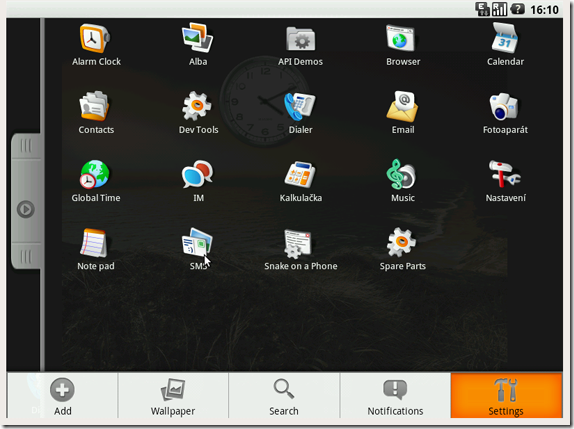
LiveAndroid

Google Andoid OS in x86

LiveAndroid Screenshot

LiveAndroid Screenshot

To download the Live CD or Live USB visit:

Link: http://code.google.com/p/live-android/

Once you have done downloading the image file you can burn it the Image to a CD or use a USB and boot it in your PC. You can use VMware to use this OS. You can follow the steps given in this post Install and Run Windows XP in Windows 7 Using VMware Player

.

[How To] Type The Rupee Symbol Using Your Keyboard

Indian_Rupee_symbol

With the release of the Rupee symbol (`), everyone in India is excited and curious of how to use this new symbol. Well, here we are suggesting a unique way of how to type this new symbol using your keyboard.

With the release of the Rupee font by Foradian Technologies, it is easily possible to type the new symbol in your computer.

Follow the simple steps below:

Step 1: Download the Rupee font from the link below:

Download: Rupee Font Version 2

Size: 60KB

Step 2: Copy the Rupee_Foradian.ttf file from the location you have saved.

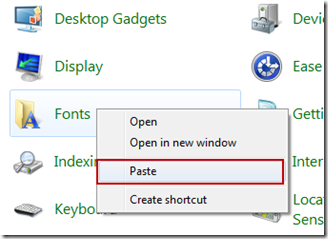
Step 3: Go to Control Panel with non category view. Find Fonts, right click and paste. The font gets installed automatically.

install_font

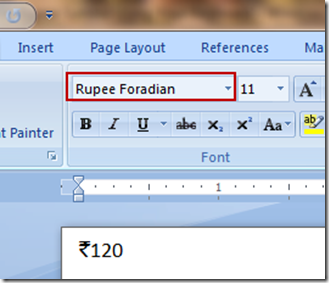
Step 4: Now you can use the ‘~’ key which is in the left of ‘1’ key to type the font. First, whenever you want to type the Rupee symbol, change the font to Rupee Foradian and press the ‘~’ key without shift.

type_rupee_symbol

After typing the symbol, you can change the font to the normal one. We are hoping that this symbol is included in the keyboard soon. Hope you have got to know how to type it now at least for the time being.

[How To] Configure Windows 7 Action Centre Warning Messages

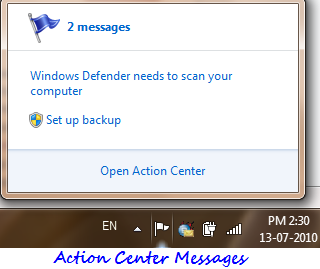
Windows 7 Action Center messages

Action Center in Windows 7 offers warning messages relating to your computer. You can find these messages in your notification area in the form of a flag. They include important security messages, virus protection alerts, Windows Update, Internet security settings, Spyware and related protection, User account control, troubleshooting, windows backup etc.

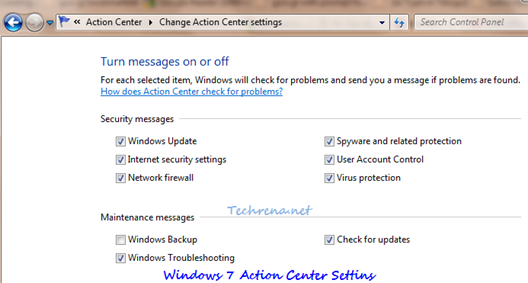
It is highly recommended that you keep these messages enabled as they include some important security issues as well. However you might not want to see Windows Backup warning messages when you are using an external third-party backup software. And you do check for updates according to your convenience. In such cases you might not want to get annoyed by warning messages about these simple things. This tutorial explains how you can configure the settings for these messages or even to completely turn off (not recommended) these action center messages in Windows 7.

Steps:

1. Click on the flag icon in your notification area or type “action center” in the start menu search box and open the Action center.

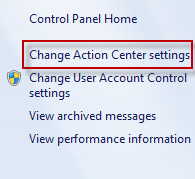
Action Center Windows 7 home

2. Under the “Action Center Settings”, you can choose for which categories Windows Action center needs to check for problems. Uncheck all to completely turn off the entire Action Center alerts which is obviously not recommended.

Windows 7 action center settings

Click OK and close the window. You will no longer receive warning messages from the categories you have unchecked in the previous step. The white flag icon however stays there without any warning messages.

[How To] Block A Website Using Content Advisor In Internet Explorer

site blocked

Blocking certain websites that may not suit the audience mainly in the case of children or workers has always been one such compulsory feature. In case you haven’t spotted yet, there’s one such option in Internet Explorer too. Here are the steps to block any website in Internet Explorer using IE’s content advisor.

Steps:

1. Go to Tools > Internet Options in the Internet Explorer.

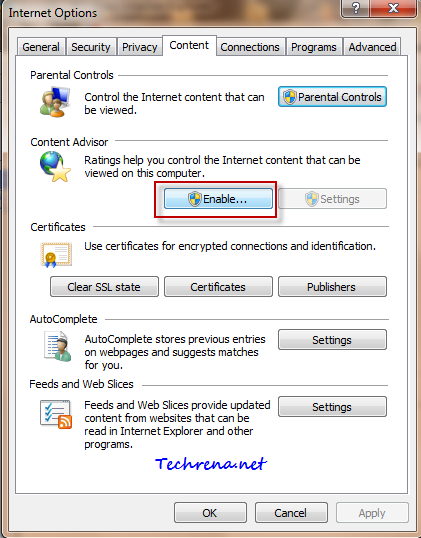
2. Go to “Content” tab under the Internet Options. Find “Content Advisor” under this tab. By default it would be set default. Click “Enable” option opposite to it.

Content advisor in Internet Options

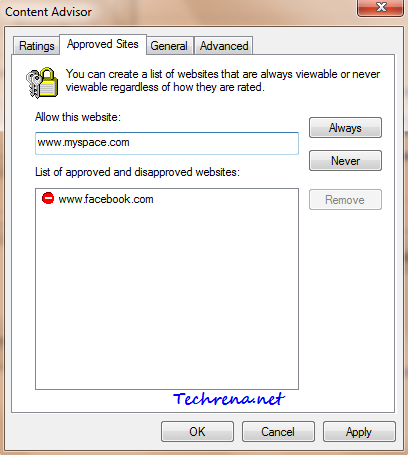
3. Go to “Approved sites” tab in the Content Advisor window. Type the URL of the website that you want to block in the text box and clock “Never” button. See the screenshot below:

Approved sites in Content advisor

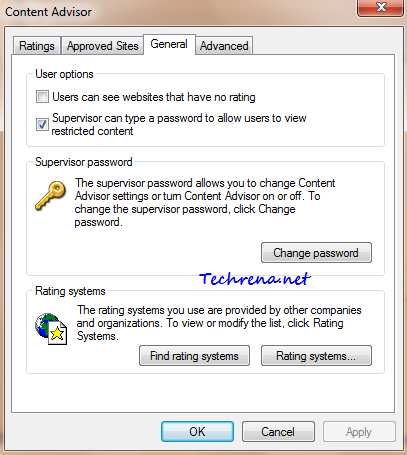
4. Click “Apply” once you are done and then go to “General” tab. Here you can choose whether to password protect the blocked sites that you added. Once configured, click “OK’ to close the window.

Content advisor General options

You will now be asked to enter the supervisor password for the content advisor settings.

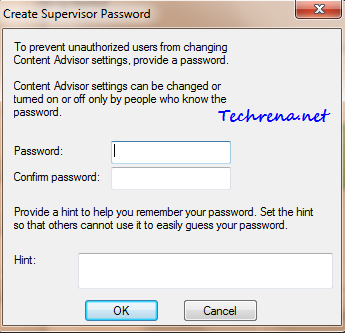
5. Create a supervisor password and add a hint (recommended) which is helpful in case you forget the password in future. Close the window once you have done that.

Supervisor password for content advisor

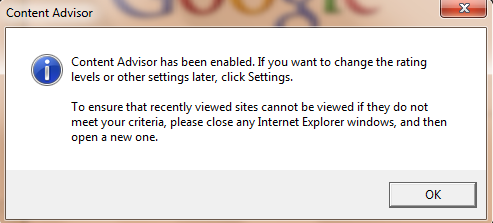
Content Advisor settings done

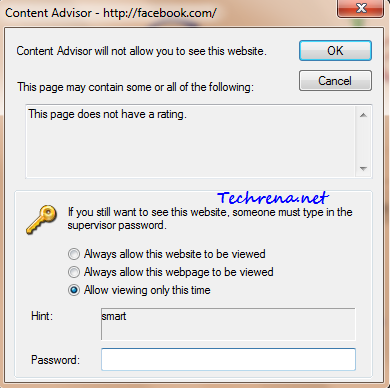
6. Now try to open any website that you have added in the block list. You will see the following prompt window, asking for you to enter the supervisor. User can view the website only if he knows the supervisor password.

Content advisor prompt window

7. You can disable the content advisor any time by clicking the “Disable” button under the “Content Advisor”. You will however need to authorized to do that by validating through the supervisor password.

For more tips on software, subscribe to Techrena’s RSS feeds via email.

[How To] Disable Firefox Taskbar Tab Previews

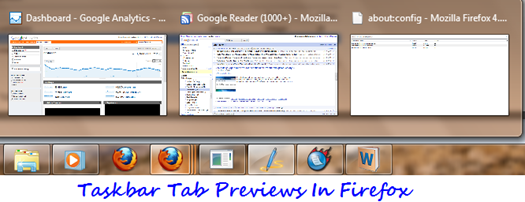
Multiple tasbar tab previews

Taskbar tab previews is a great feature introduced in Windows 7, with the help of which you can access any opened tab right from your taskbar without opening the browser. This feature was first meant for Internet Explorer only, but later it was adopted by almost all the browsers.

Even though this is a great feature, however it may sometimes annoy you particularly when you open a lot too may tabs in the browser. That’s why we posted a tutorial on how to disable the multiple taskbar tab previews in IE, Firefox and Google Chrome. Now that Firefox 4 is coming with this taskbar tab previews feature enabled, we thought we’d revisit and bring to your attention if you are looking for a way to get this feature disabled in your Firefox. Follow the steps carefully:

Steps:

1. Type about:config in the Firefox address bar.

2. Accept the warning message and proceed (Click “I’ll be careful, I promise) to the configuration page.

Firefox about:config warning

3. Type

browser.taskbar.previews.enable

in the filter and look for the entry with the same name as shown in the following screenshot.

Firefox 4 taskbar previews config
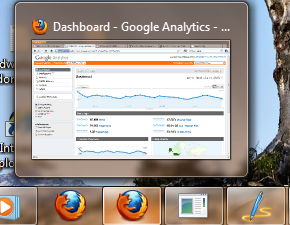
4. Change the value to “false” by double-clicking. That’s it. You will only see a preview of the one (active) tab preview instead of the multiple taskbar tab previews.

Firefox taskbar tab previews disabled

You might also want to read our tutorial on how to enable All Tabs Preview in Firefox.

Add Images To Your Gmail Signatures

Gmail has recently launched a new feature that lets you add rich HTML signatures right inside your Gmail without needing to any hacks. Until now Gmail didn’t have a built-in support for rich text HTML signatures, if you had to add a signature, it used to look like something as shown below;

gmail_old_signature

Now that Gmail has official support for rich text HTML signatures, you can create a more customised signatures like the one shown below:

Gmail html signature

To start using this feature in Gmail, follow the steps:

1. Login to your Gmail and go to settings page.

2. Find the signature section under settings

3. You can see a much familiar rich text editor that you would normally see while composing a mail using Gmail.

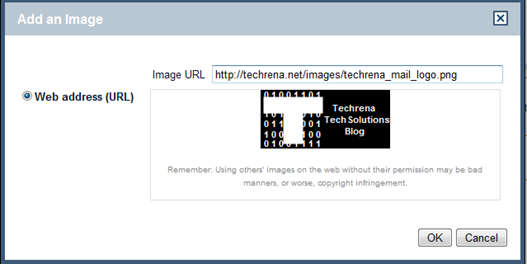
4. You can even add images and link them to your profiles on various social networking sites.Click on the “image” icon to start uploading a image.

add images in Gmail signatures

The only issue here is that you can only upload images that are already present on the web, however you can’t upload images directly from your computer. That being said, one need not bother much about it because images can be easily uploaded to Flickr or Picasa for permanent storage and faster access. You can also resize the image to three different sizes (small, medium or large).

5. You can even change your font size, style, color etc. using the rich text editor. Click on the “save changes” to save your signature.

[How To] Enable All Tabs Preview In Firefox 4

firefox logo

As Mozilla has made Firefox 4 Beta to be available publicly. My Firefox lovers have already downloaded it and managed to get a first look of what’s in store for the upcoming Firefox 4. Whie we still learn about all the major and minor features introduced in Firefox 4, we thought we would share this minor and handy feature that may interest you. This feature is called “All tabs preview”. It is similar to taskbar-tabs preview, but built right into the Firefox without needing to install additional add ons. By default this is not active in Firefox 4.0, but you can always activate it by following the steps briefed below:

All_tabs_preview_firefox_4

Steps:

1. Type “about:config” in your Firefox address bar and press enter.

2. Accept the warning that you get under “This might void your warranty”. Click on “I’ll be careful, I promise”.

this might void your warranty firefox

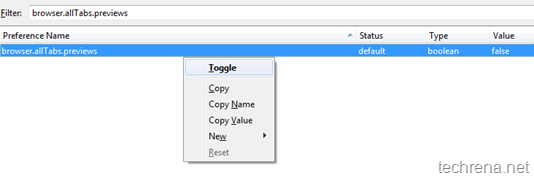
3. Now type “browser.allTabs.previews” and look for a entry with the same name (Preference Name).

All_tabs_preview_firefox4
By default, this has been set to “false” which disables the All Tabs Preview feature in your Firefox 4. To enable this, double click on it or right-click and choose “Toggle”, change the value to “True”. Close the about:config window.

4. You can now spot a new “List All Tabs” icon at the top right hand side, just below the close icon of your window. click on the icon to see the preview of all the opened tabs of your Firefox.

All tabs preview firefox 4 icon

To disable this feature, go back to the third step and change the value of browser.allTabs.previews back to “false”.

Tip: Learn how you can run two different builds of Firefox on the same computer.

Enable/Disable Auto Fill Or Auto Complete In Firefox

AutoFill Firefox

Firefox by default is coming up with AutoFill or Auto Complete feature in location bar (address bar), but for some reasons if you see it disabled in your Firefox, you can enable it in the following steps:

1. Type about:config in the address bar.

about: config firefox

2. Just accept the “This might void your identity” warning to proceed to the about:config settings page

3. Under the Preference Name, filter the entries by typing “Autofill” in the filter bar.

Autofill in browser urlbar

4. Change the value field to “false” to enable the Auto Complete feature in the browser URL bar.

Just set the value back to “false” to disable the auto-fill feature in the location bar.